Time in status | SLA | Timer | Stopwatch
In this guide we will create two timers that will track the time of the first response and time to resolution.
- The time will be calculated according to the working calendar.
- The timer will count 3 hours from the moment the task was created.
- The timer will stop when answering or taking a task to work.
- The timer can be paused by putting the task in Hold status.
- The time will be calculated according to the working calendar.
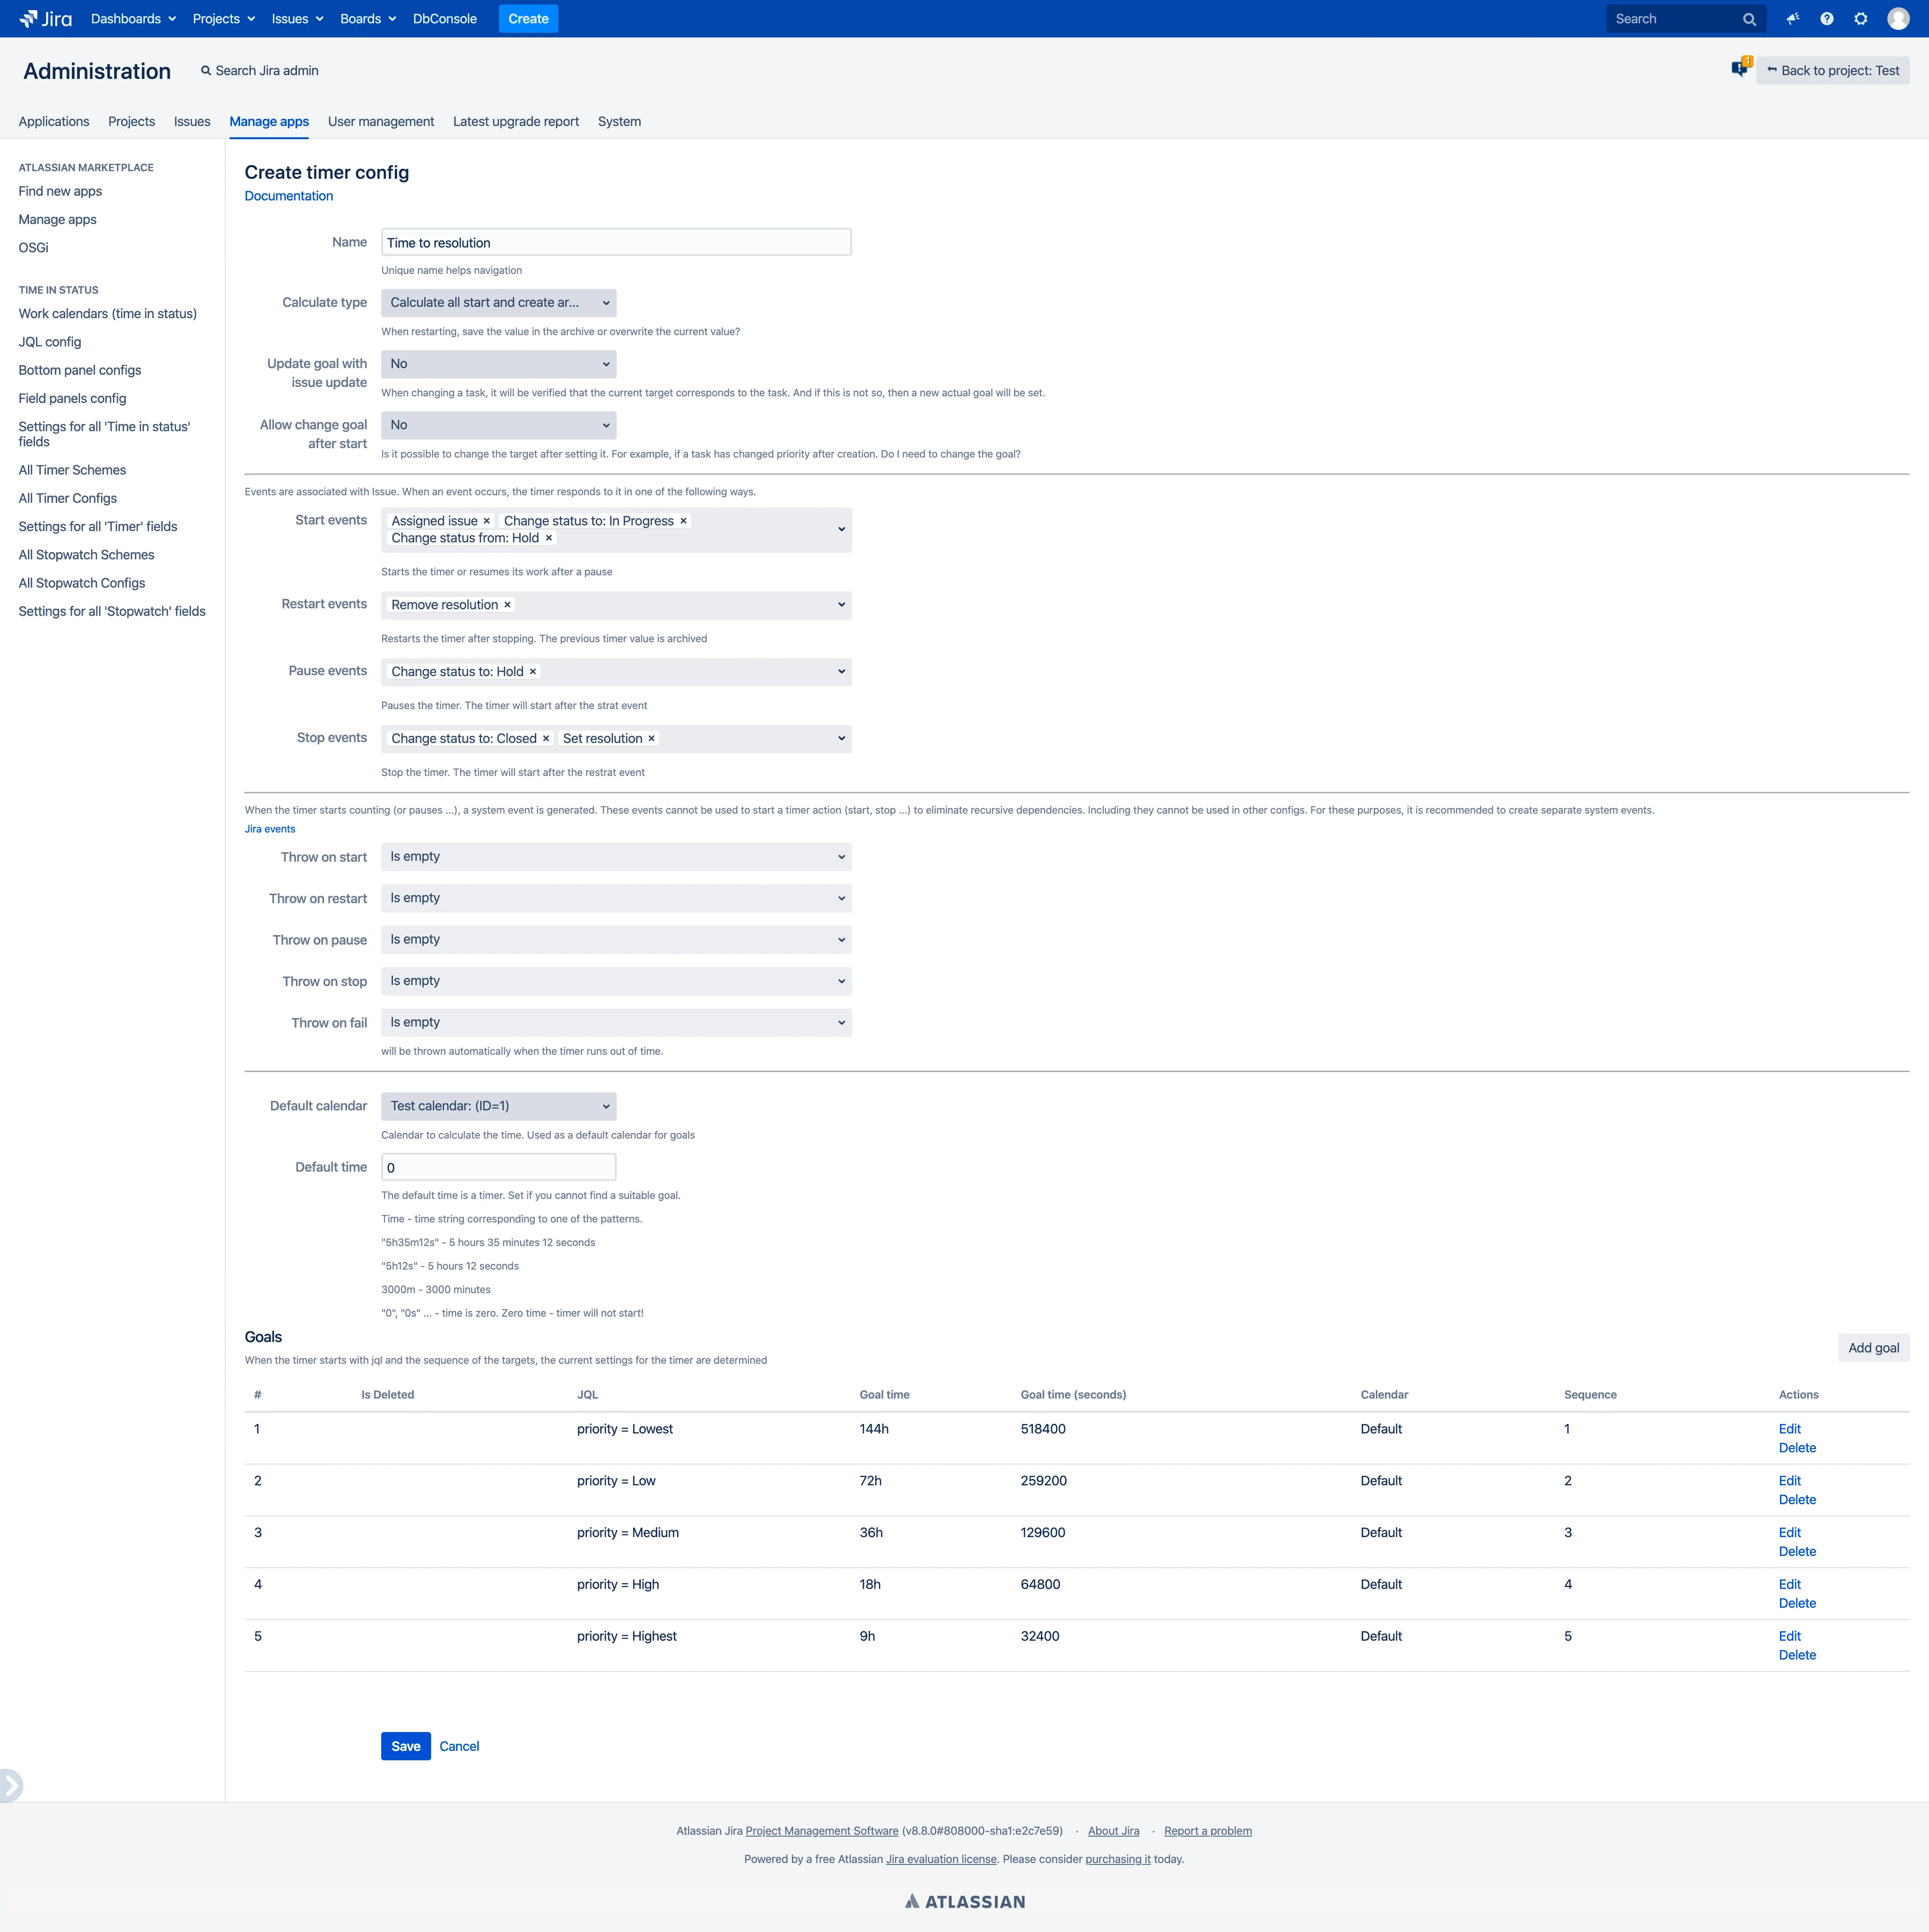
- The time it takes to resolve the request will depend on the priority of the task.
- Priority Lowest - 144h
- Priority Low - 72h
- Priority Medium - 36h
- Priority High - 18h
- Priority Highest - 9h
- The timer can be paused by putting the task in Hold status.
- The timer is fixed when you close the task or set the resolution.
- The timer restarts when the resolution is removed.
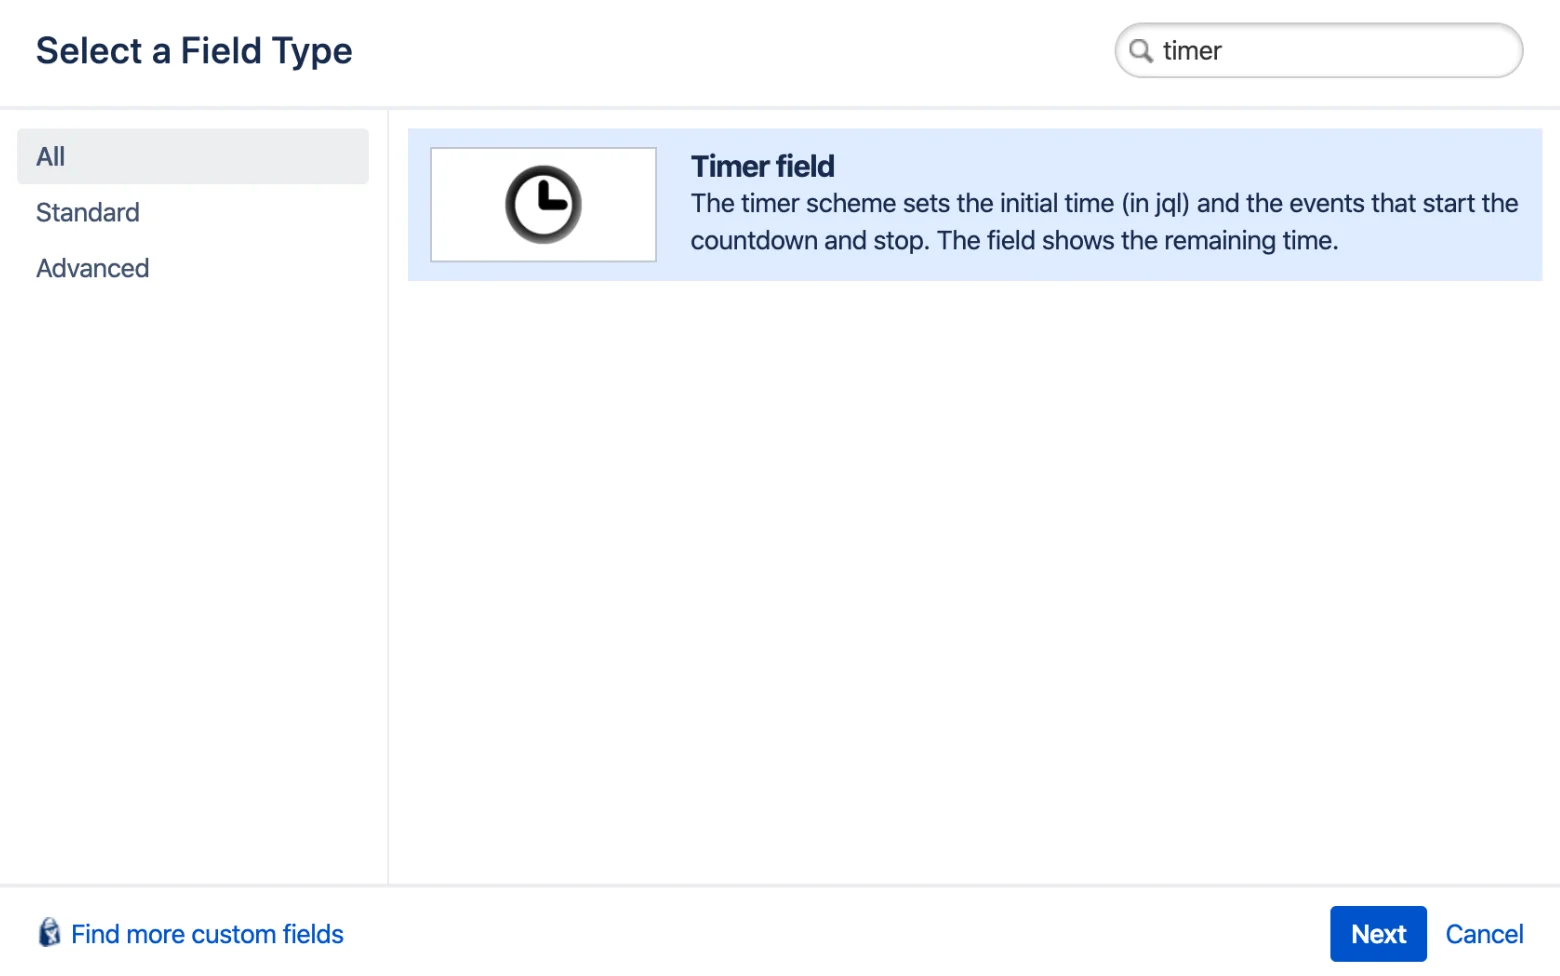
1. Create fields
- Create two timer field with names “Time to first response” and “Time to resolution”.
- Set the screens and contexts on which you want to see the timer. We will configure the field in detail later.
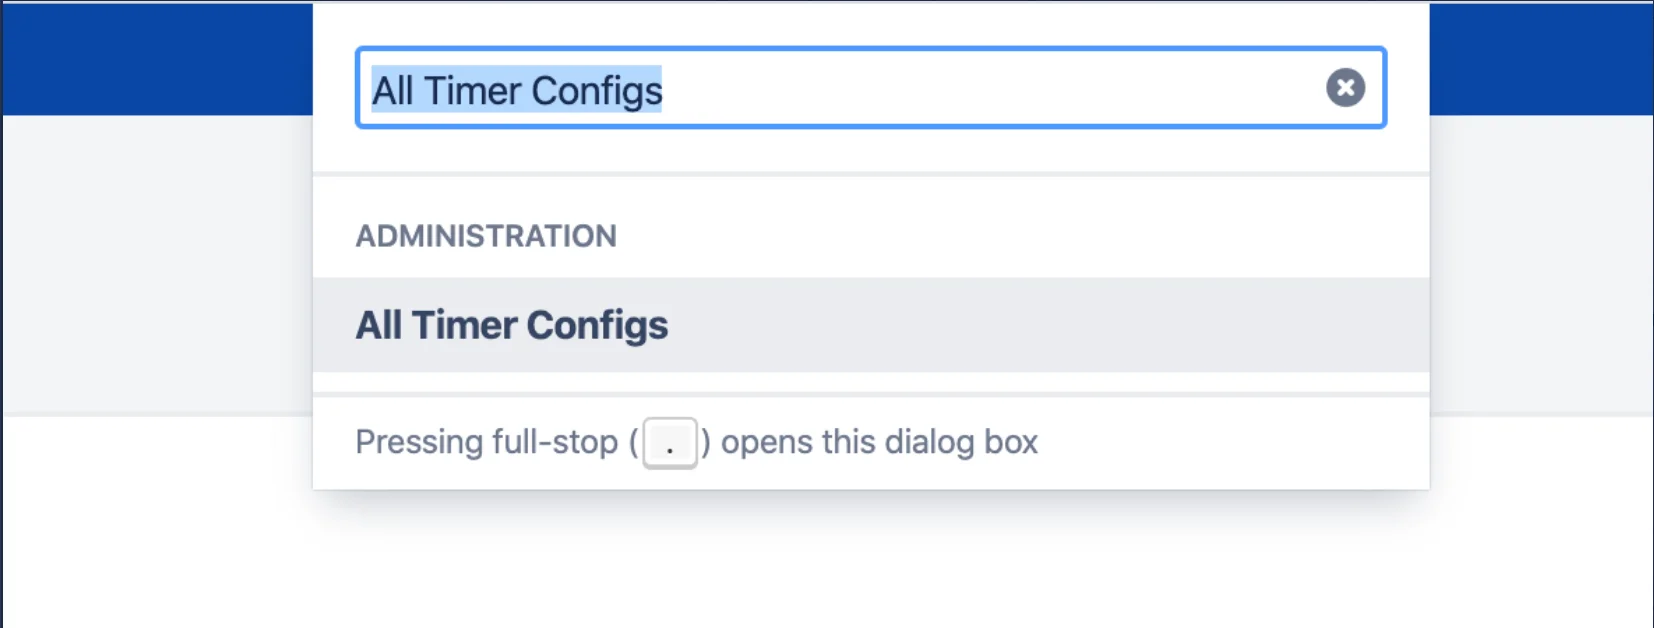
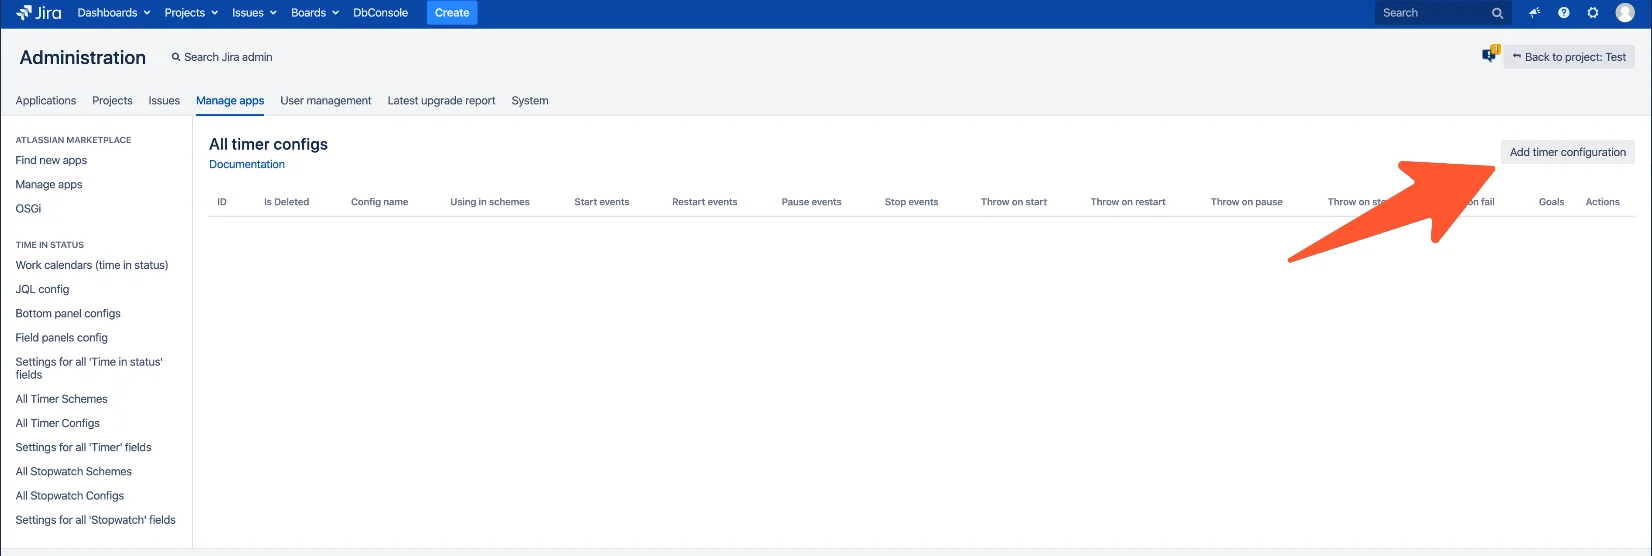
2. Open All Timer Configs
go to {baseUrl}/secure/jibrokAllTimerConfigs.jspa
or open with admin search (gg + “All Timer Configs”)
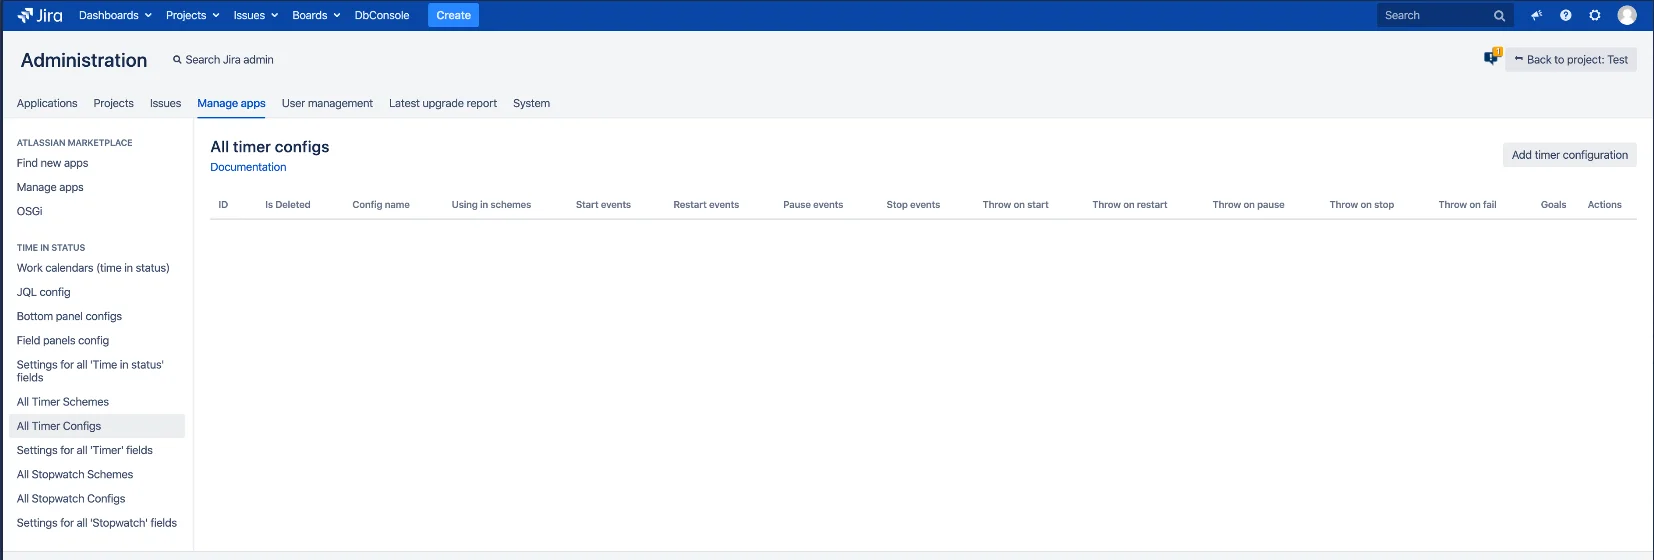
3. Click “Add timer configuration”
Timers and Stopwatches - Scheme and configurations
Now we will configure the conditions for starting the timer, stopping …
4. Configure timer for “Time to first response”
Configuration “Time to first response”:
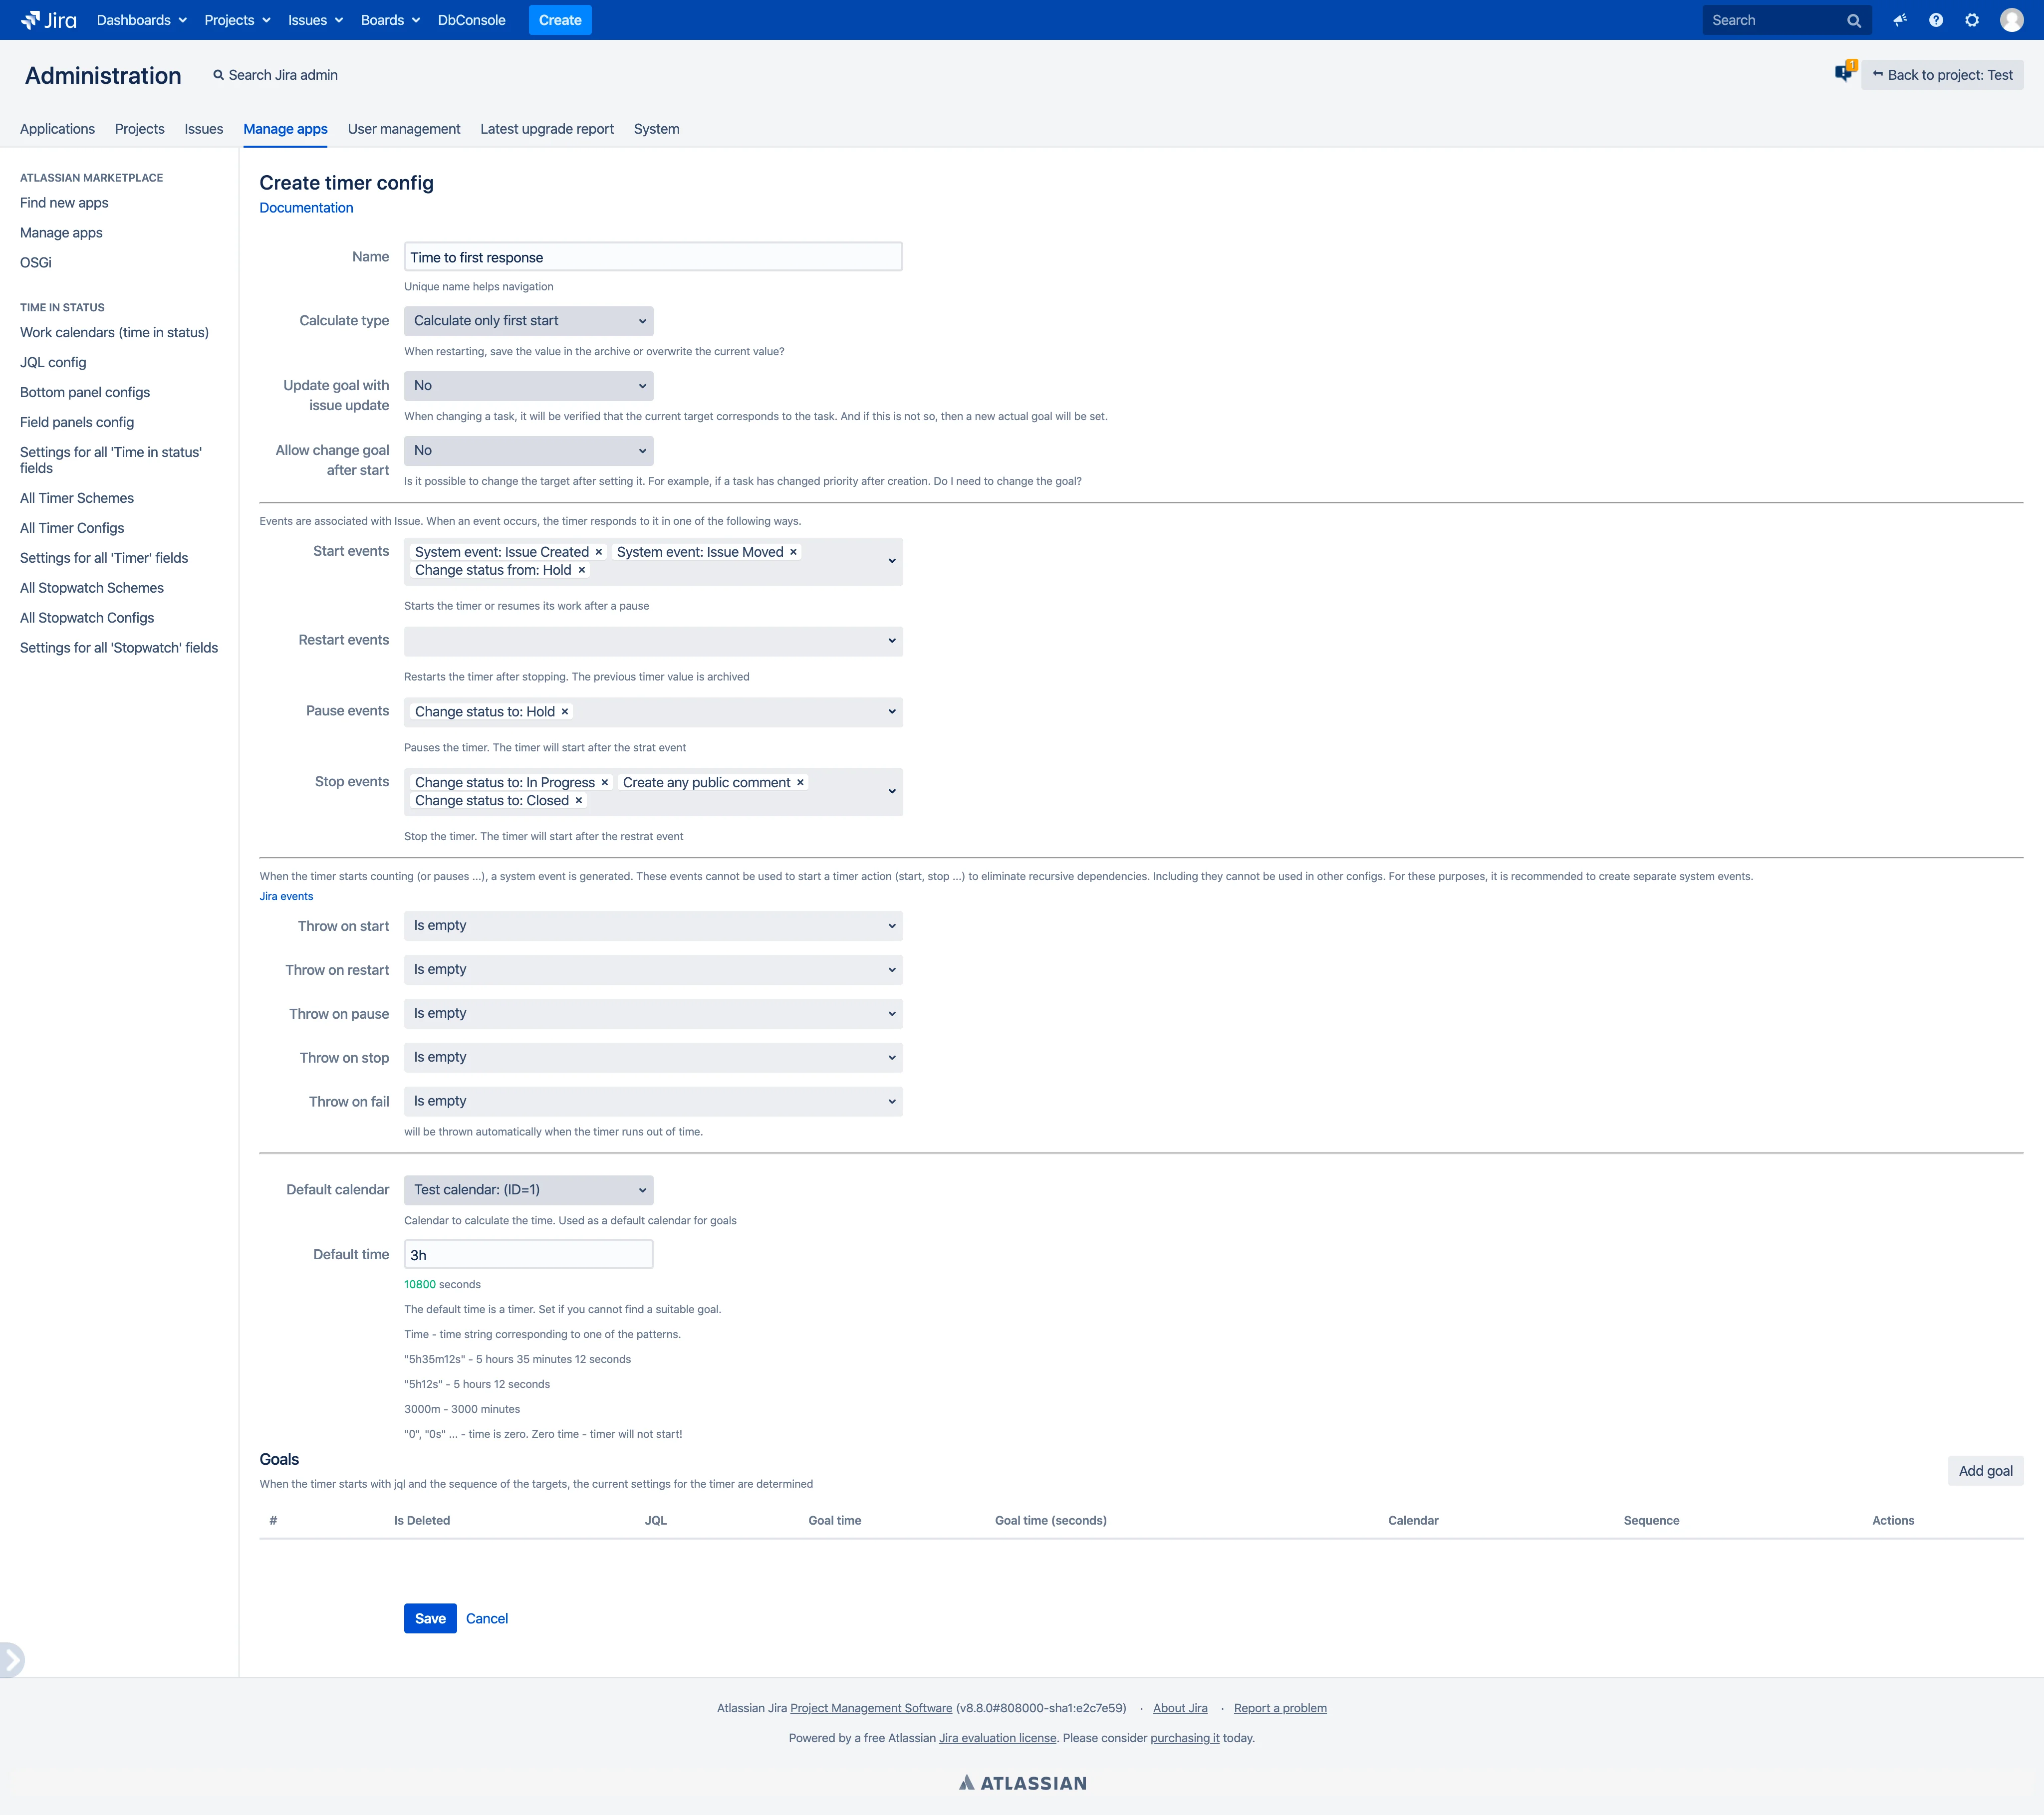
- Common settings
- Set a name convenient for navigation - “Time to first response”
- Set Calculate type - “First start”. Our timer can’t restart.
- Update goal with issue update - No. Our timer will always be set to 3 hours (only default time). Therefore, you can set any value.
- Allow change goal after start - No. Our timer will only have a default time(goal). Therefore, you can set any value.
- Events
- Start events:
- The timer will start when the task is created. add “Issue created”.
- In our project the task can be transferred from another project. add “Issue moved”.
- (see Pause events) When a task returns from Hold status, if it is still unanswered, then a timer must be started. add “Change status from: Hold”.
- Pause events:
- The team can send the task to hold the status without response. While the task in this status the timer needs to be stopped. add “Change status to: Hold”.
- Stop events:
- We record the response time when the user is given an answer.add “Create any public comment” or “Create first public comment”.
- We also fix the time when the task is taken to work or closed. add “Change status to: In progress”. add “Change status to: Closed”.
- Start events:
- Throw events We do not need Thrown events in this timer.
- Calendar
Default calendar - You can set a working calendar by which the timer will be considered. If left blank, the time will be considered 24/7.
Work calendars - Goal time
- Default time (Default goal) - Time for which the timer is set if it is not possible to select the goal.
- According to our condition the timer must be set for 3 hours. Set “3h”
- We do not need Additional goals in this timer.
- Click “Save”.
- Default time (Default goal) - Time for which the timer is set if it is not possible to select the goal.
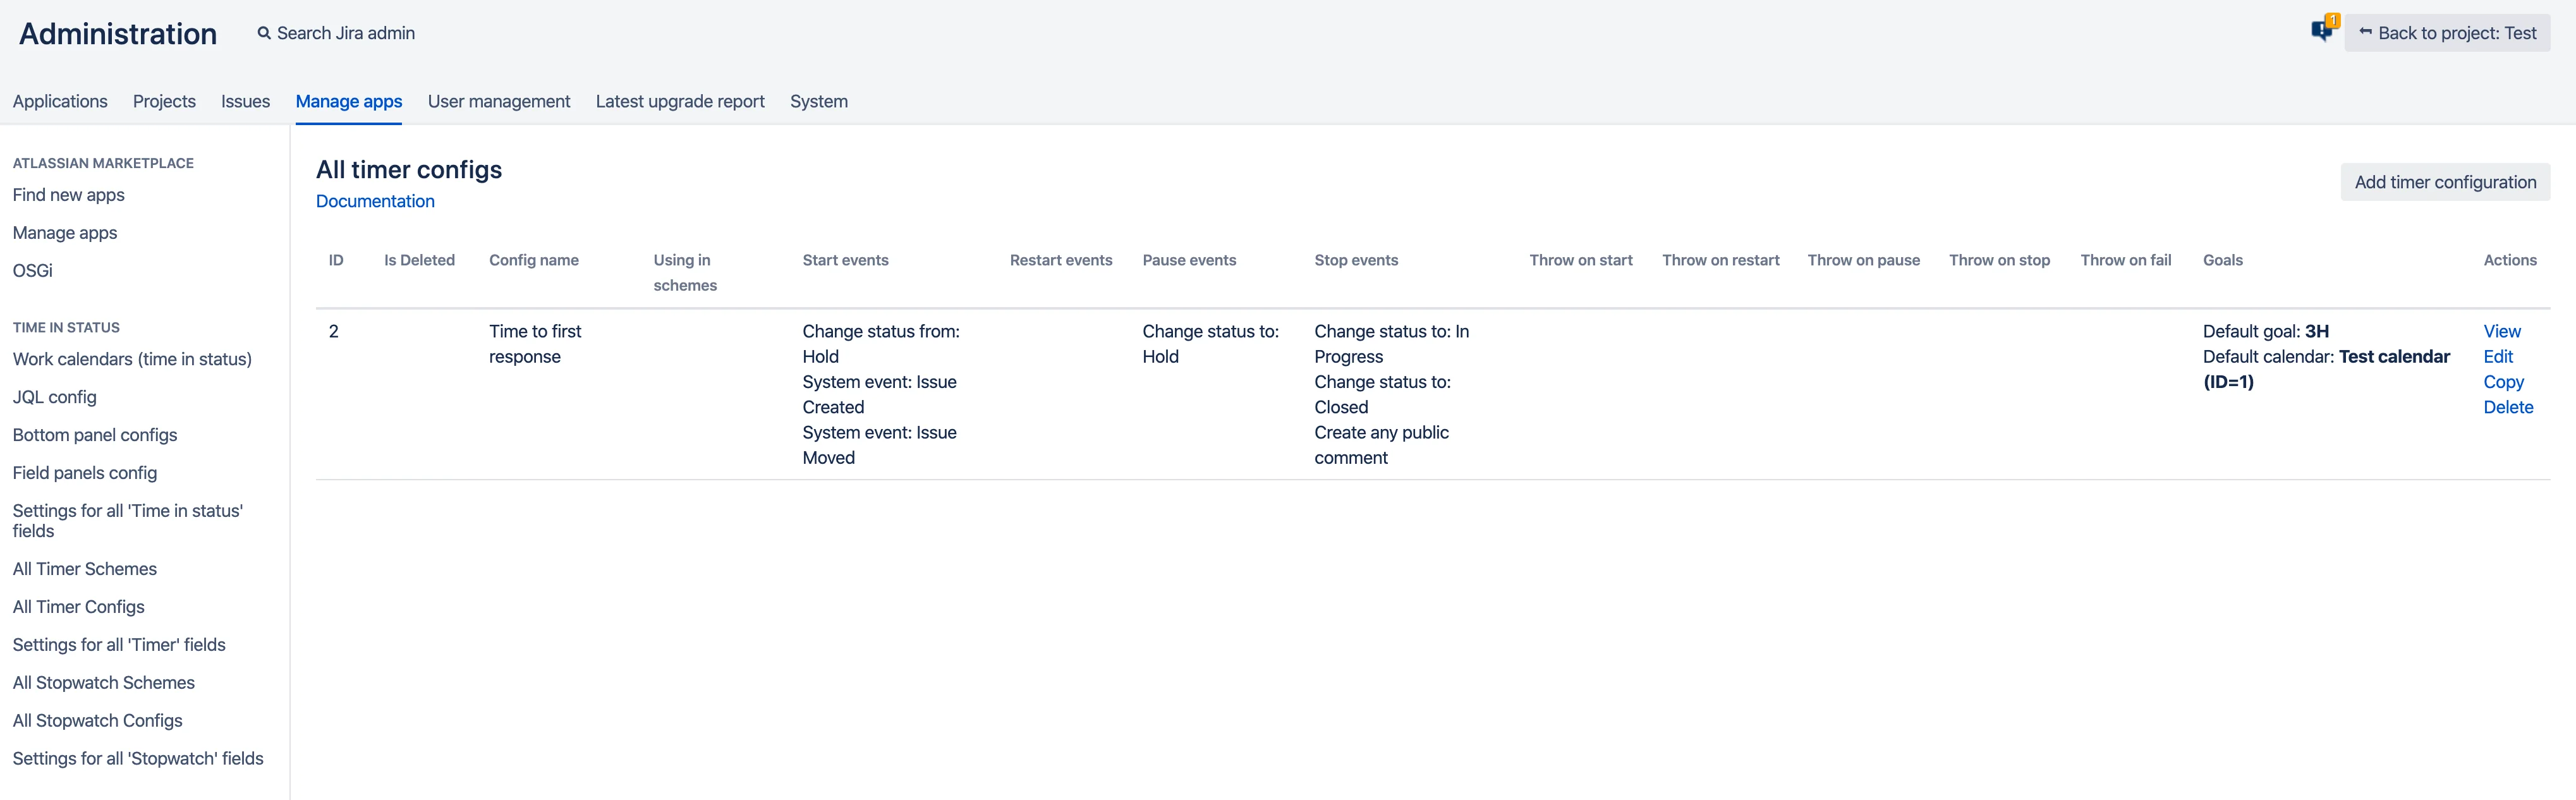
After create “Time to first response”:
5. Configure timer for “Time to resolution”
- Create new Configuration for (see p3)
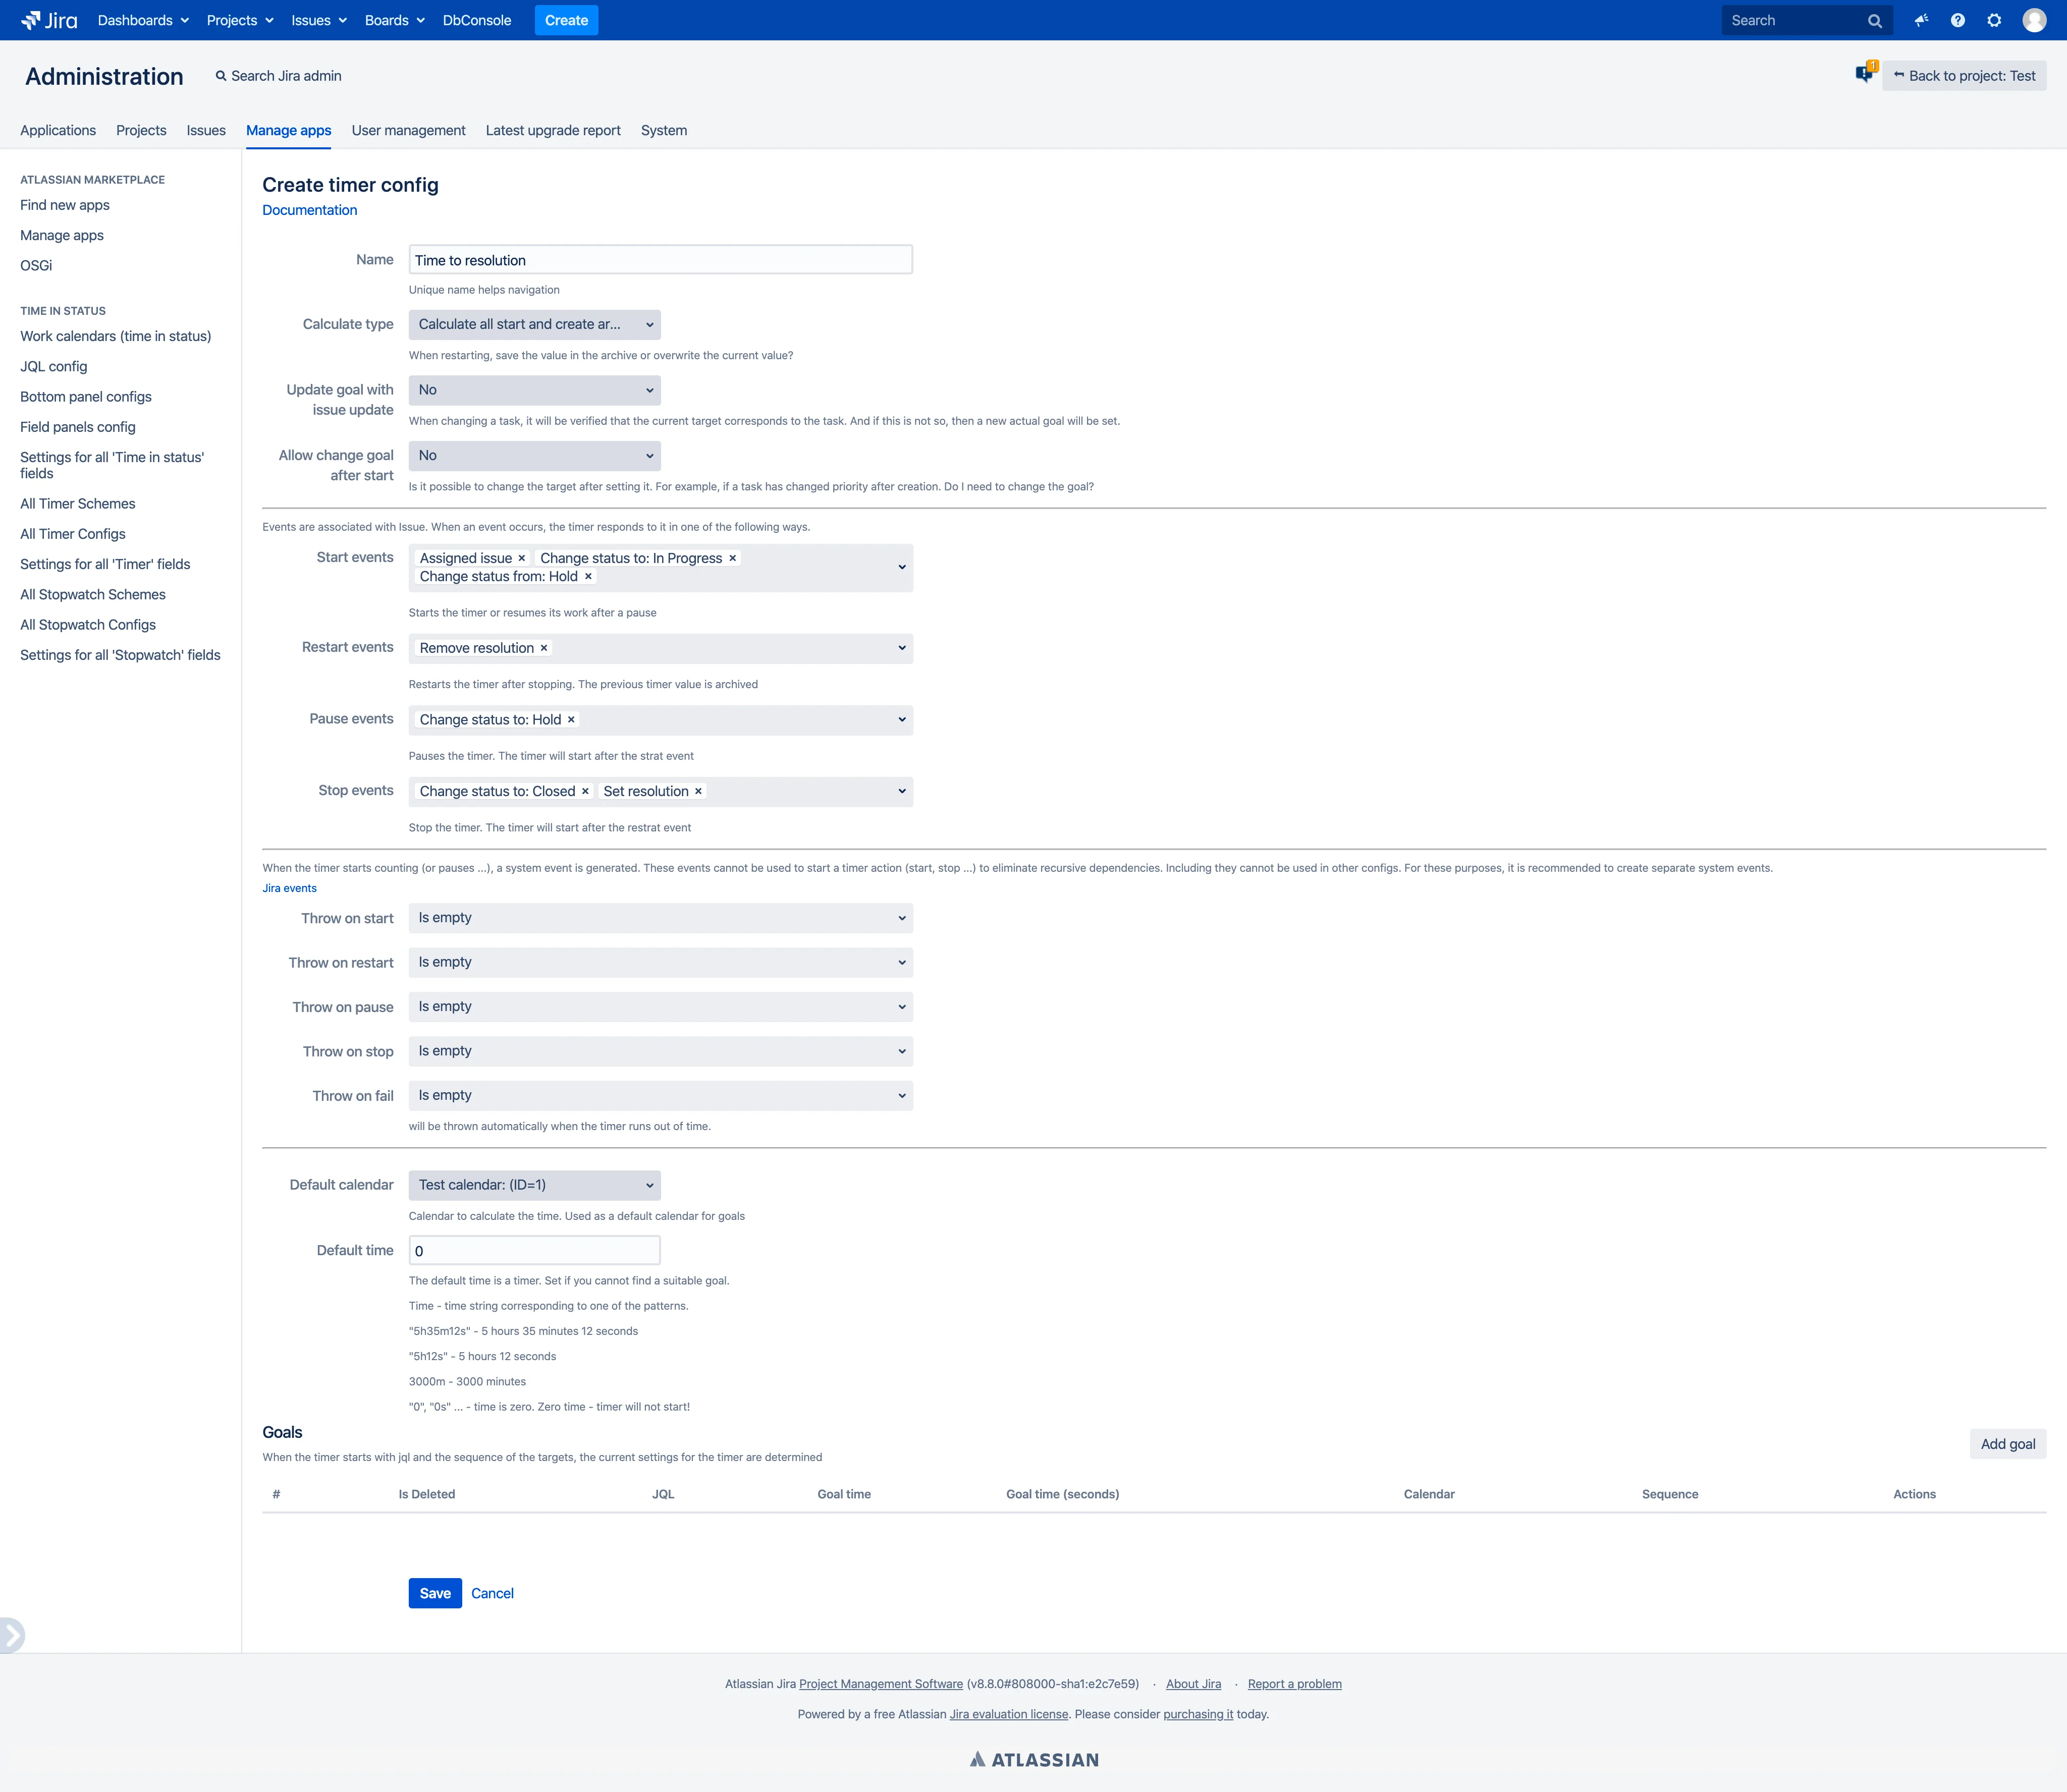
- Common settings
- Set a name convenient for navigation - “Time to resolution”.
- Set Calculate type - “Calculate all start and create archive”. The timer may restart and I want to see its previous values.
- Update goal with issue update - No. The priority of the task is determined at the time of adoption (before the timer starts). And in the future, priority cannot change.
- Allow change goal after start - No. The priority of the task is determined at the time of adoption (before the timer starts). And in the future, priority cannot change.
- Events
- Start events:
- The timer will start when the task transition to “In progress”. add “Change status to: In progress”.
- (see Pause events) When a task returns from Hold status, then a timer must be started. add “Change status from: Hold”.
- When a task is assigned (assignee change from Null(Empty) to user). add “assigned issue”.
- Restart events:
- If the task is removed from the resolution, then the timer starts the countdown again. add “Remove resolution”. (If you do not need to restart the timer, then you need to use a pause instead of a retart.)
- Pause events:
- The team can send the task to hold the status. While the task in this status the timer needs to be stopped. add “Change status to: Hold”.
- Stop events:
- We fix the timer time when the task closes or a solution is established for it. .add “Change status to: Closed”. add “Set resolution”.
- Start events:
- throw events
- We do not need Thrown events in this timer.
- Calendar
- Default calendar - You can set a working calendar by which the timer will be considered. If left blank, the time will be considered 24/7
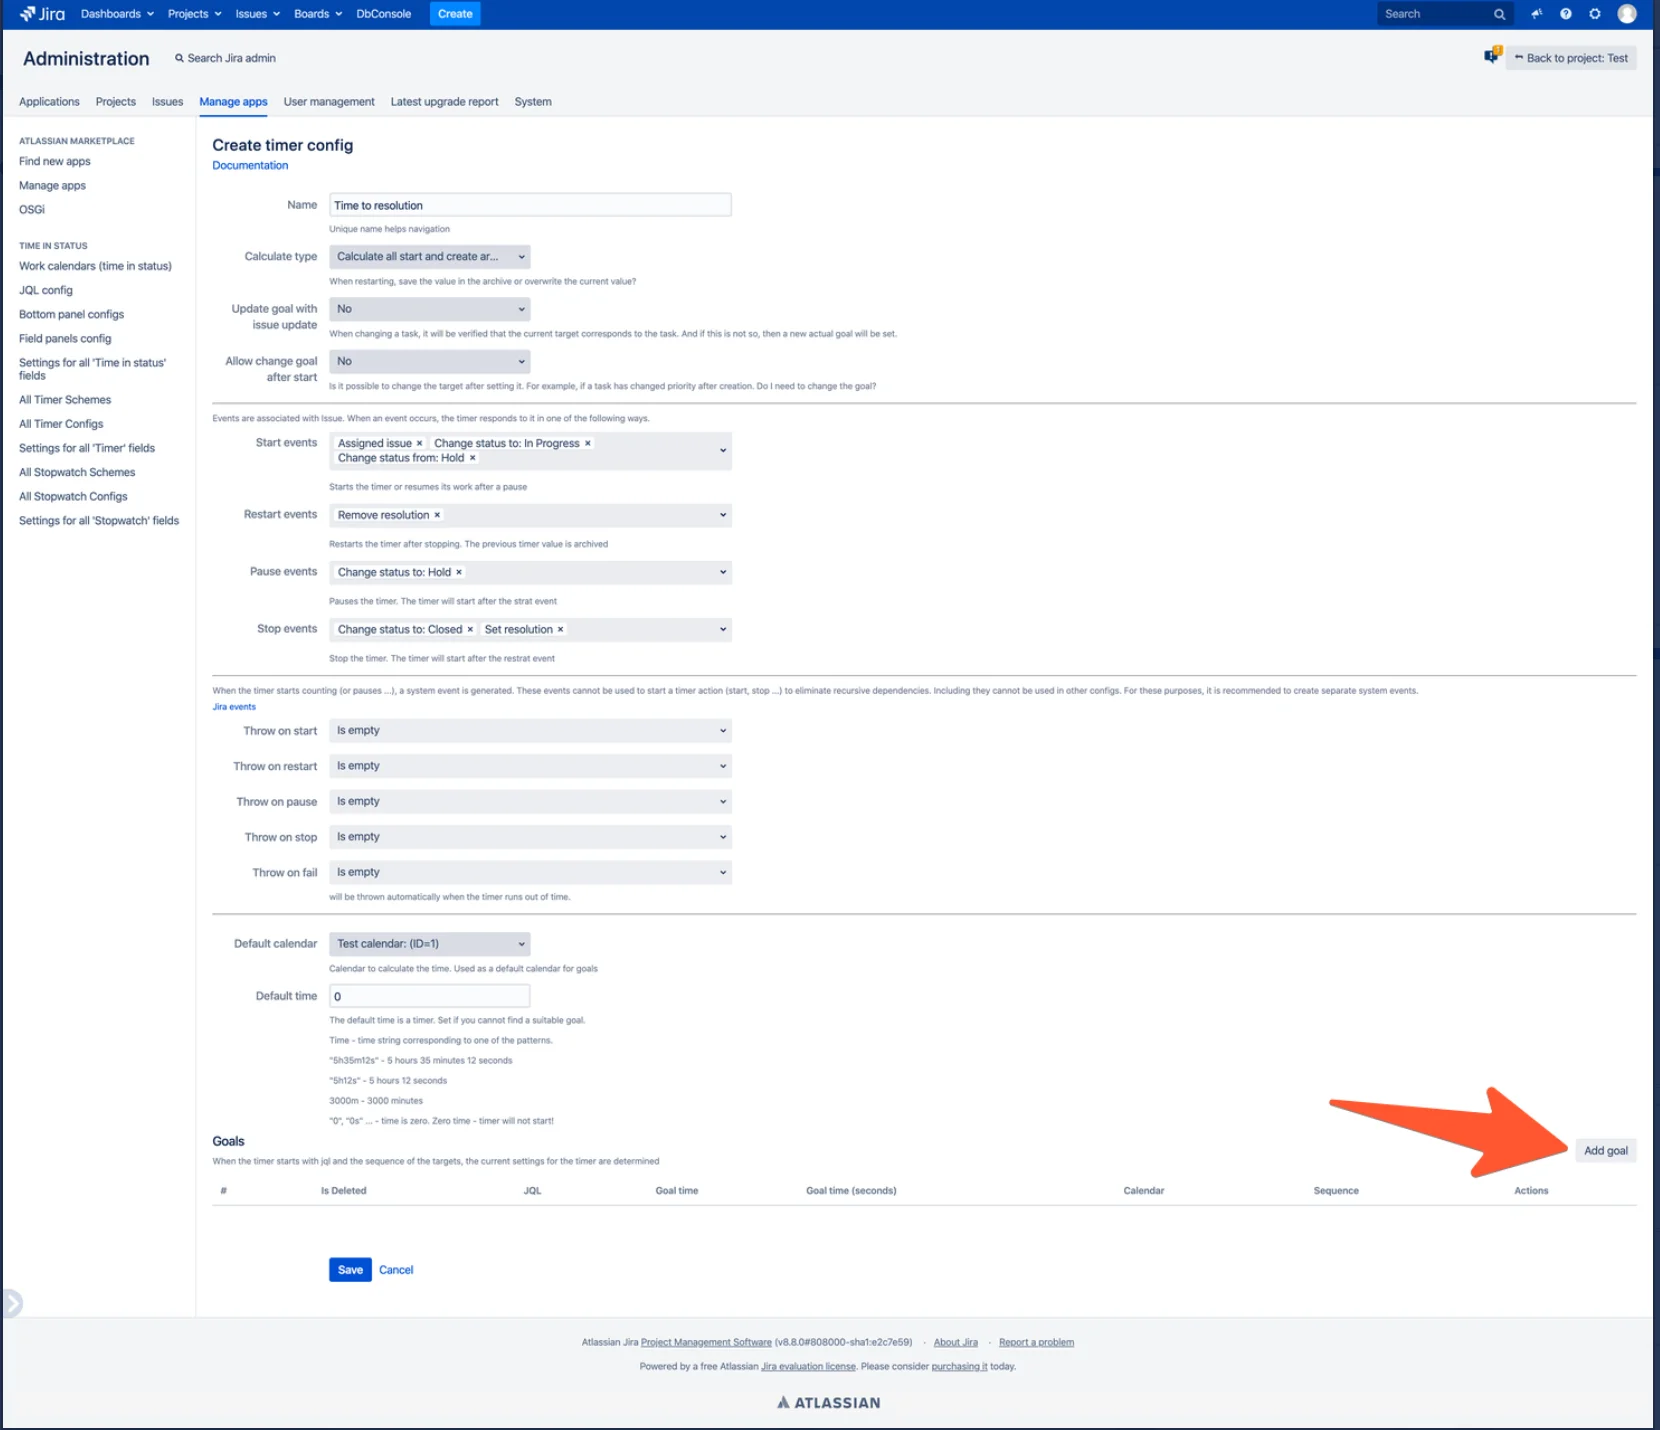
- Goals
- Default time (Default goal) - Time for which the timer is set if it is not possible to select the goal.
- The timer time depends on the priority and all tasks have priority. set “0”.
- The target time will be determined by the priority of the task. For each condition (priority) you need to add a goal.
- Create goals by priorities: see screenshots
- Default time (Default goal) - Time for which the timer is set if it is not possible to select the goal.
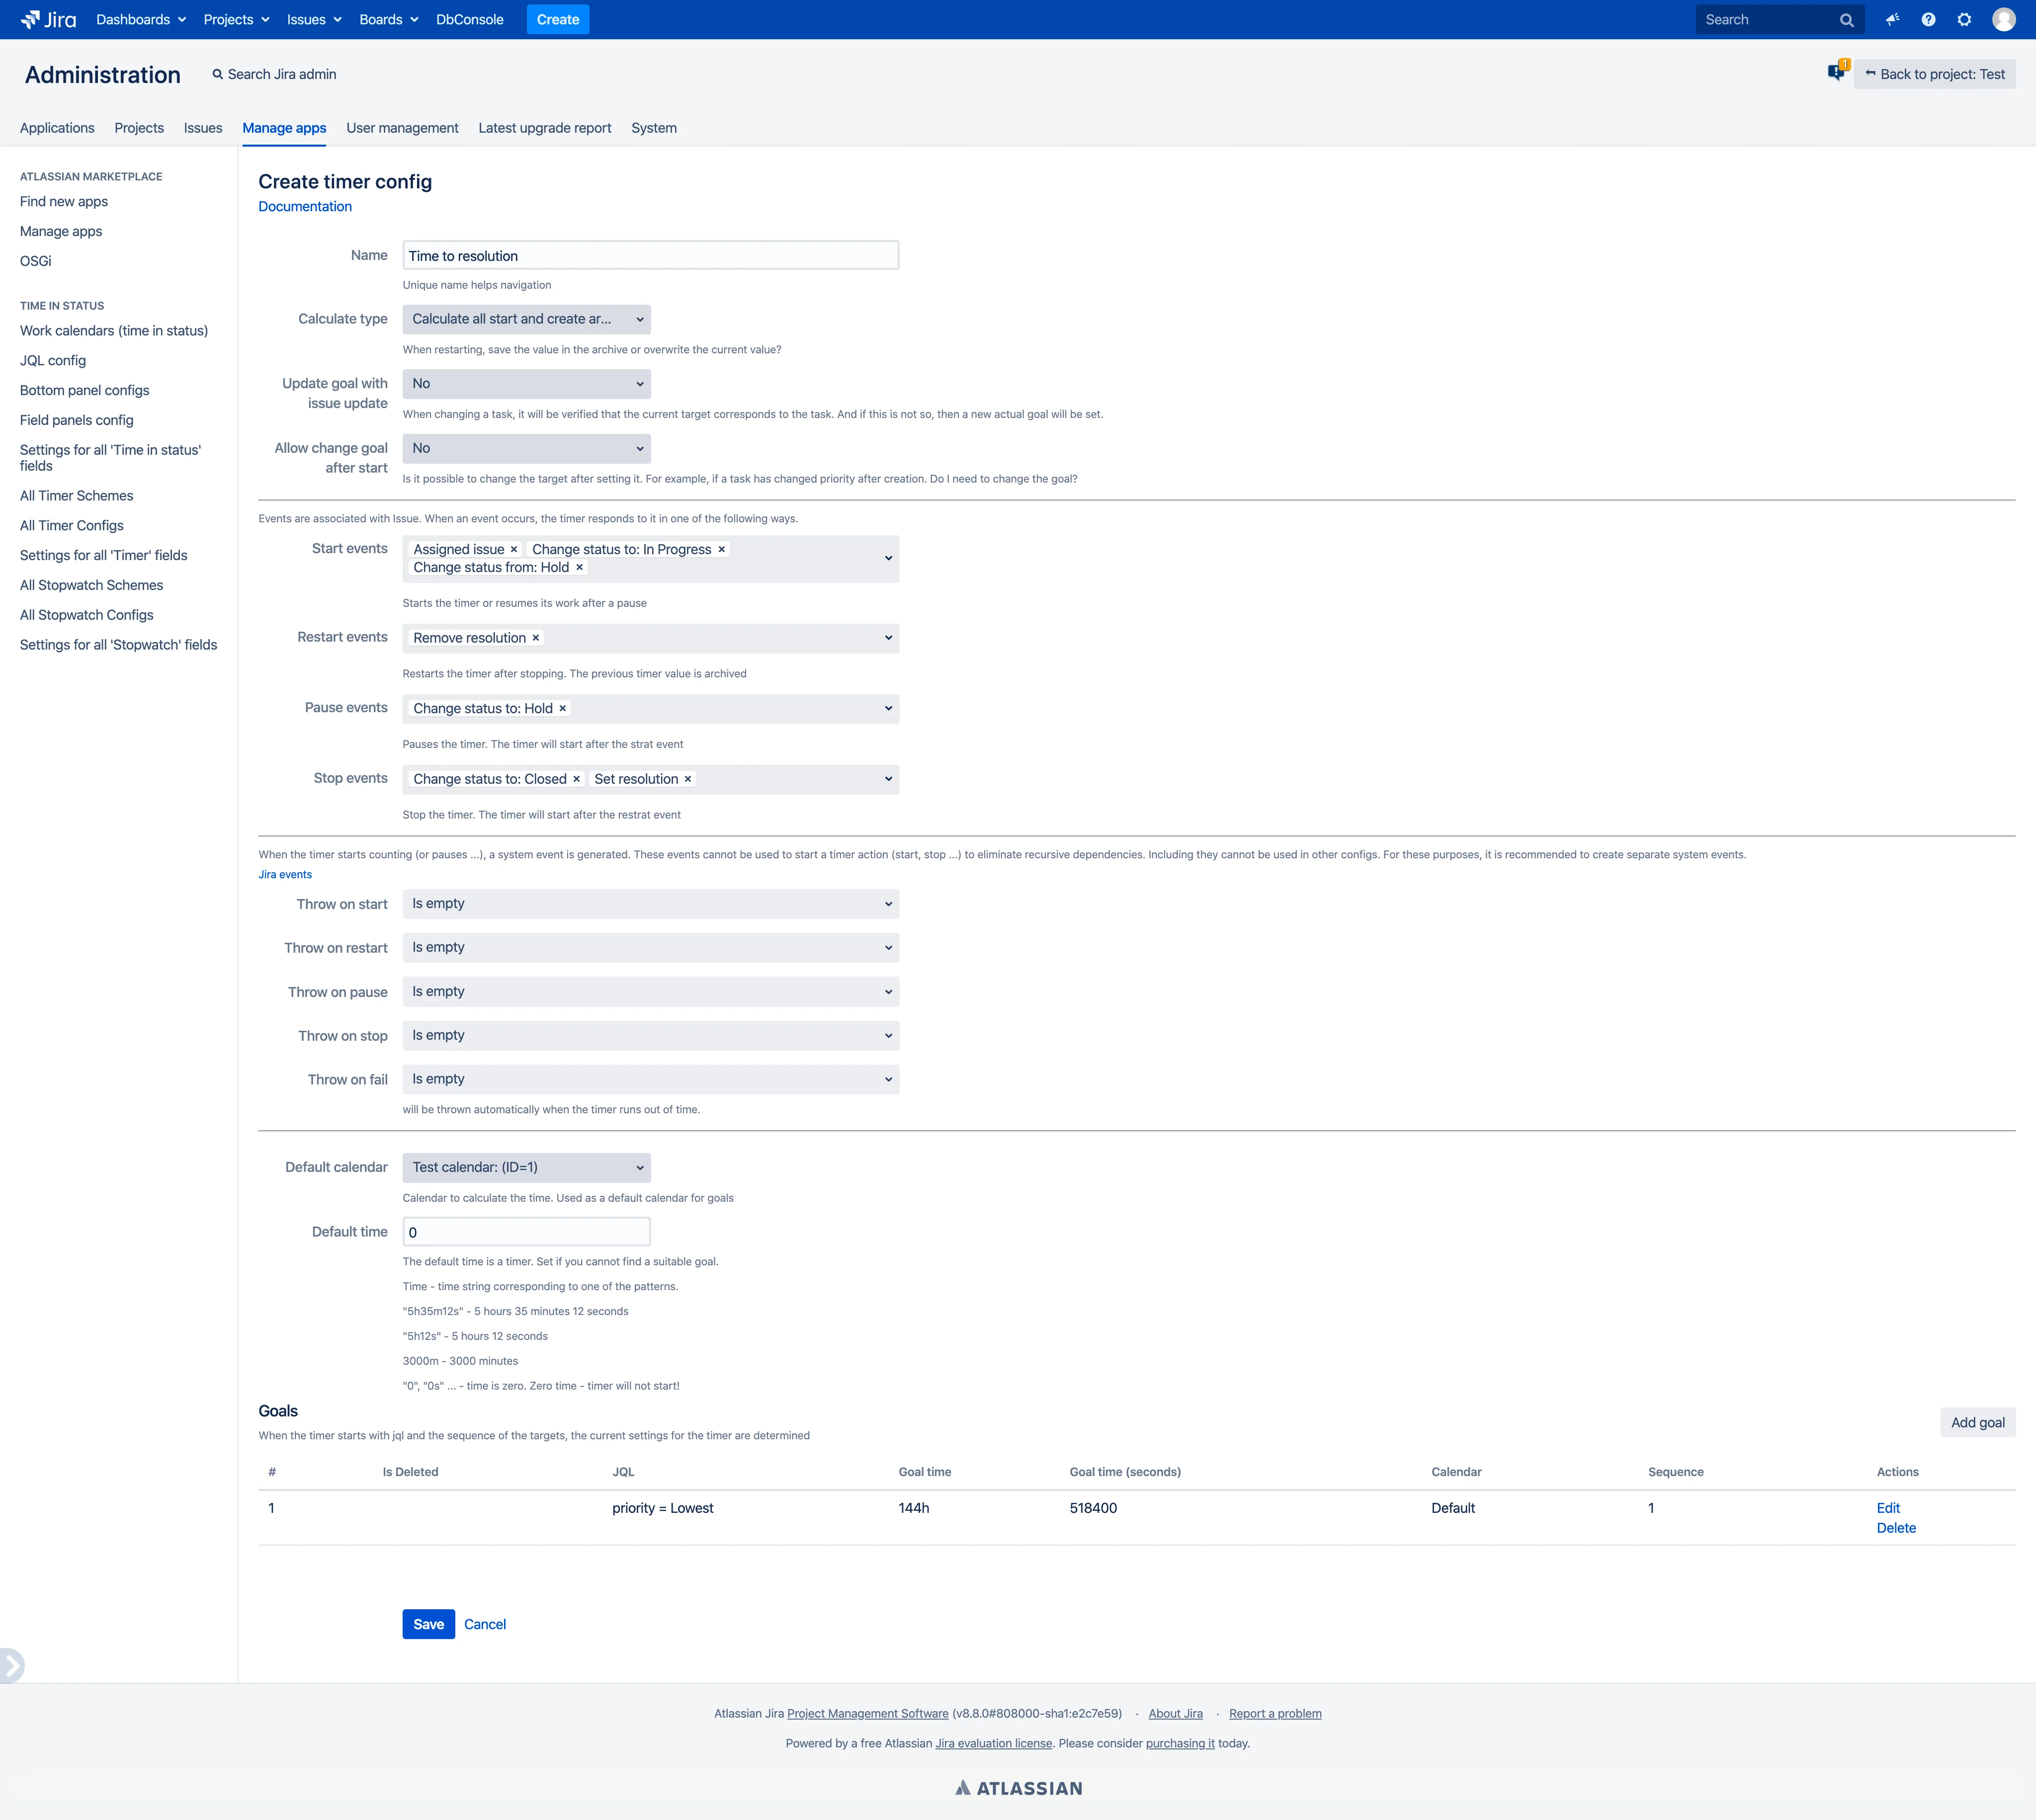
Create goal:
- JQL - condition by priority.
- Example: priority = Lowest
- Use default time? - No
- Each goal has its own unique time.
- Time - set by condition
- Set “144h”
- Calendar - Set on which calendar you need to calculate the time. In this process, we use 1 working calendar.
- Set “Default”
- Sequence - The conditions for our purposes do not overlap, so we do not need this field(The field will be filled automatically after create goal)
- You can leave this field blank.
- Click “Create”
After create first goal:
after create all goals click “Save”
after create all goals:
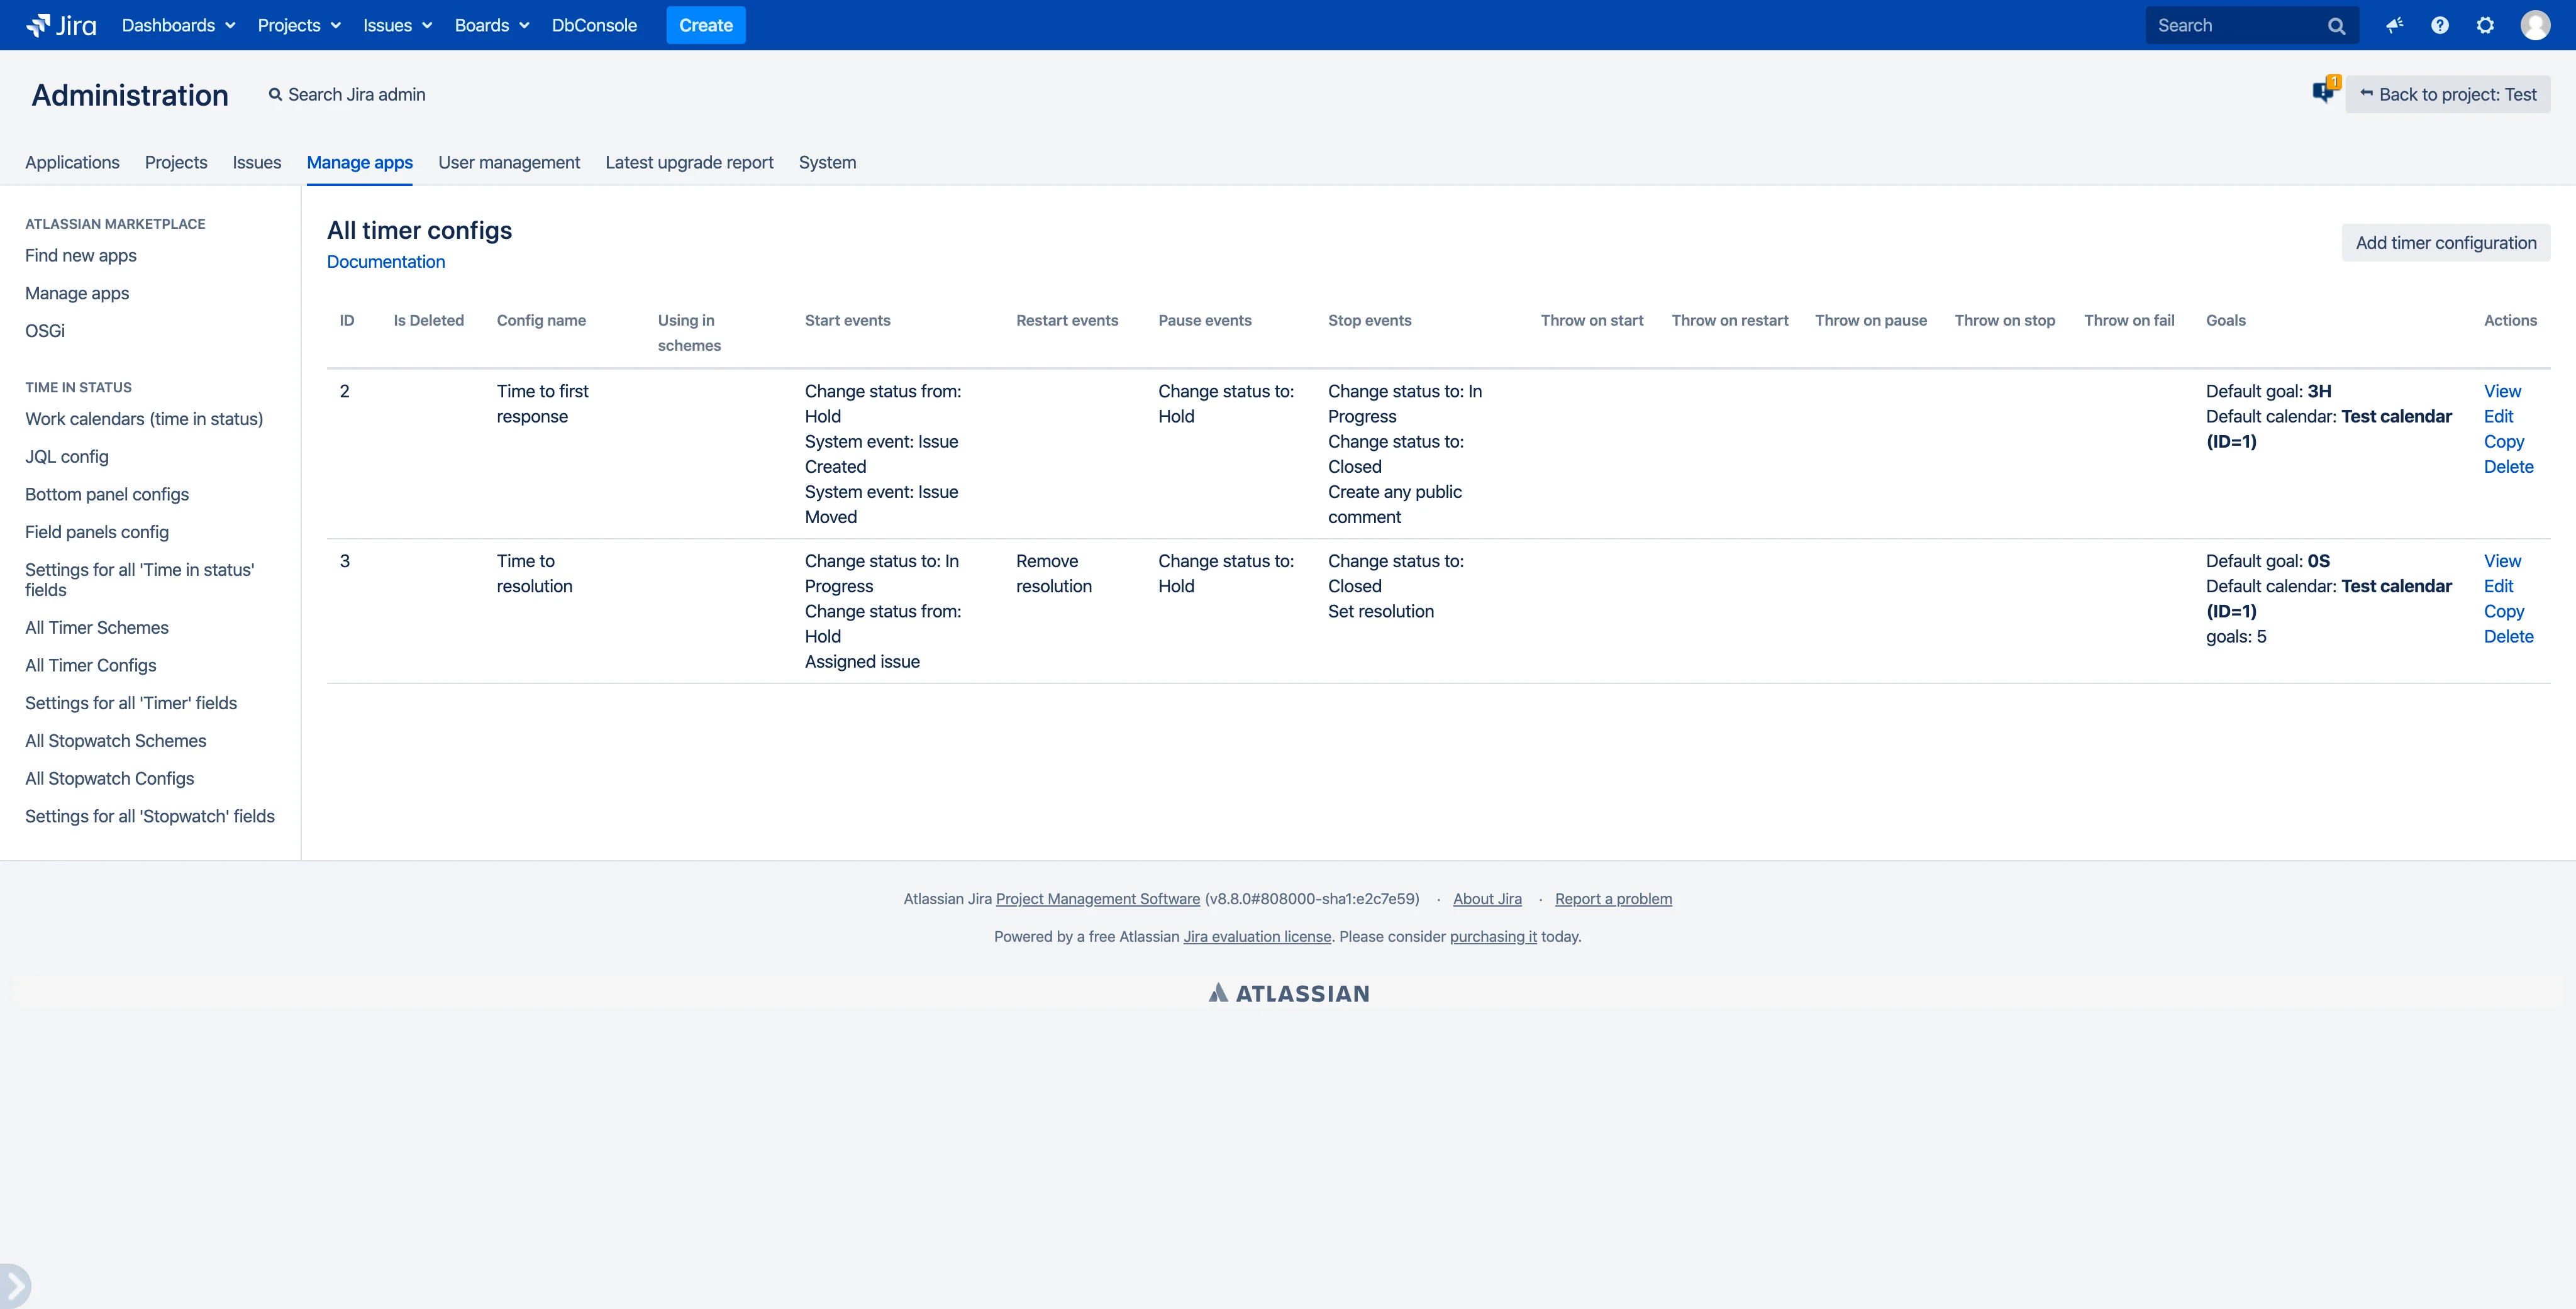
after save config for “Time to resolution”:
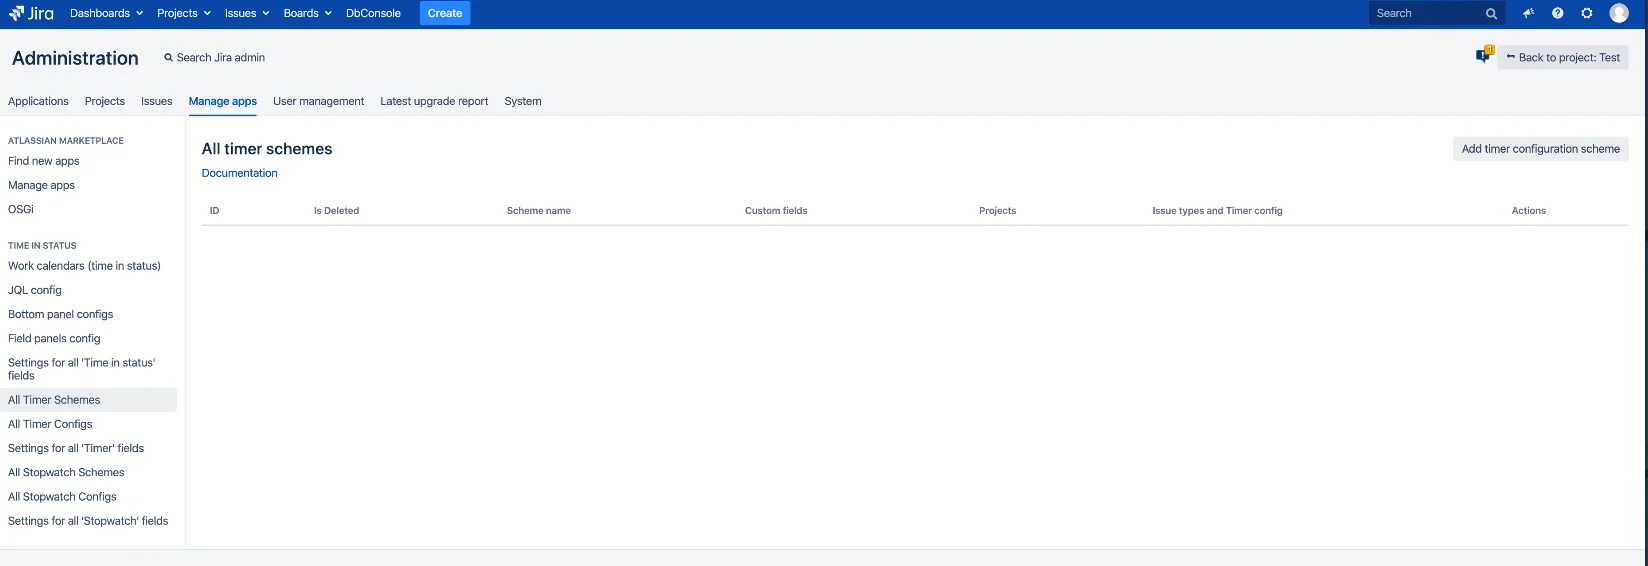
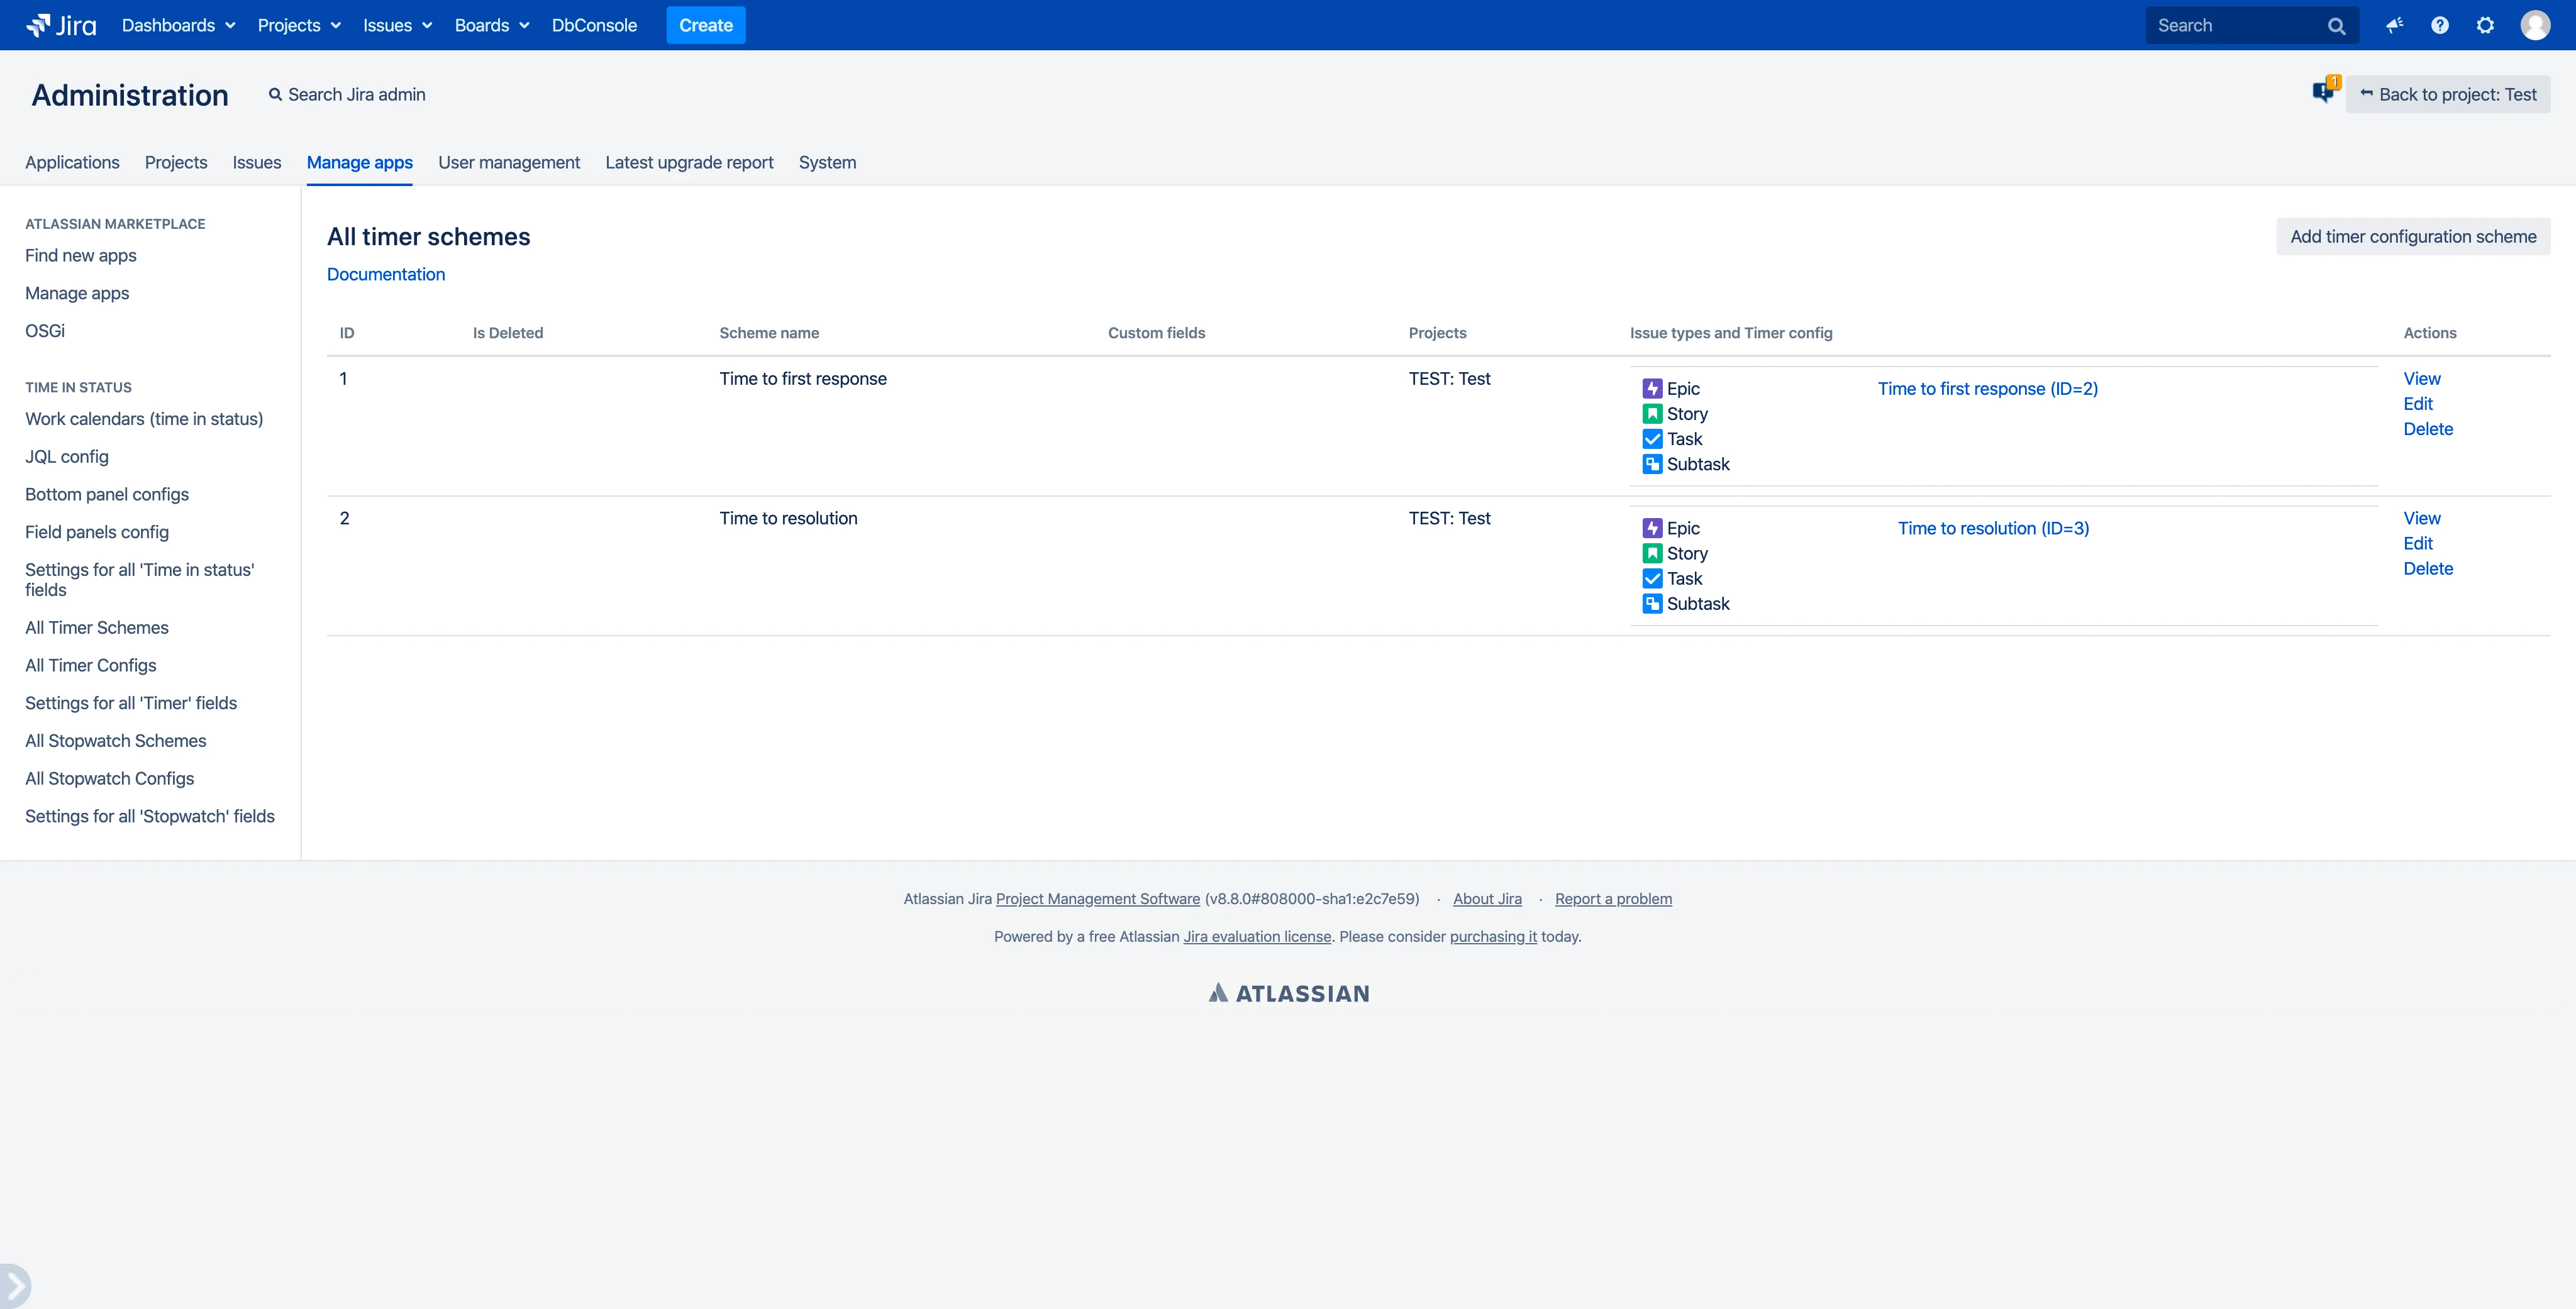
6. Open All timer schemes
go to {baseUrl}/secure/jibrokAllTimerSchemes.jspa
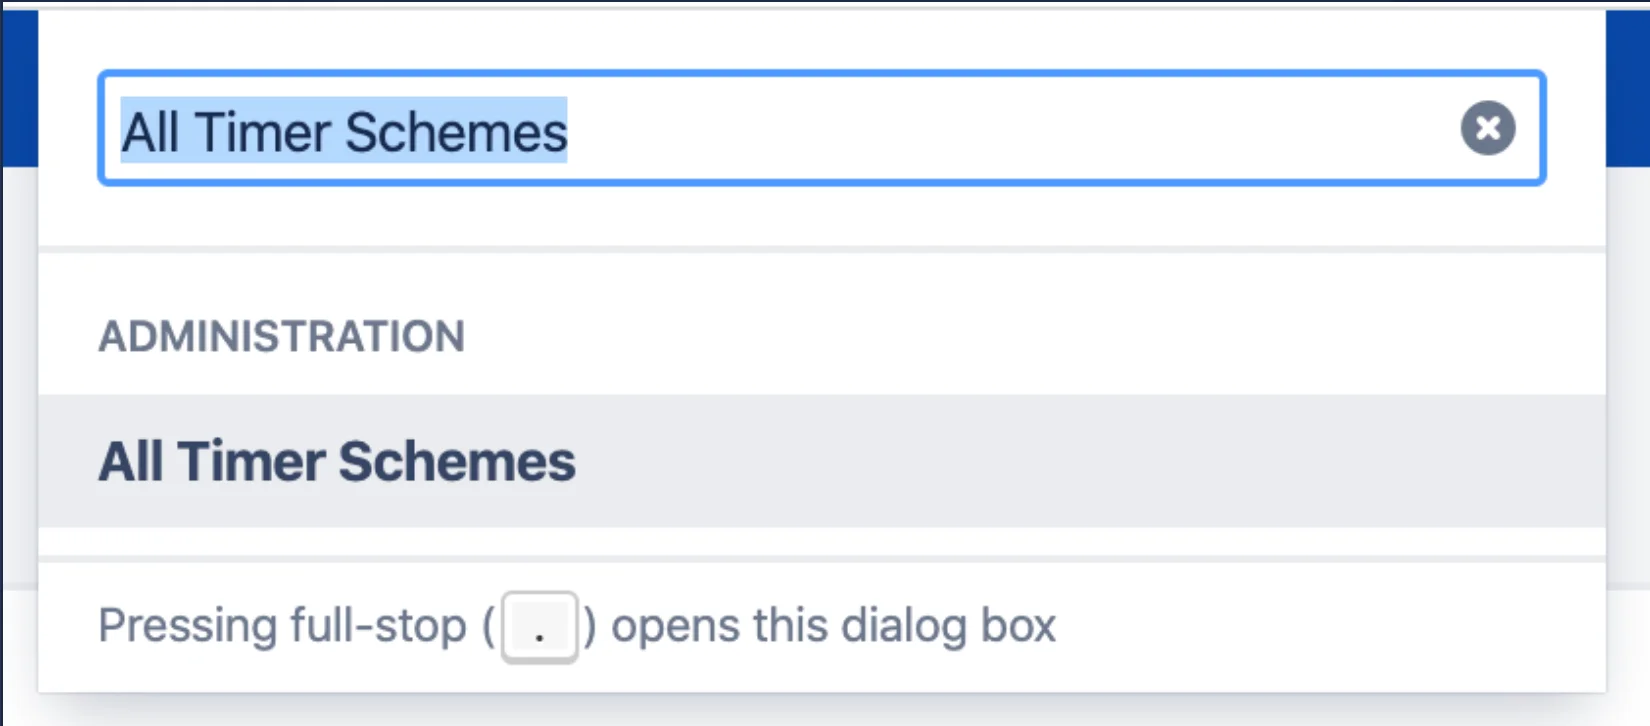
or open with admin search (gg + “All timer schemes”)
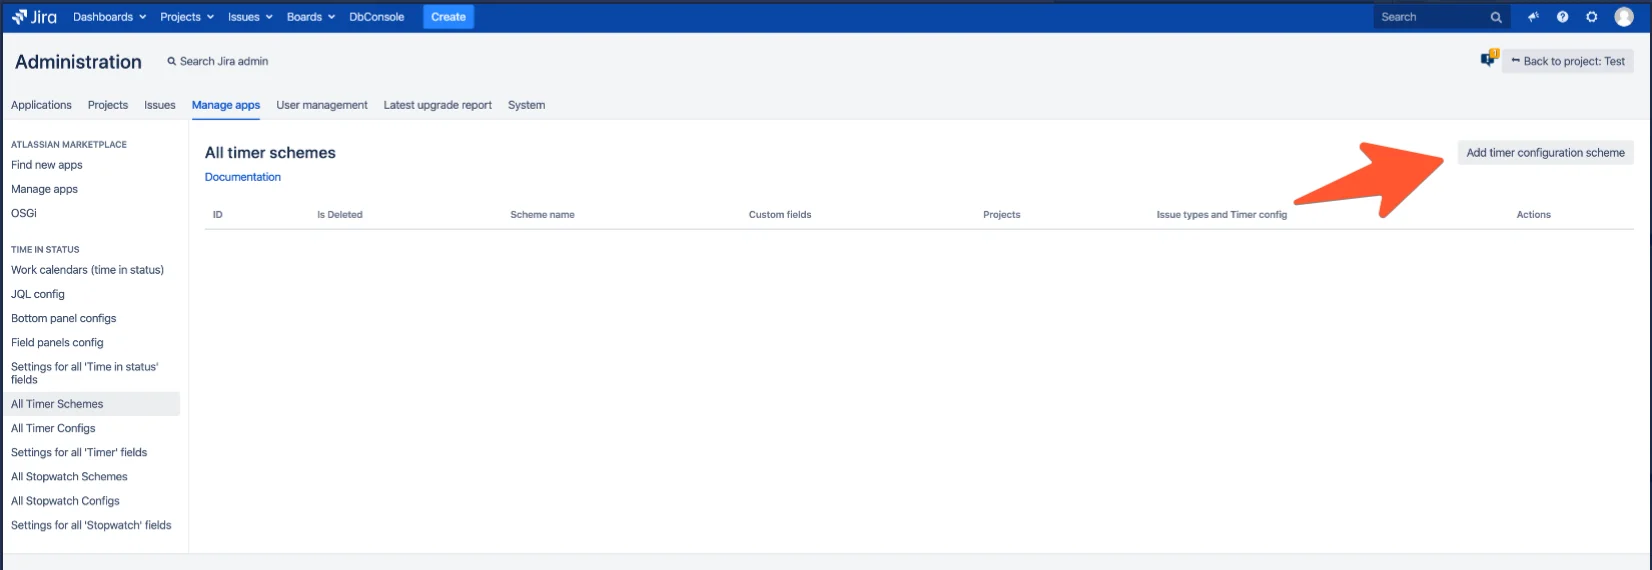
7. Click “Add timer configuration scheme”
Timers and Stopwatches - Scheme and configurations
Now you need to set which timer configurations to use depending on the project and the type of task. Analogue of context for custom fields.
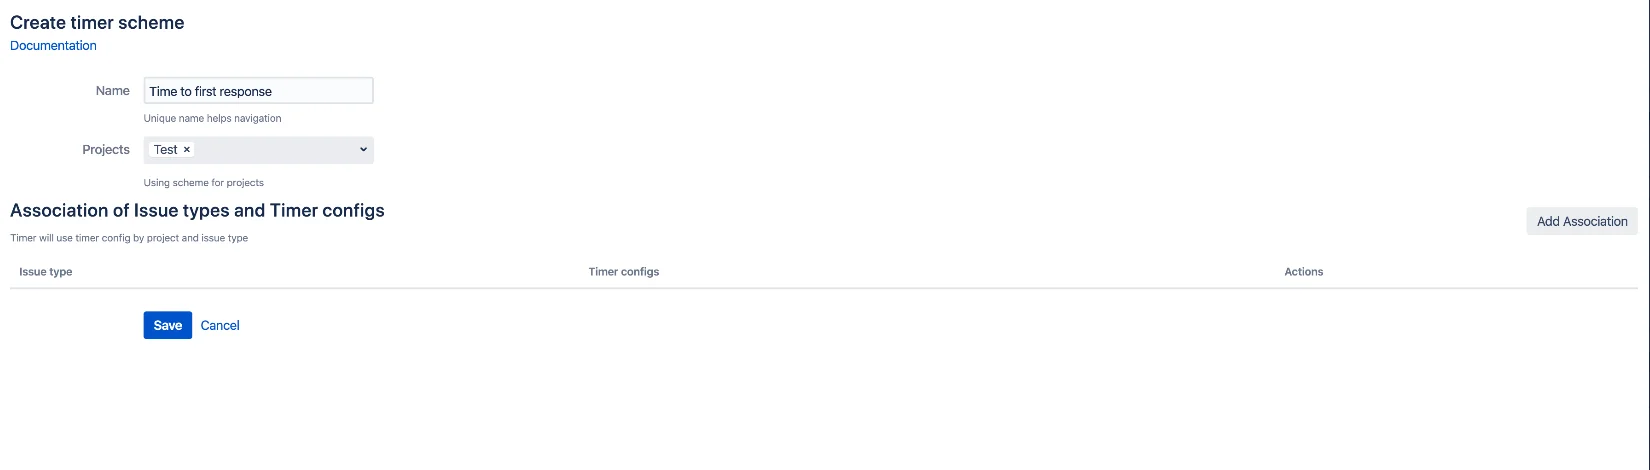
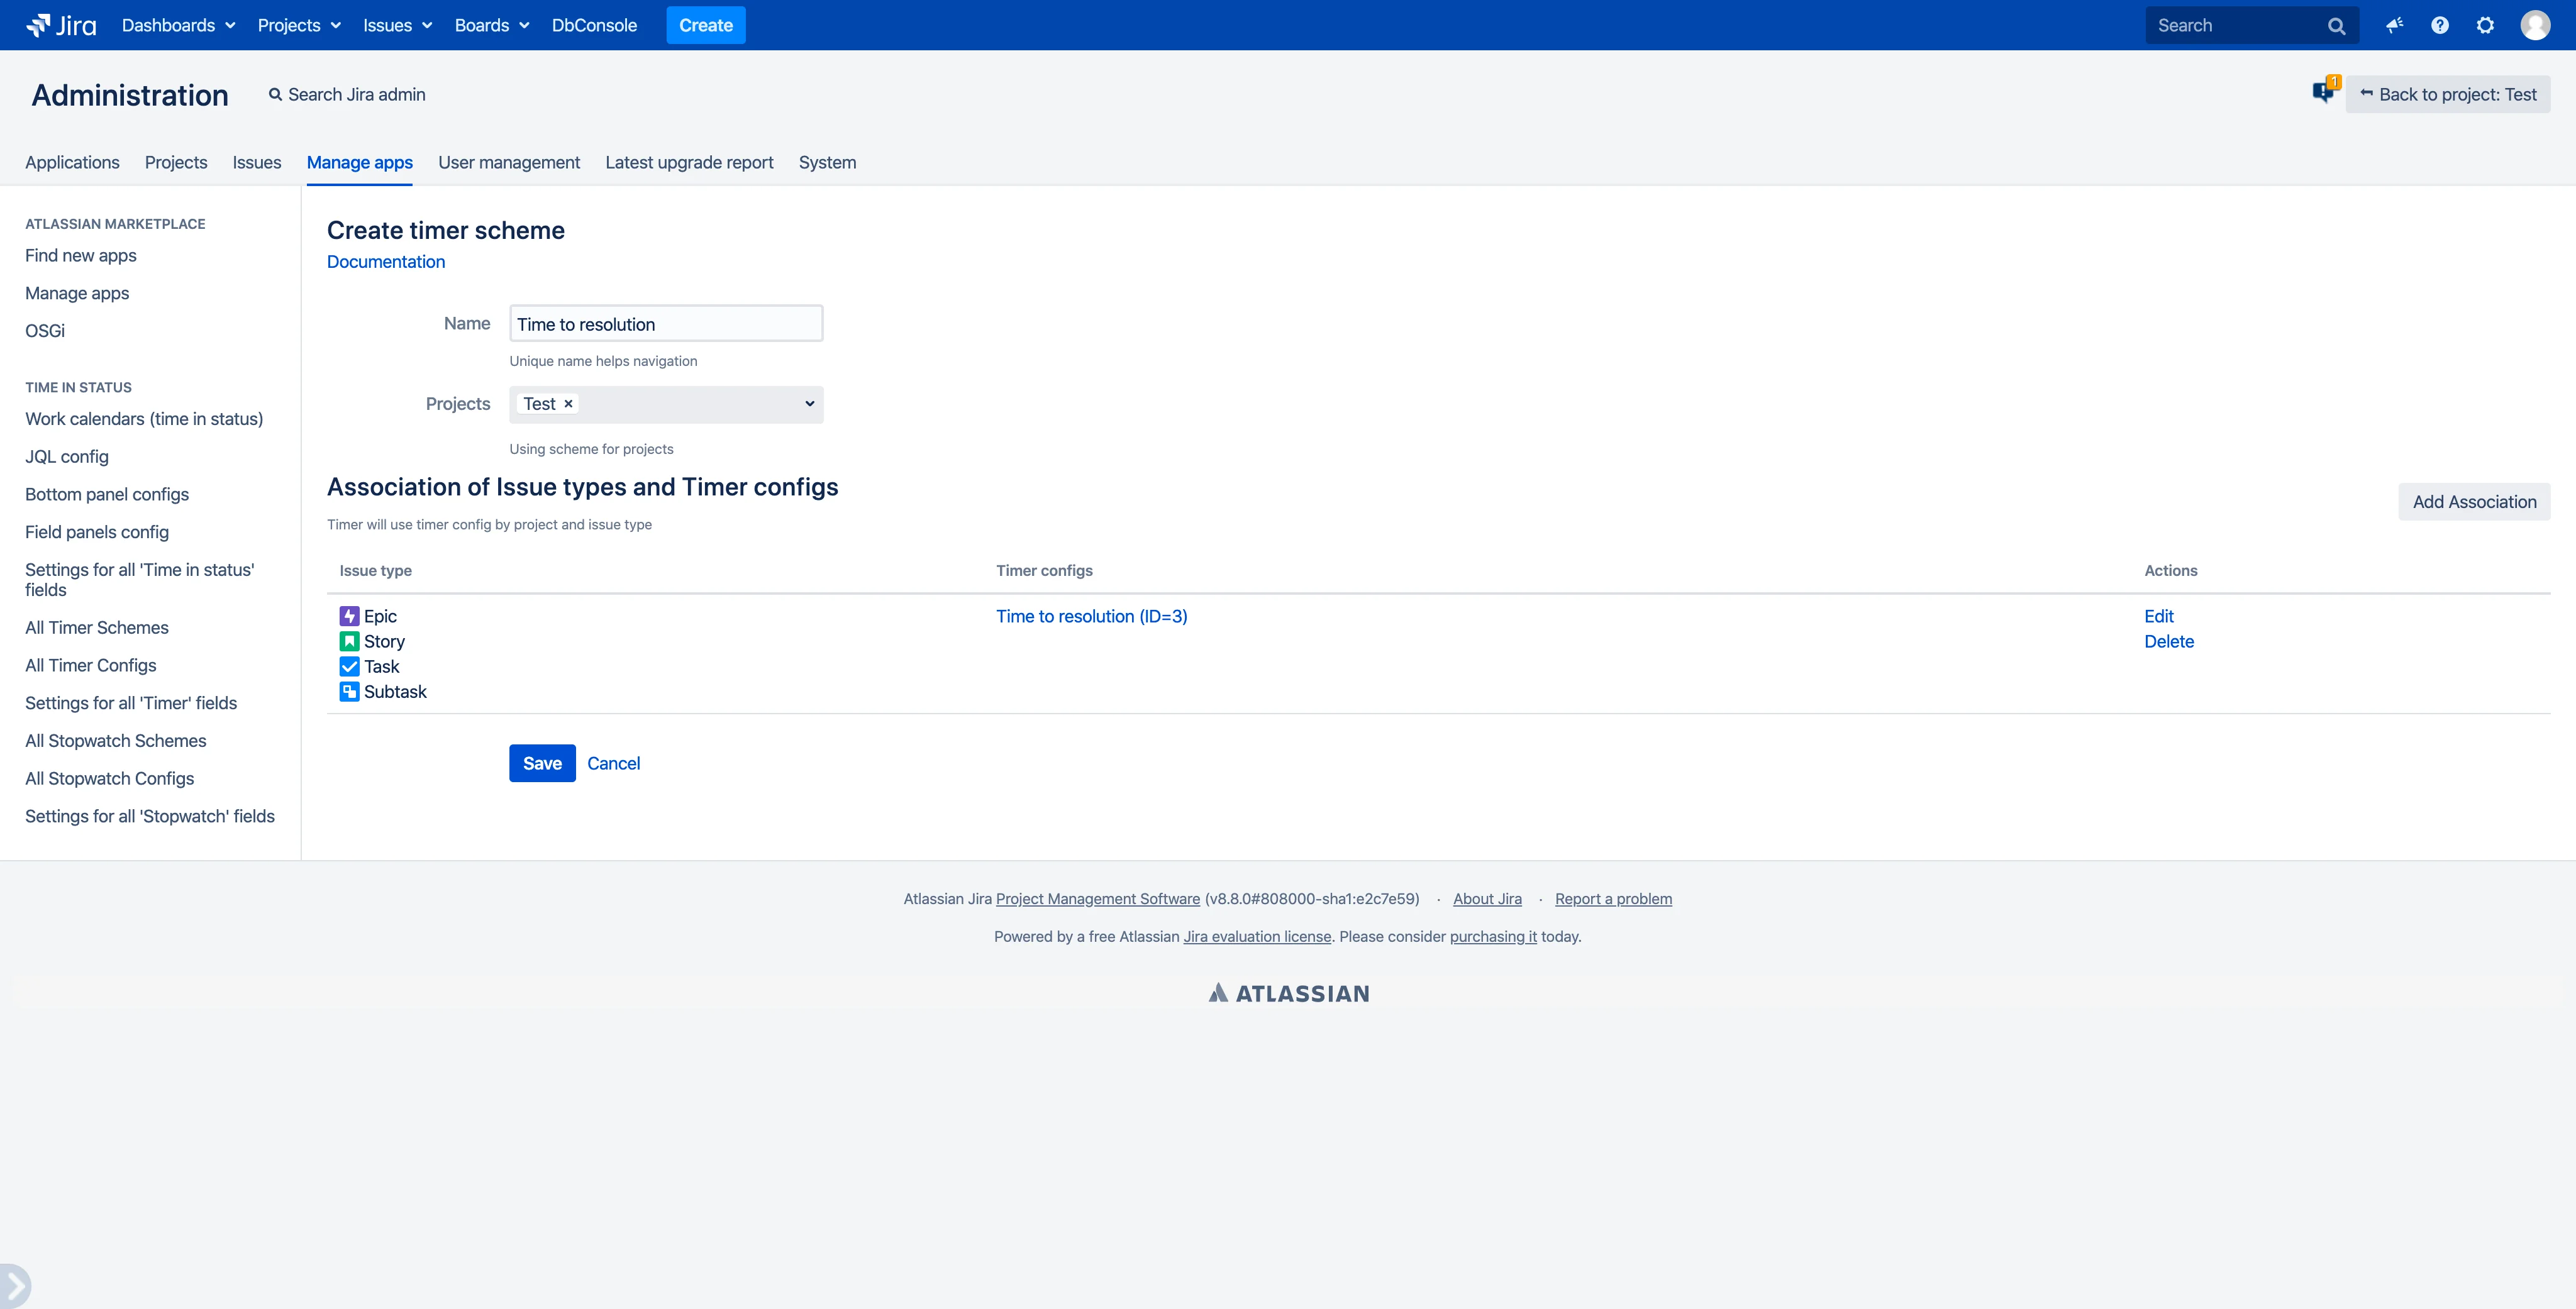
8. Configure timer scheme for “Time to first response”
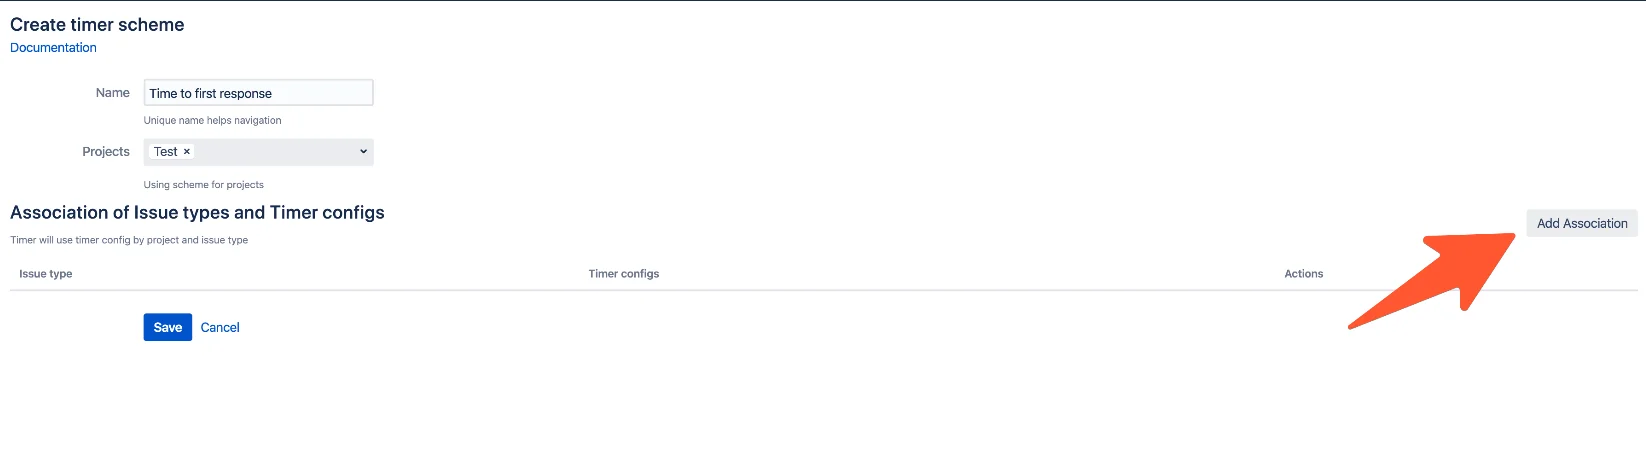
- Set a name convenient for navigation - “Time to first response”
- Projects - Select the projects for which this scheme will work.
- Click “Add Association”
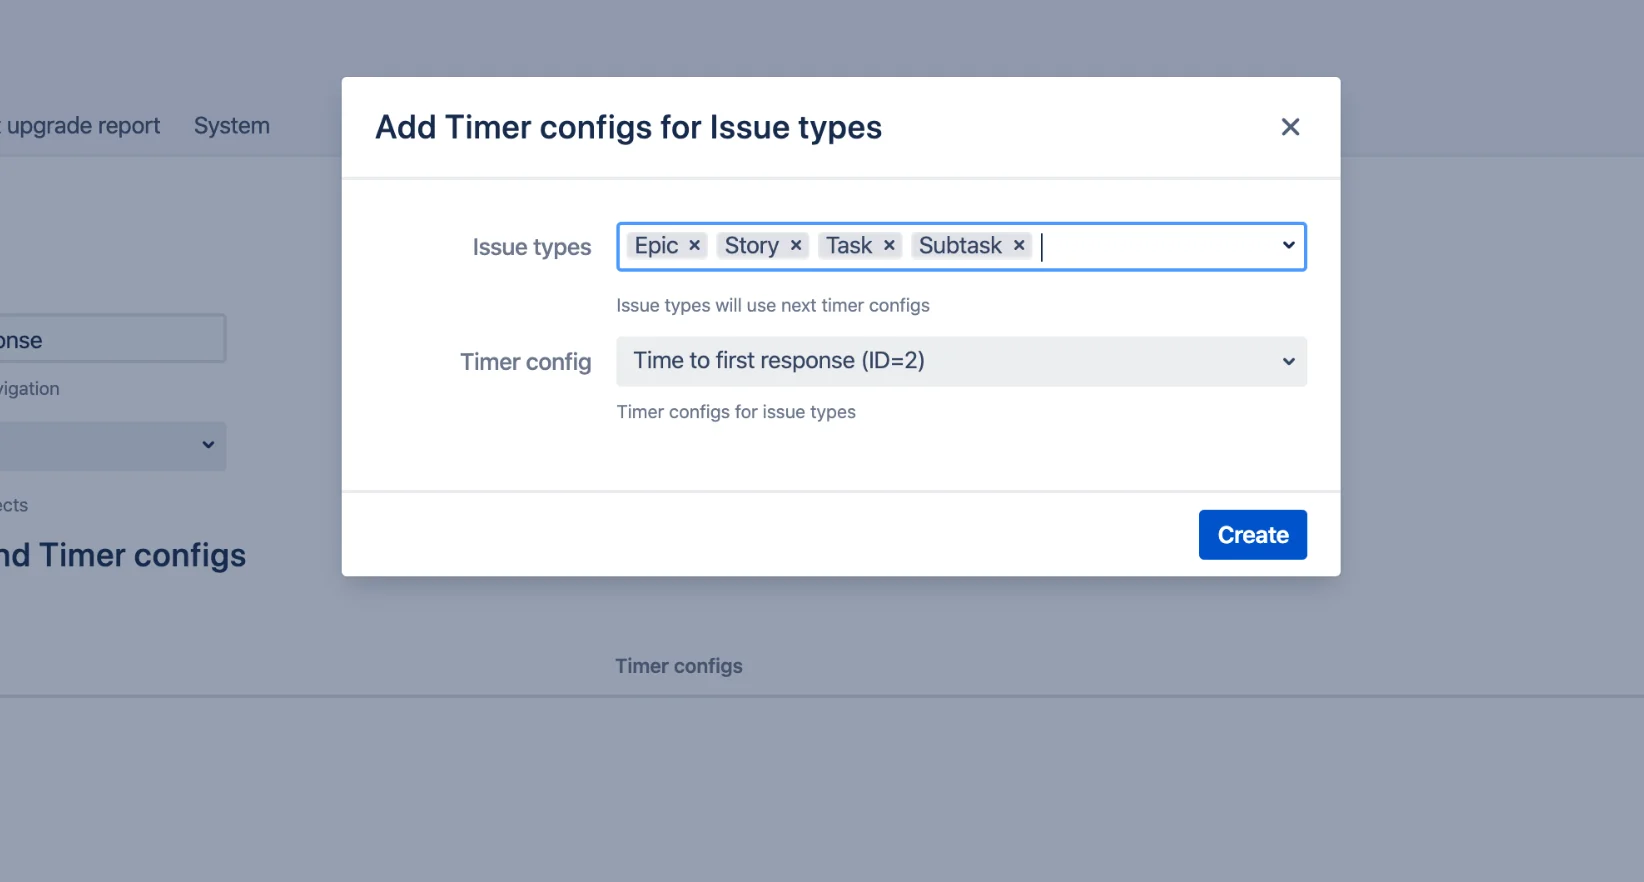
- Set issue types and timer config(from p5)
- Click “Create”
- We indicated that the timer config are relevant for tasks from the project and issue types.
- Click “Save”
Click “Add Association”:
Set issue types and timer config(see p5):
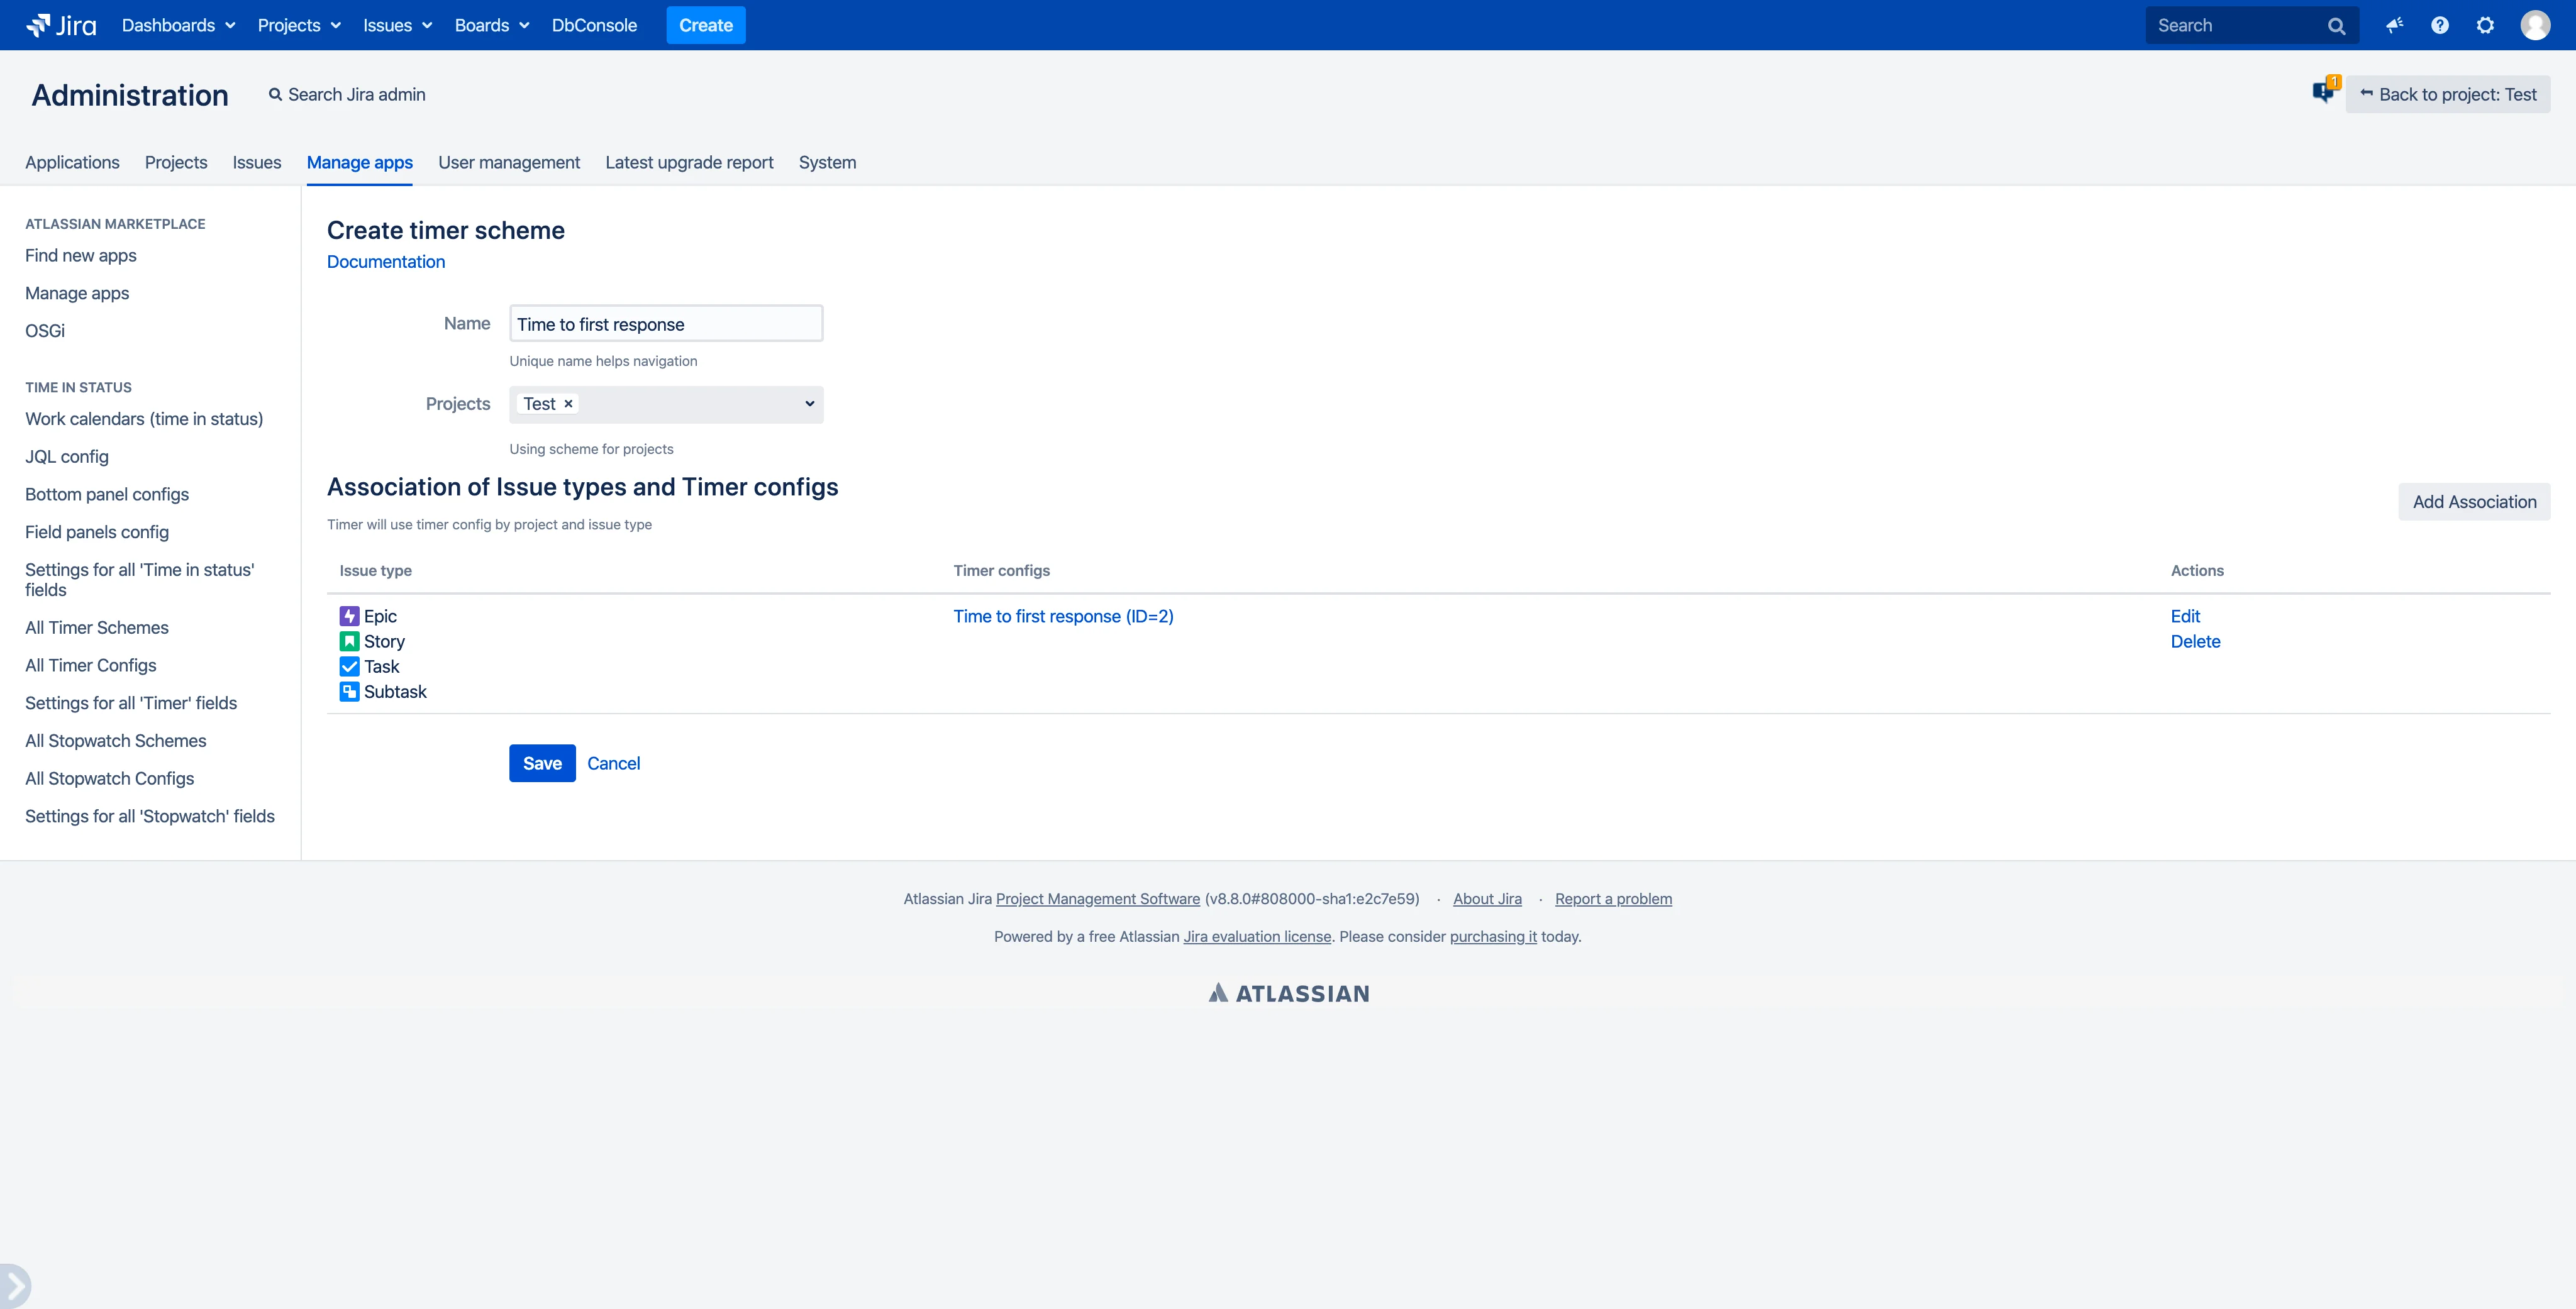
After save:
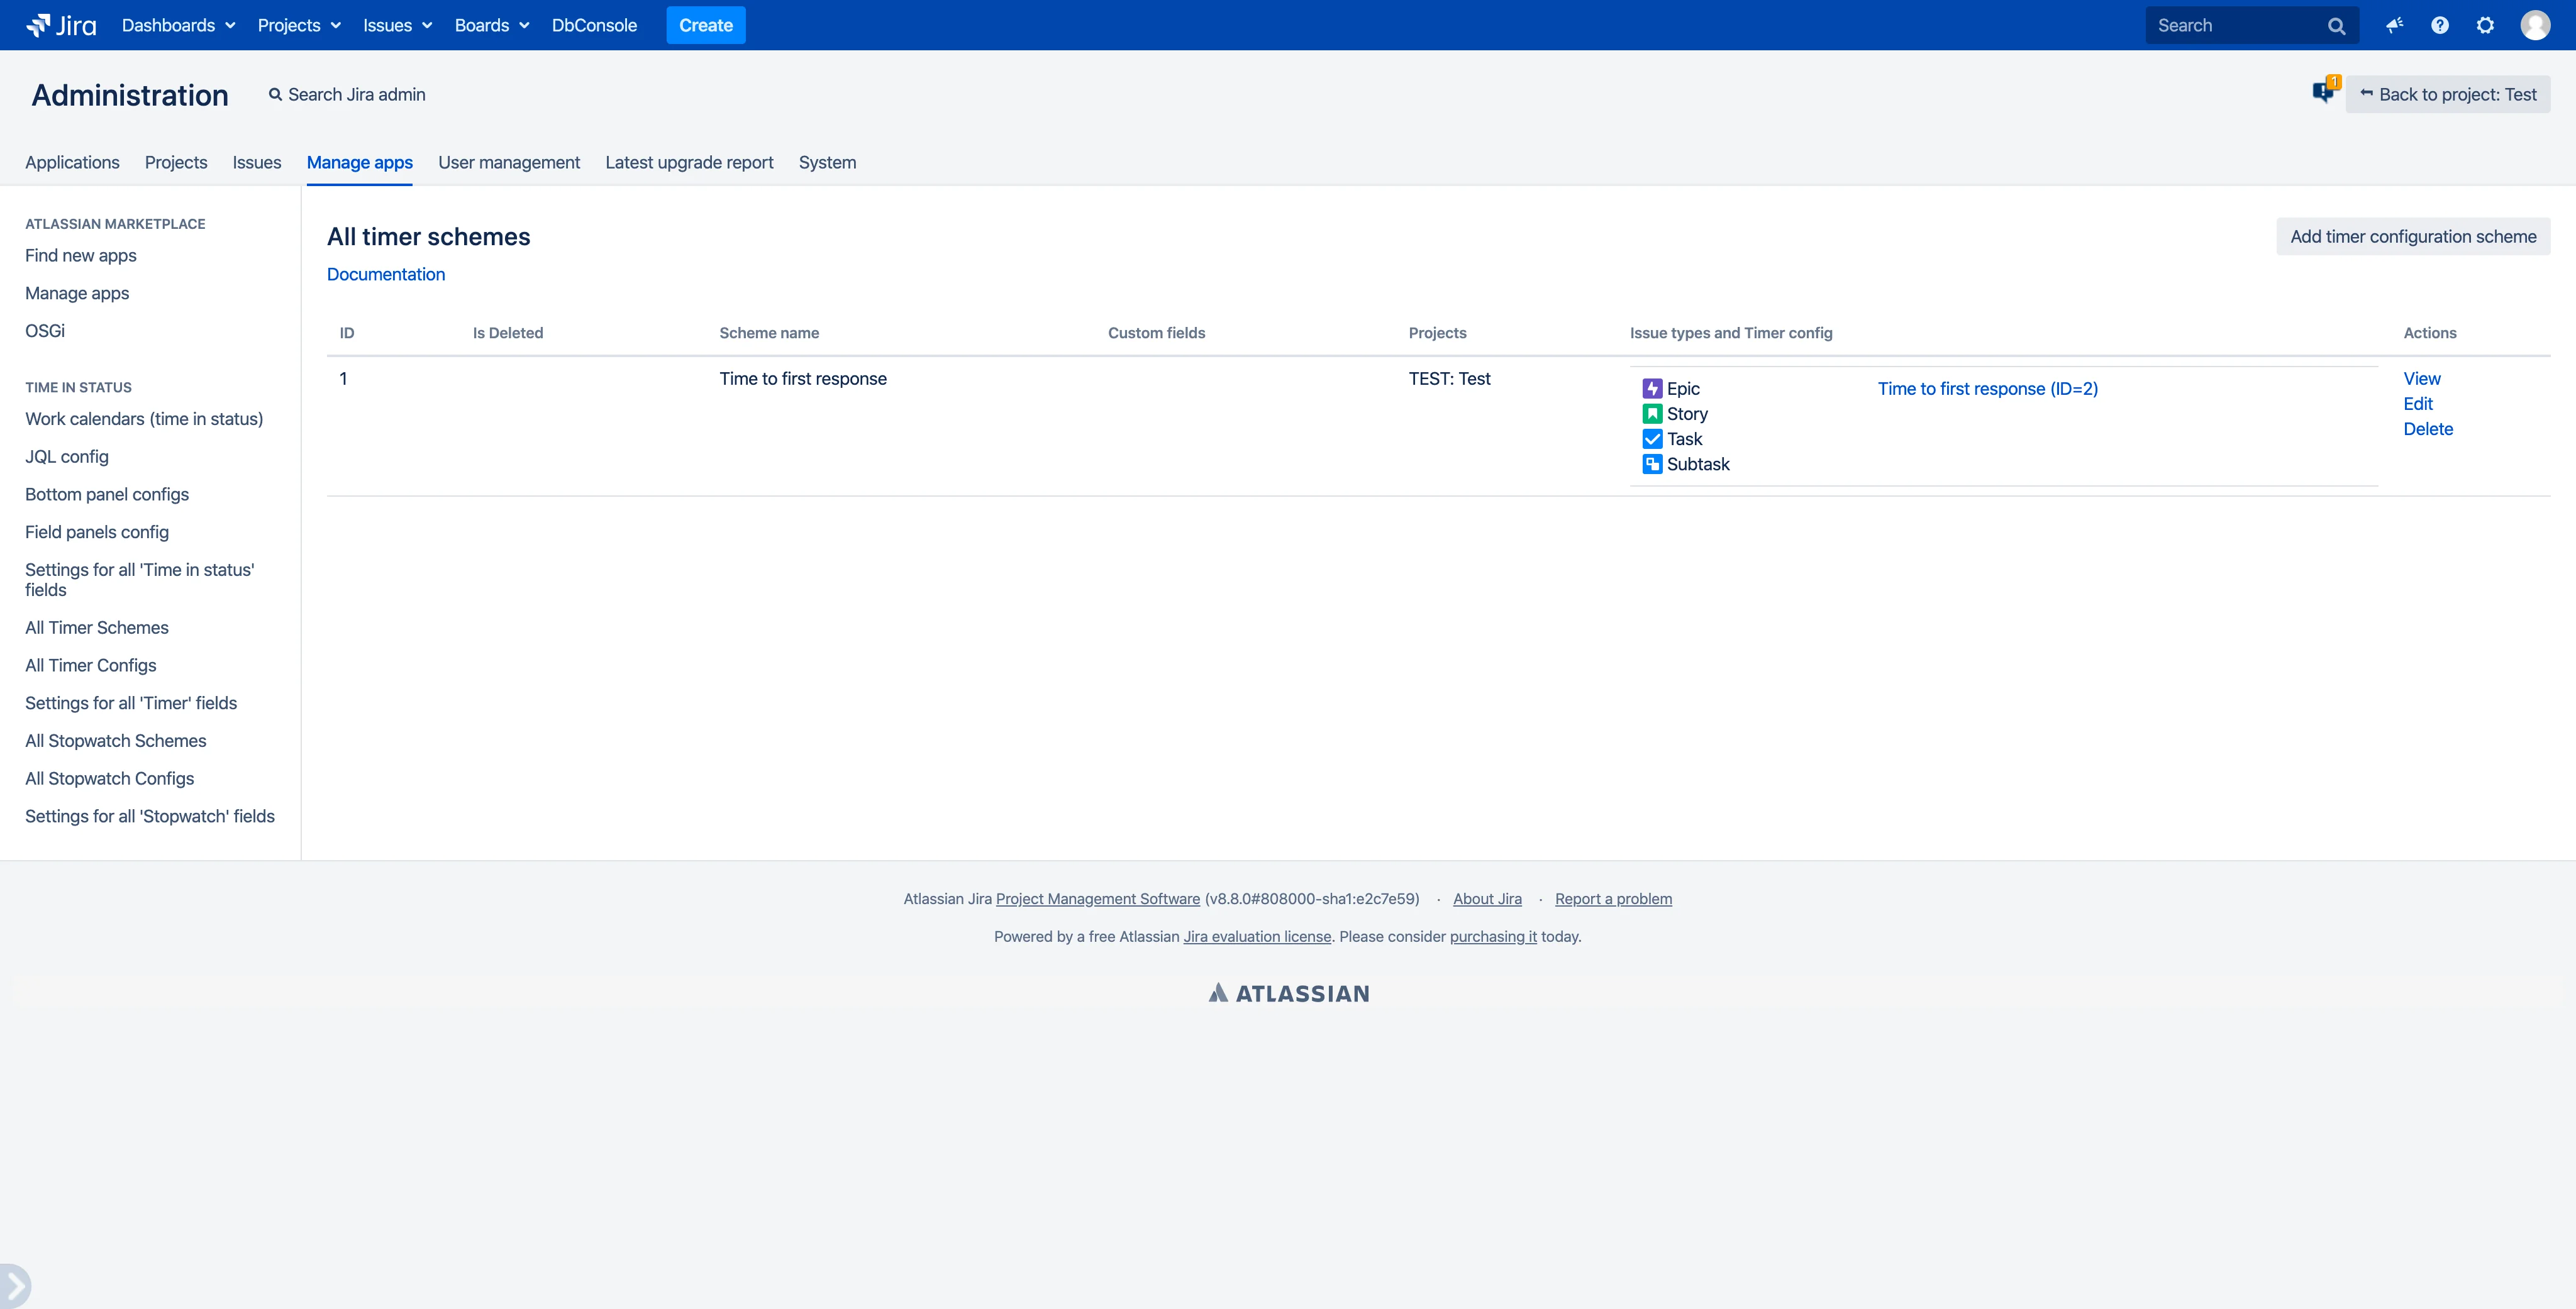
9. Configure timer scheme for “Time to resolution” (see p8)
In our case, the schemes differ only in name and selected timer config(Time to resolution)
After save:
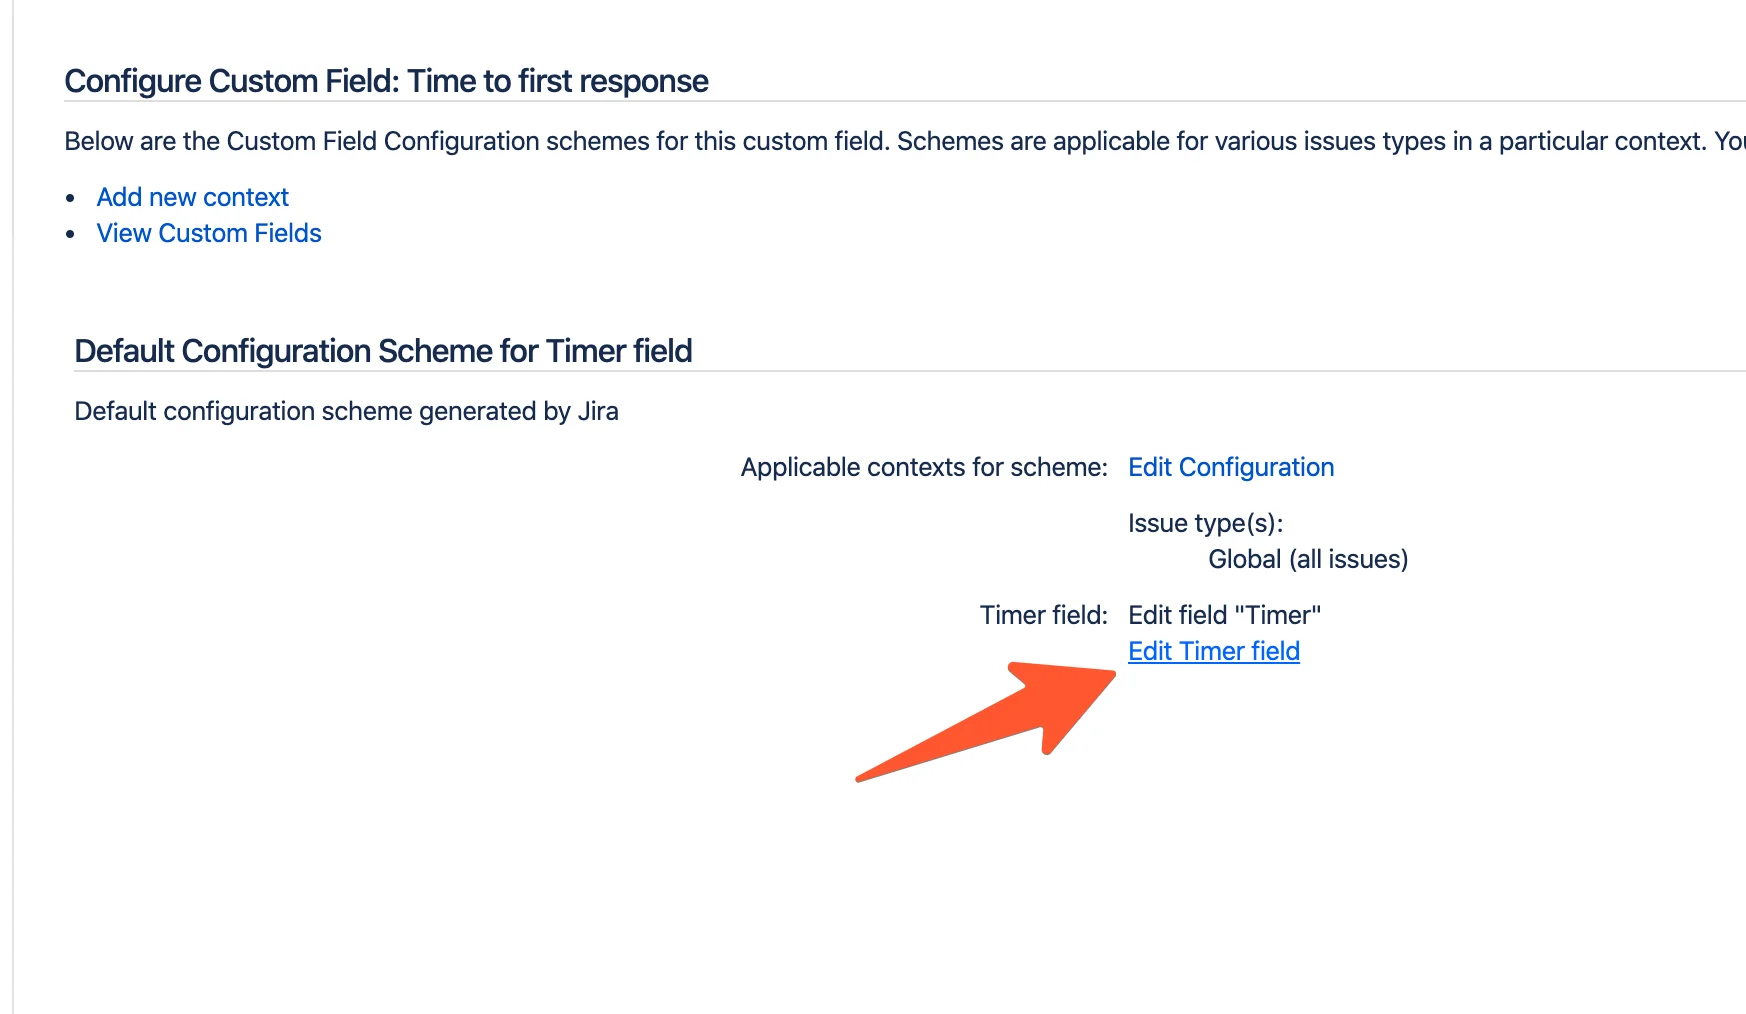
10. Field settings for “Time to first response”
Now we need to configure the fields and connect the created schemes to them.
Create timer field
Timers and Stopwatches - Scheme and configurations
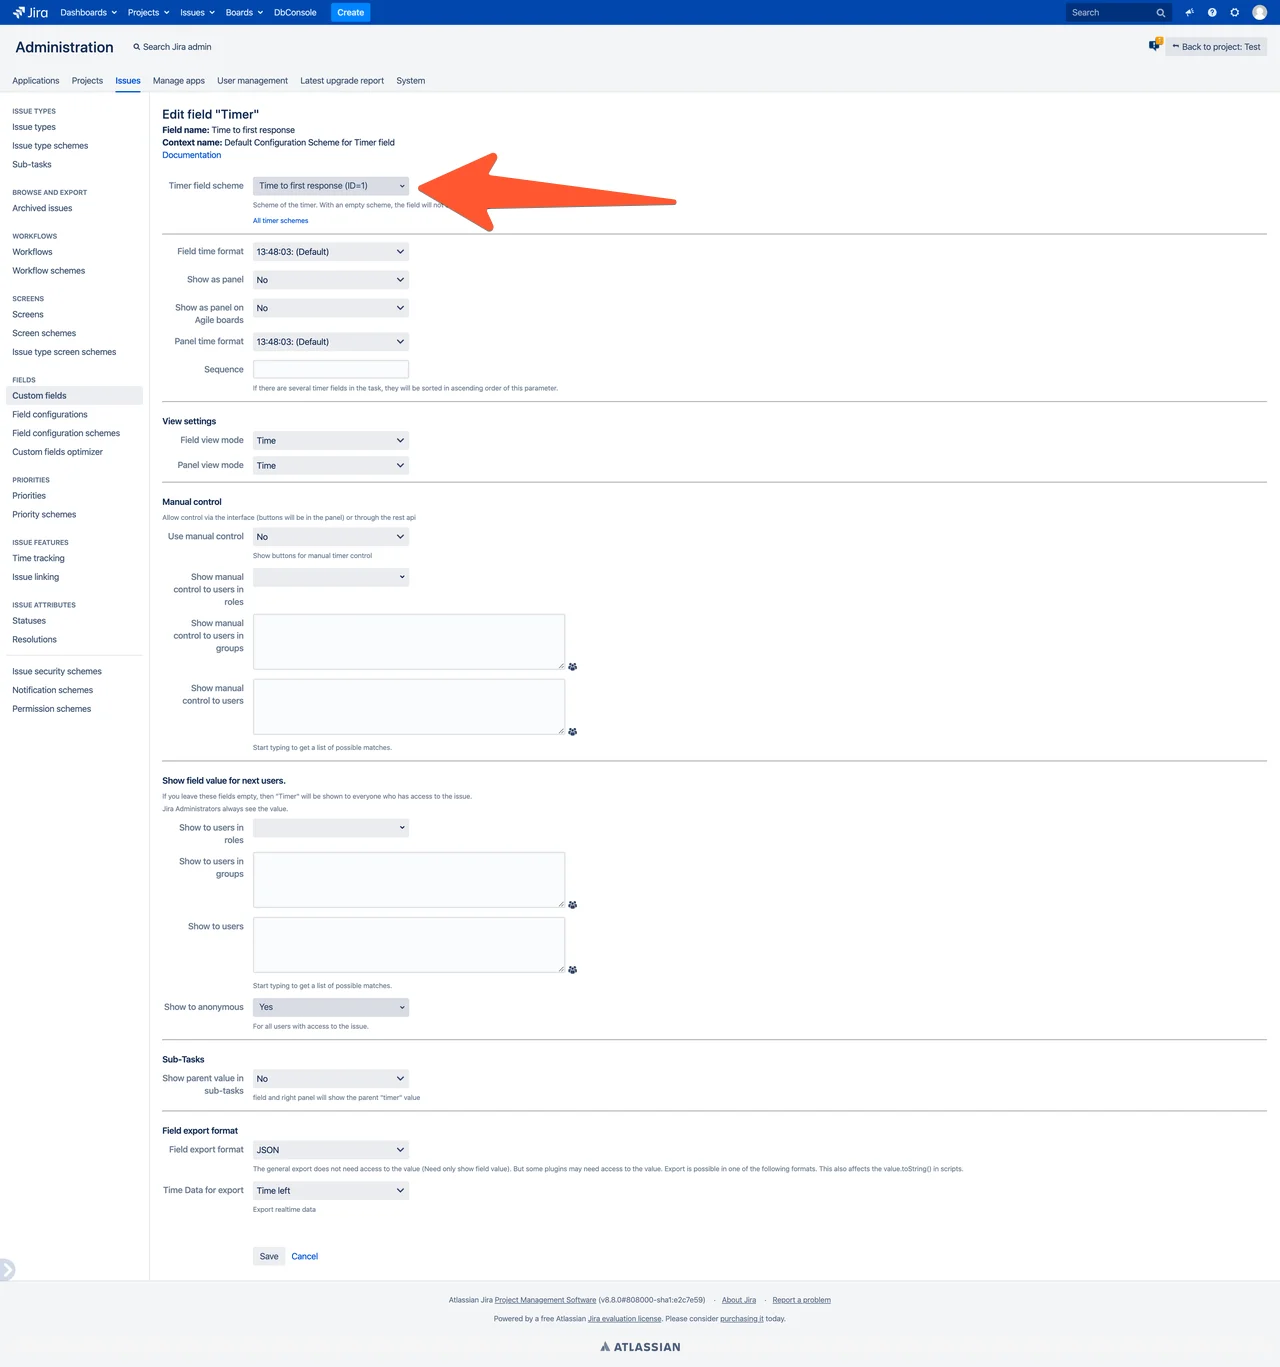
- Open the field settings (see screenshots) for field “Time to first response” (see p1)
- Set timer scheme “Time to first response”
- Other settings can be set by default.
- click “Save”
Timer field Click configure:

Open timer field settings:
Set timer scheme:
Test
11. Field settings for “Time to resolution”
(see p10) All the same, just select the scheme “Time to resolution”

12. At this step, the basic setup is complete. You can test how everything works.
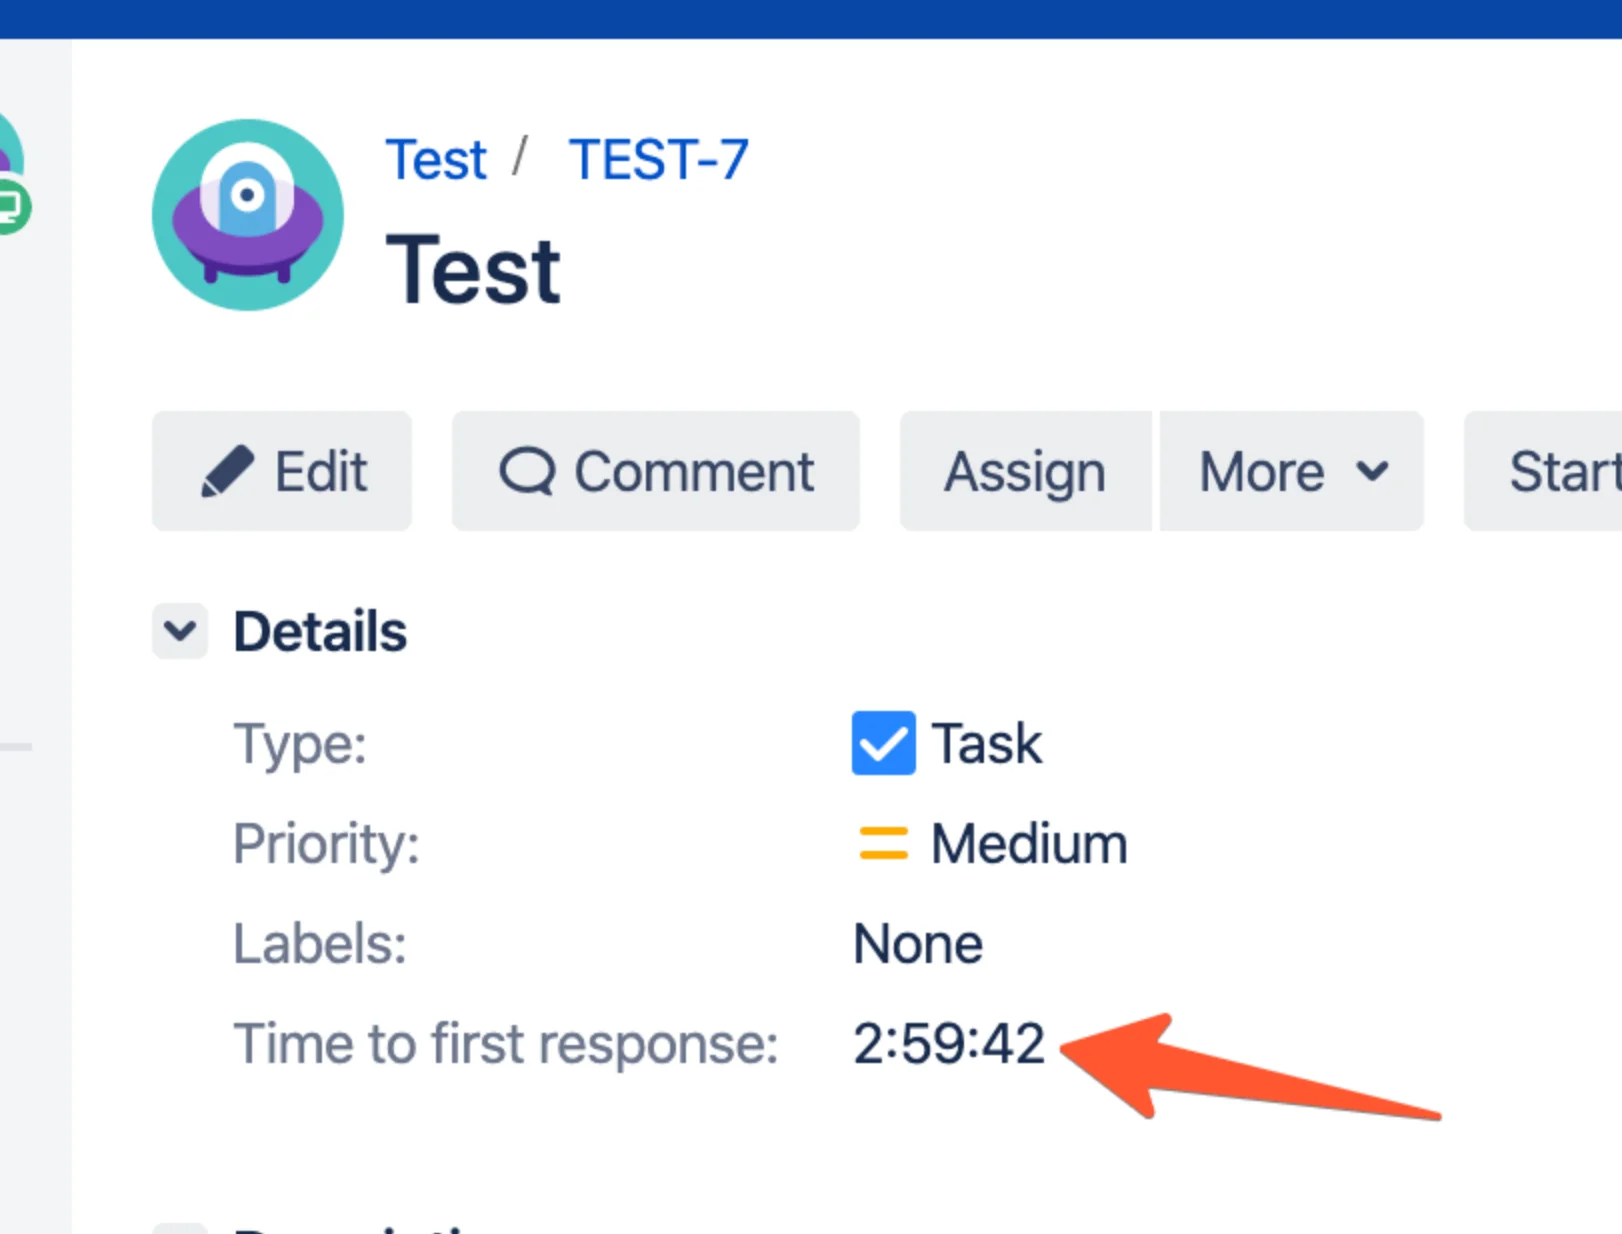
- Create issue
- The time report for the first answer began.
After create new issue:
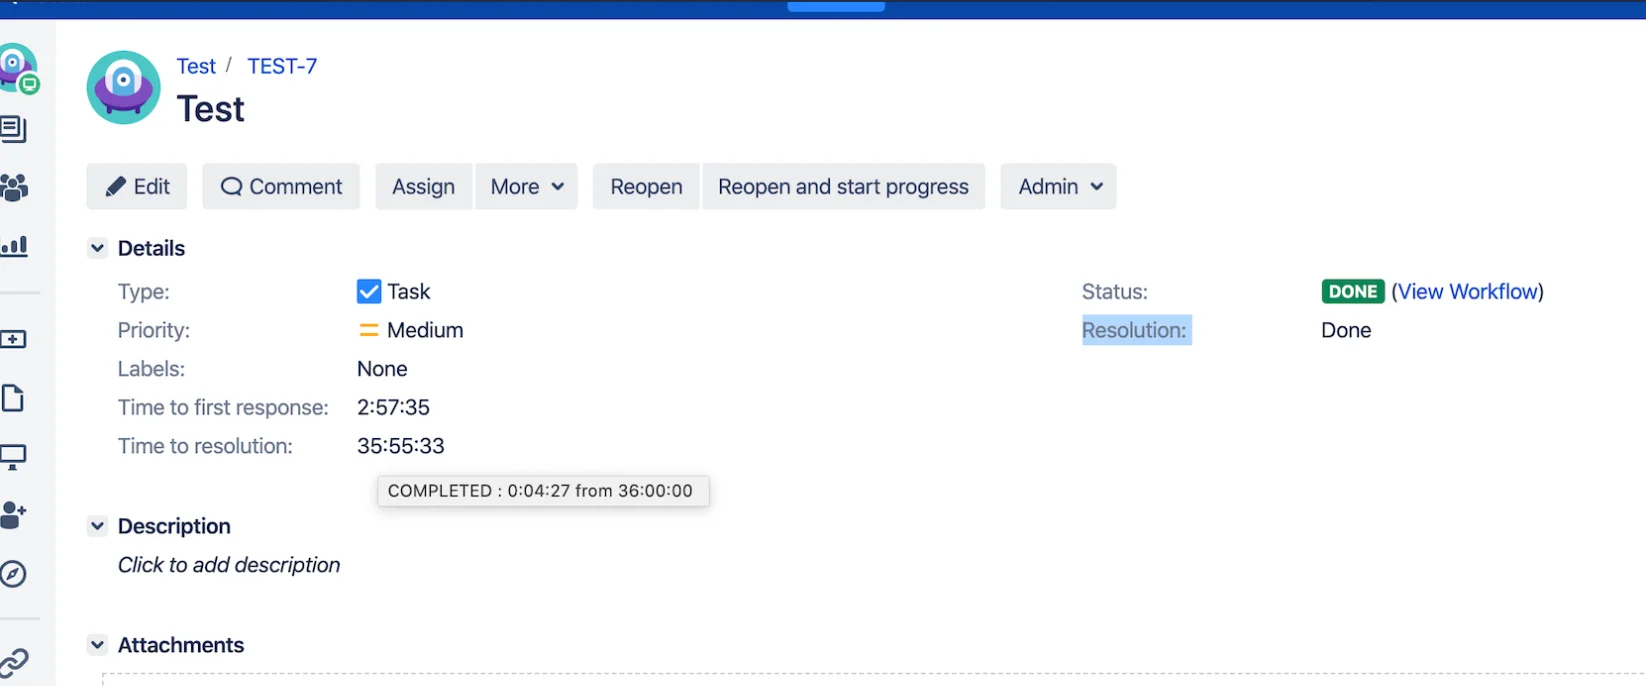
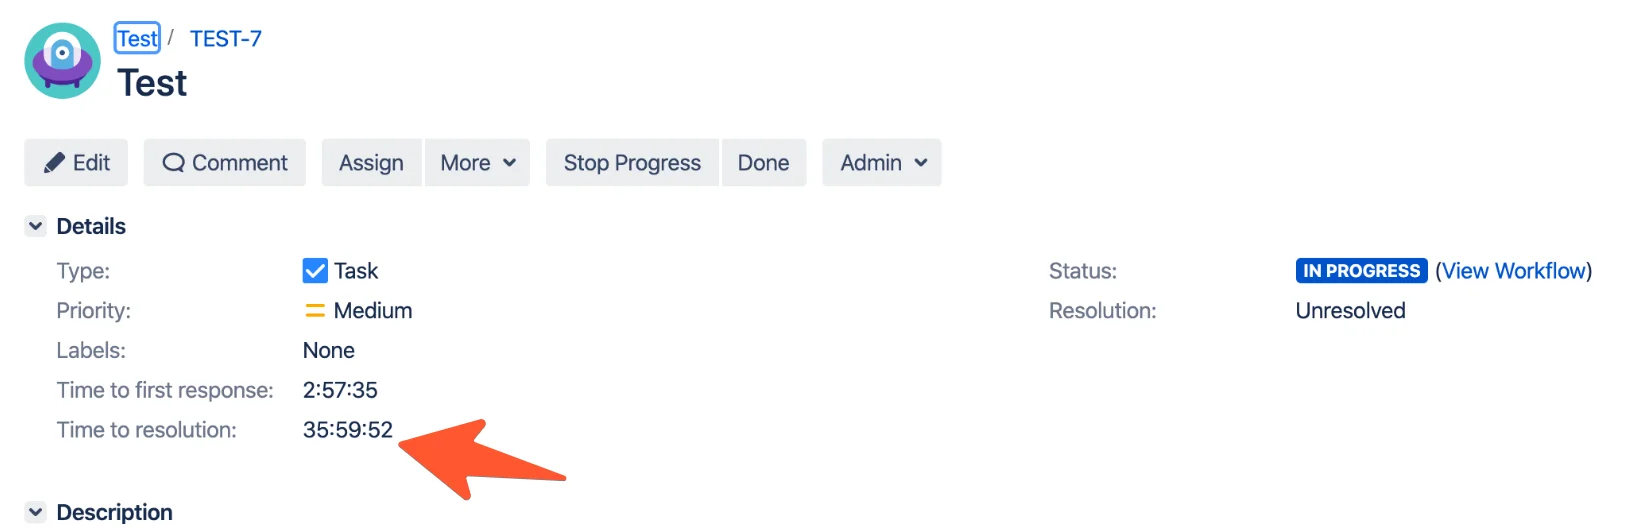
13. Set status in progress
- Time to first response - The timer has stopped.
- In the current settings of the field, only time is displayed. The status of the timer can be displayed by hovering the mouse over the time.
- Time to resolution - The timer has started.
14. Set status close or set resolution
Time to resolution - The timer has stopped.