 Time in status | SLA | Timer | Stopwatch
Configuring the export format
In the settings of the Time in status field(Timer and Stopwatch), there is “Field export format“. It configures the data format for export to various systems including eazyBI. The example will use the standard settings.
- Field export format: JSON
- Export empty value: No

The time and state of the counter are simultaneously uploaded in JSON format. Other formats are easier to configure.
Creating new fields in eazyBI.
The eazyBI app doesn’t always see fields from third-party plugins. To solve this problem, they have special tools that allow you to manually configure additional fields.
As an administrator go to Settings (1) and open the Advanced settings(2) section.
Here you can specify the configuration of new fields.
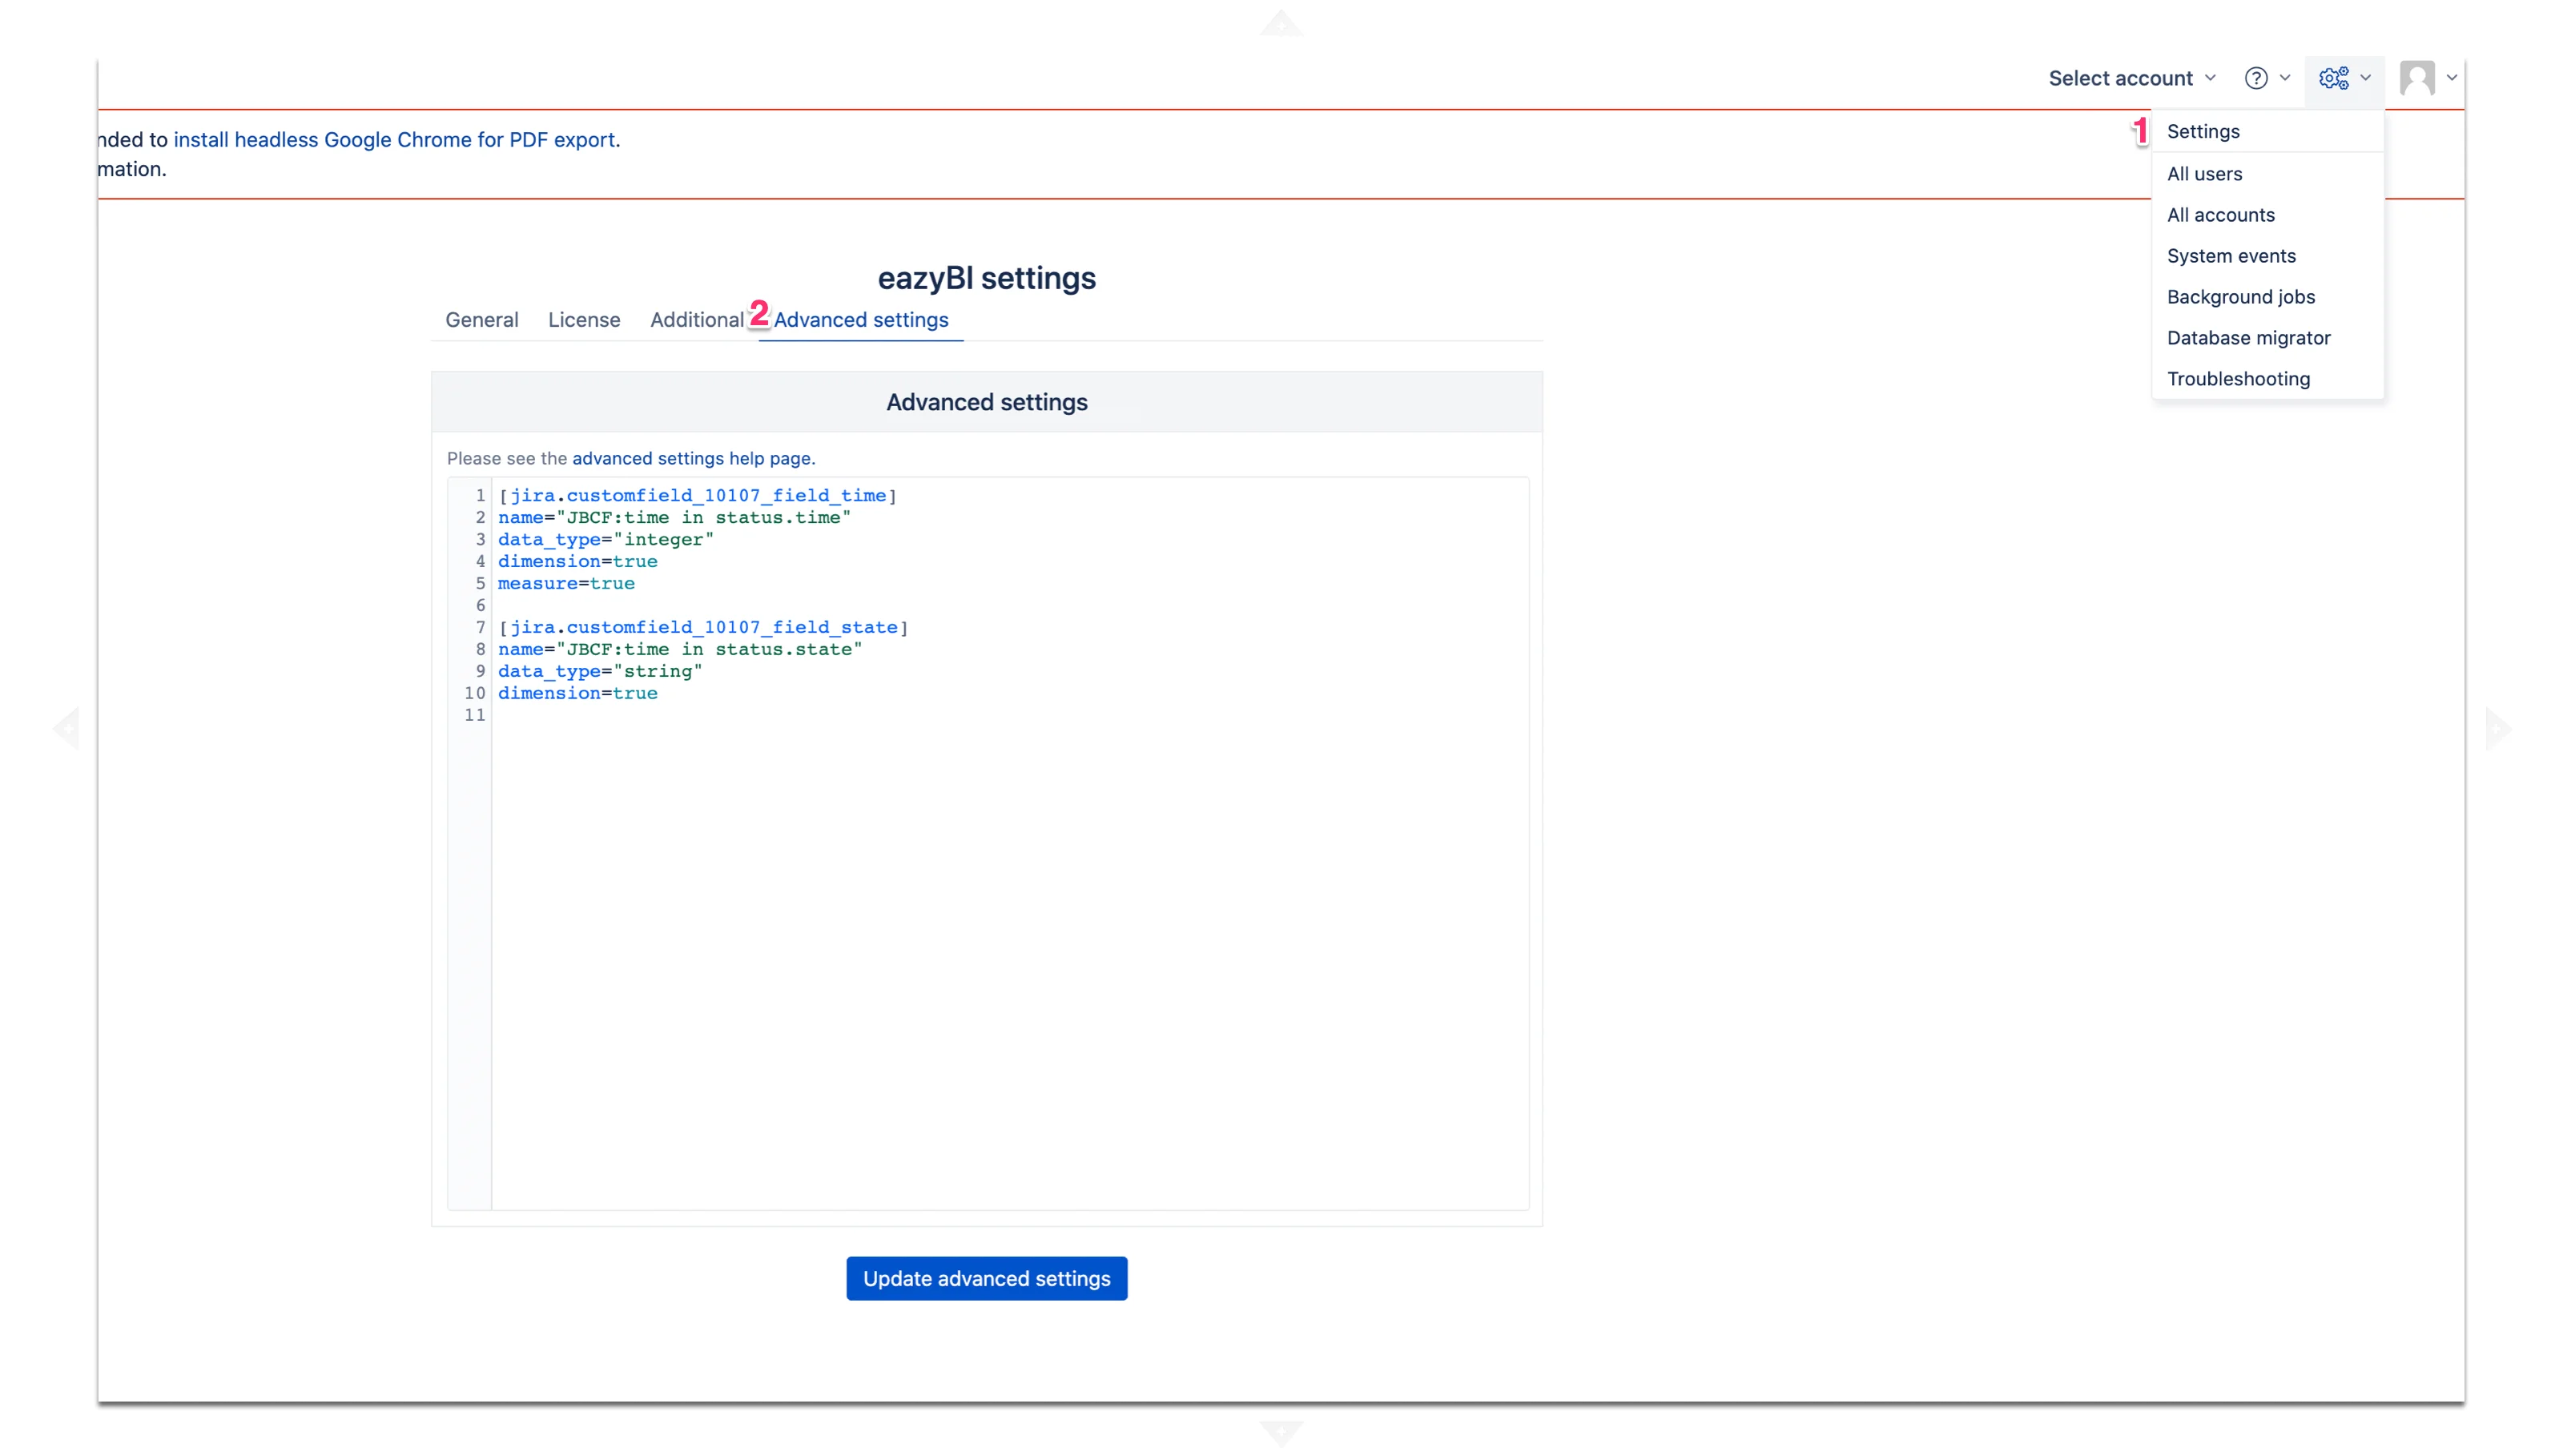
The example creates two fields. One for the time and the second for the counter state.
- In square brackets, replace the field ID(10107) in the id code of your Time in status field.
-
Name - you can name these new fields as you like. Under these names, the fields will be available in eazyBI reports.
 [jira.customfield_10107_field_time]
 name="JBCF:time in status.time"
 data_type="integer"
 dimension=true
 measure=true


 [jira.customfield_10107_field_state]
 name="JBCF:time in status.state"
 data_type="string"
 dimension=true
 measure=true
Save the settings.
Initialize the new fields
Now you can select new Fields in the Custom Fields tab.
Once selected, click import. eazyBI imports data with new fields. (the fields are still empty)
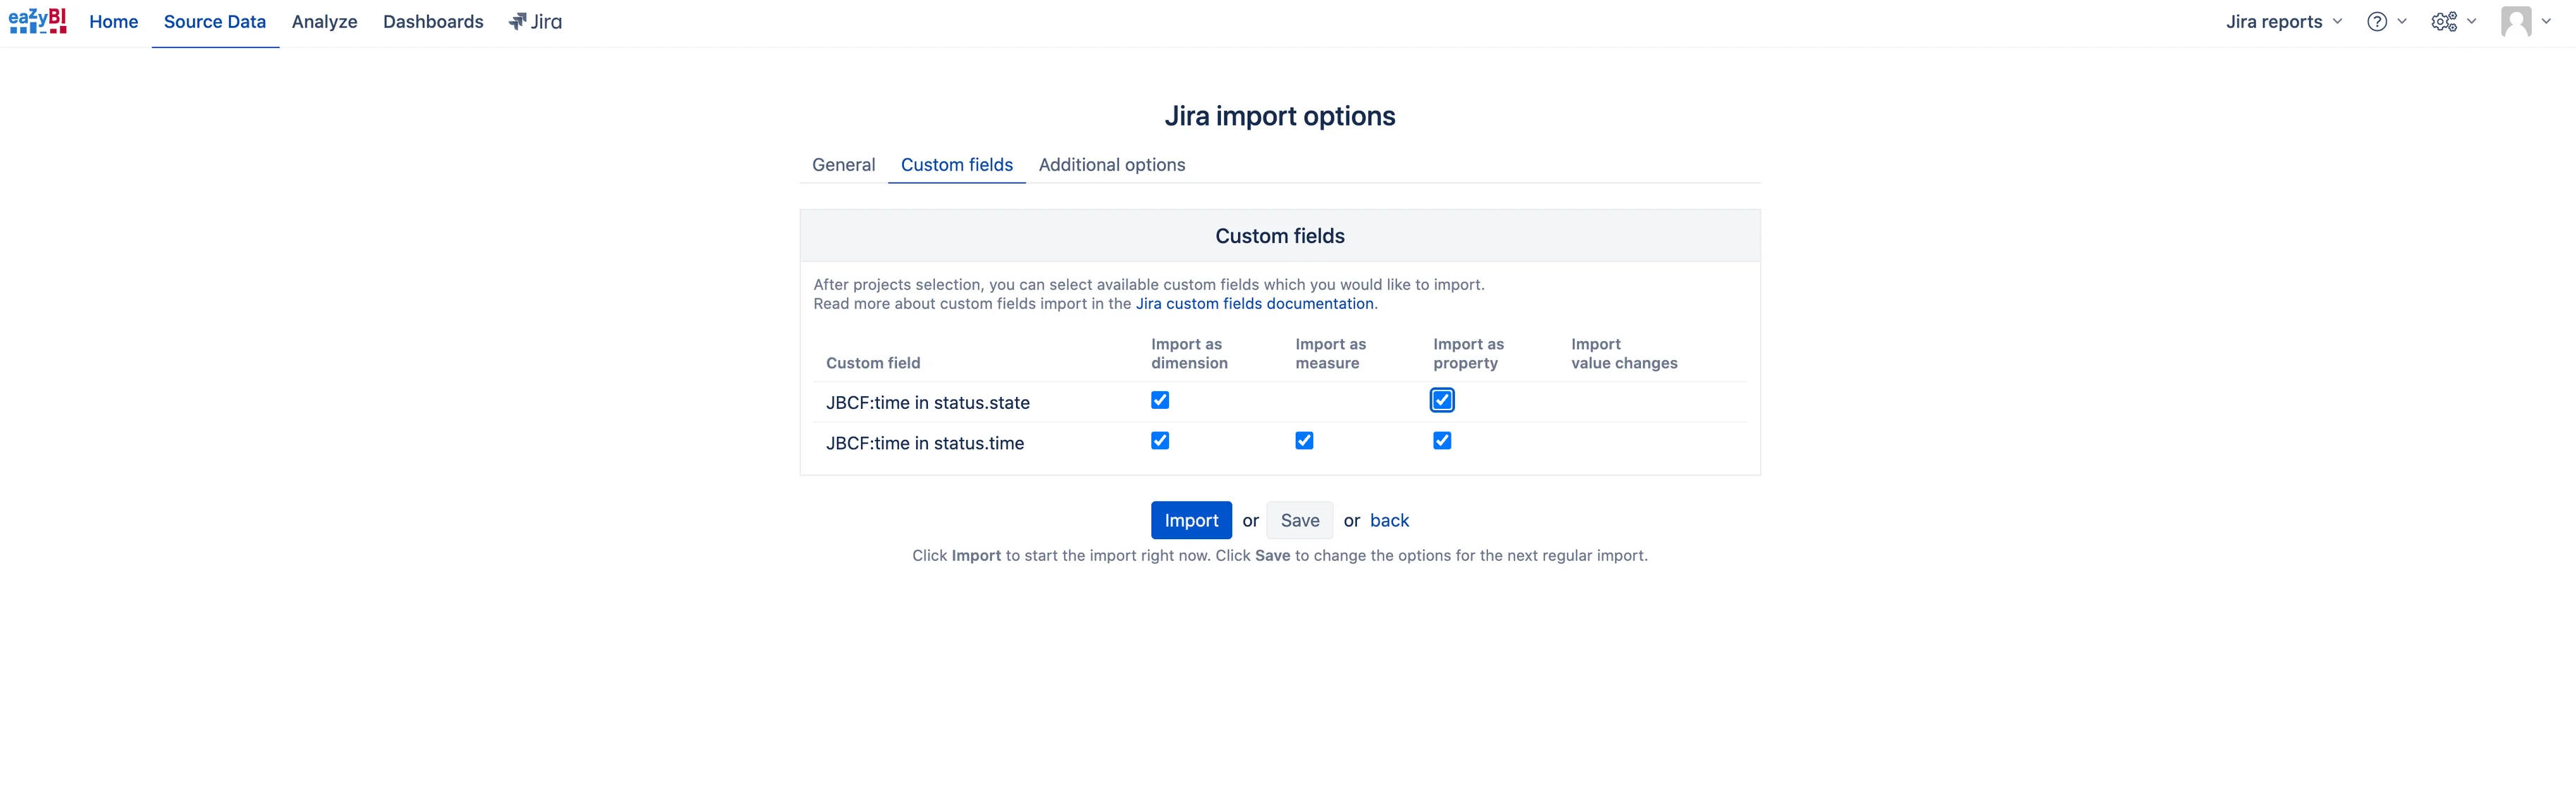
The import must be successful. This means that the fields are configured correctly.

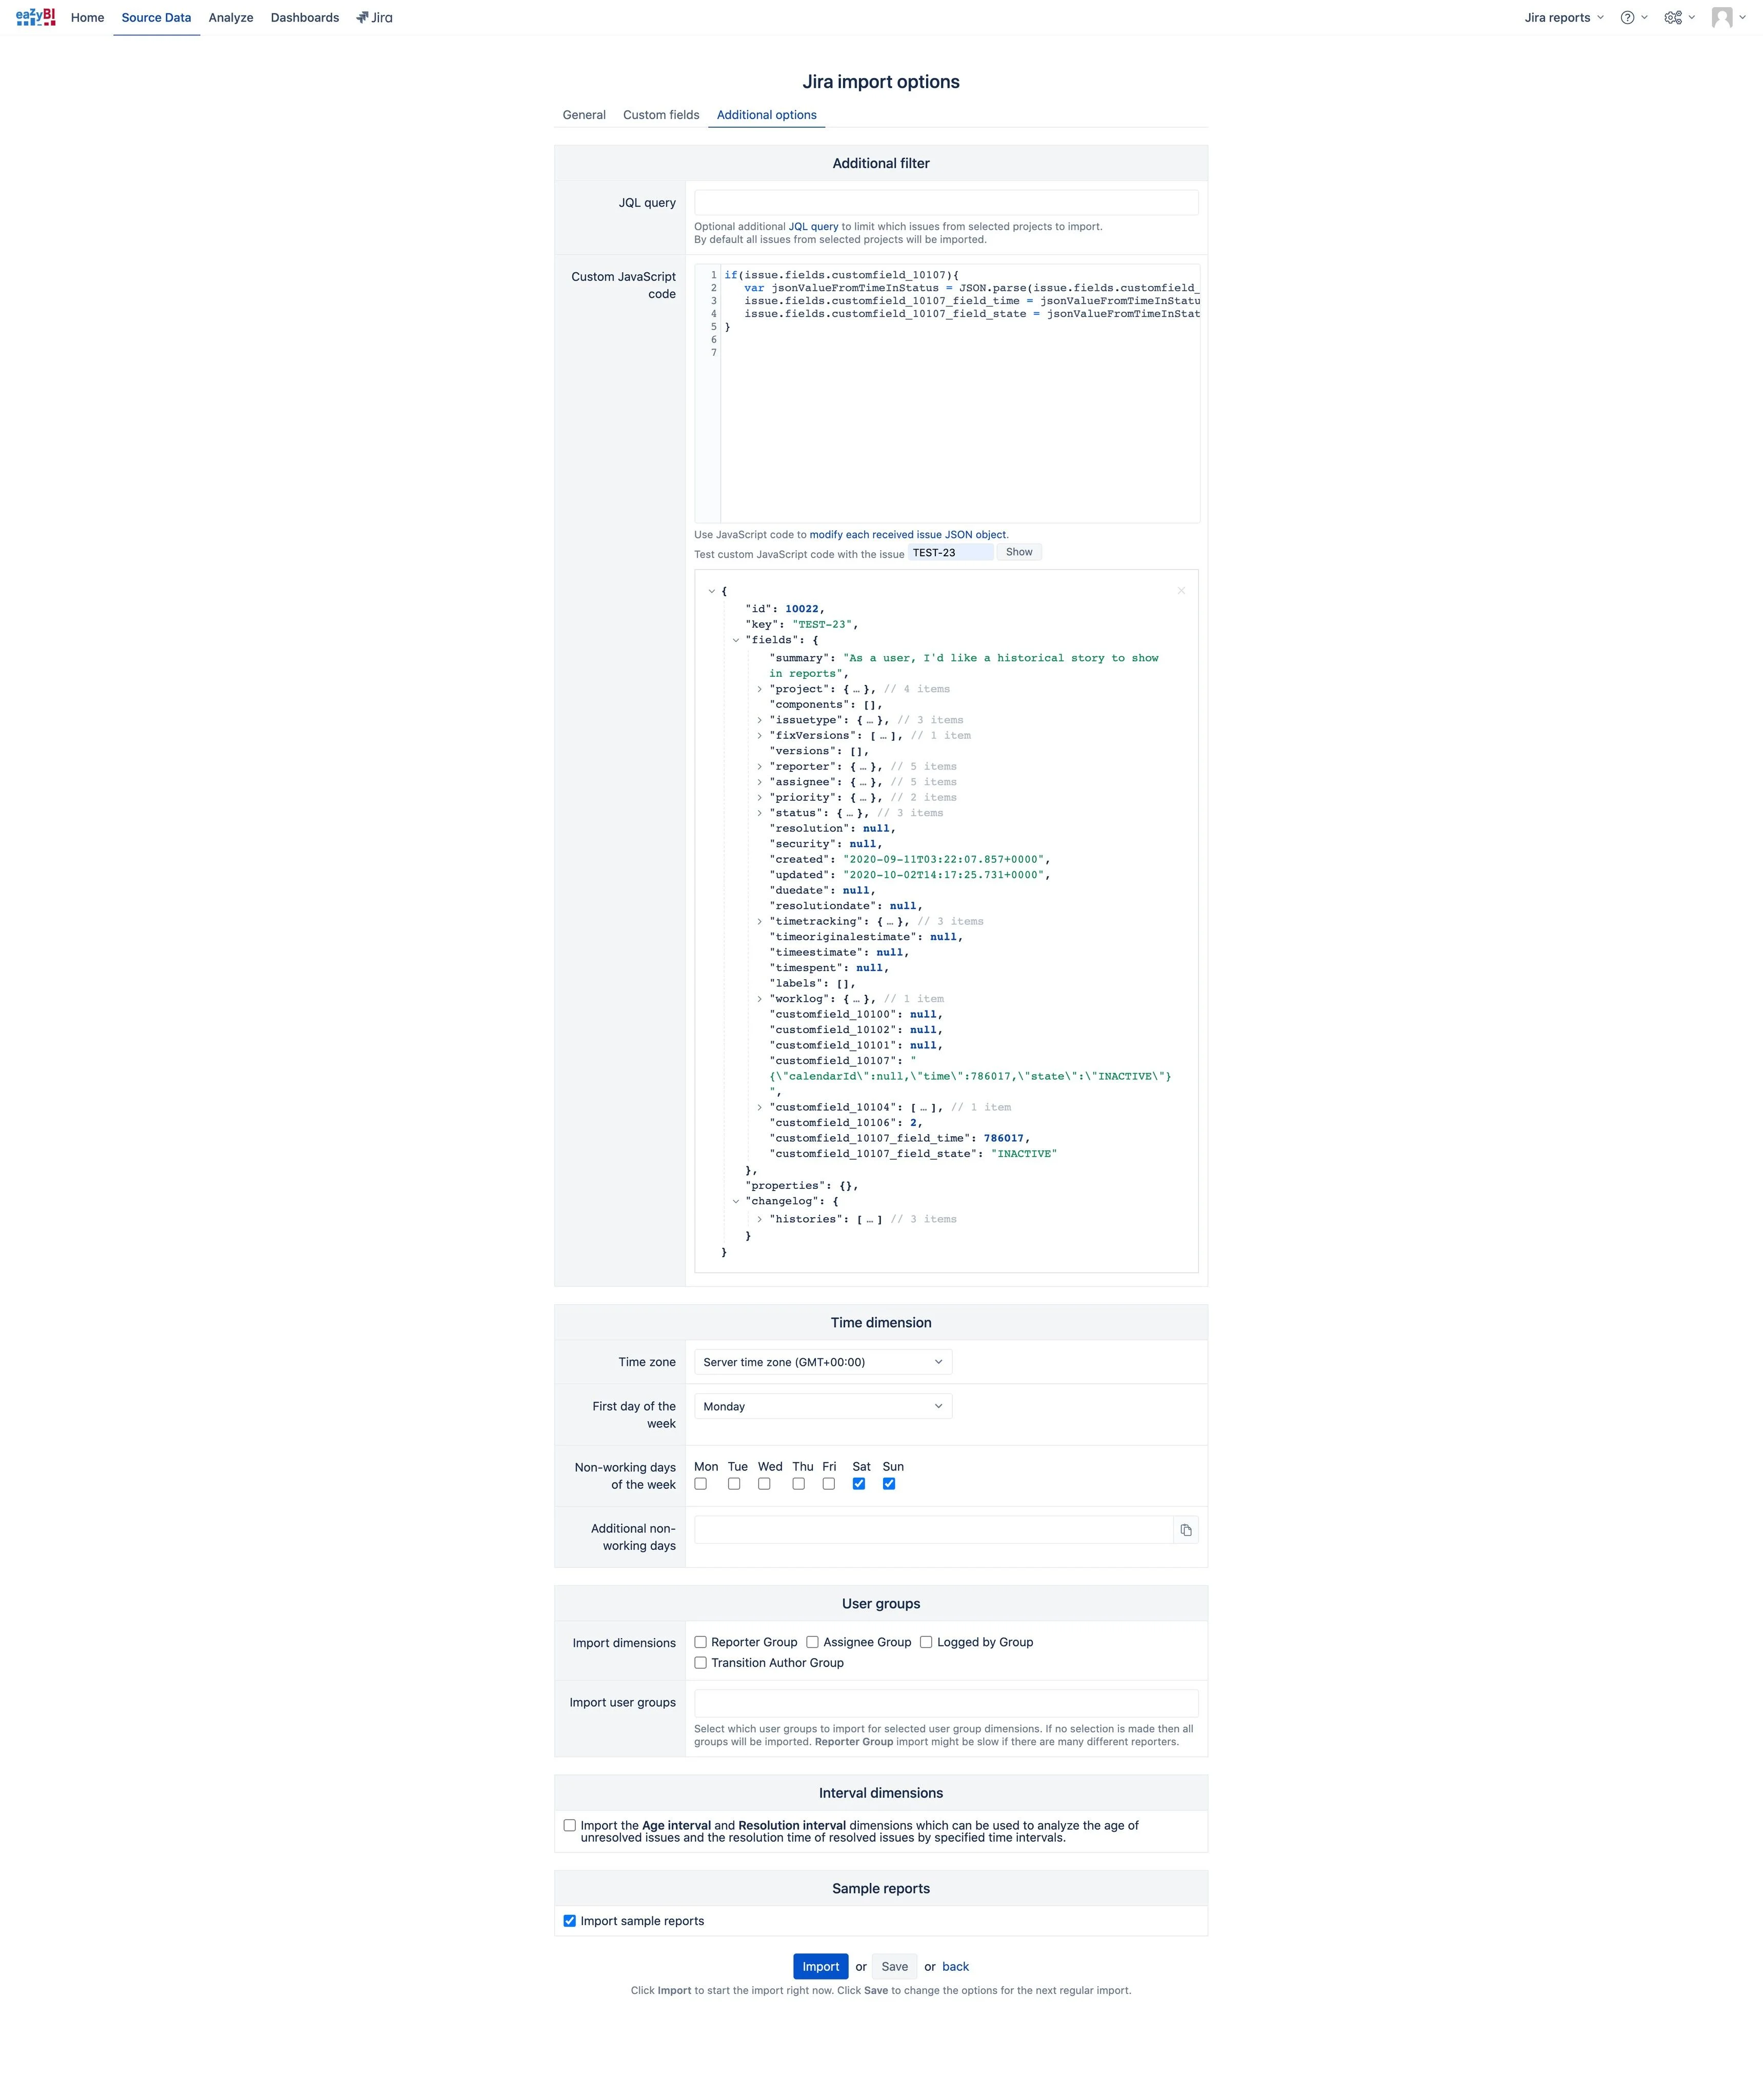
Now open the report settings again and go to the Additional options tab. Add the following code to initialize the new fields. This code is only suitable when the field settings specify export in JSON format(1 step).
if(issue.fields.customfield_10107){
    var jsonValueFromTimeInStatus = JSON.parse(issue.fields.customfield_10107)
    issue.fields.customfield_10107_field_time = jsonValueFromTimeInStatus.time
    issue.fields.customfield_10107_field_state = jsonValueFromTimeInStatus.state
}
You can specify the task key for testing below. Your new fields must accept the correct values. In the same code, you can change the time format. In JSON format, the time is specified in seconds.
Replace the 3rd line with the next one, then the time will be imported in minutes.
issue.fields.customfield_10107_field_time = jsonValueFromTimeInStatus.time / 60
After setting up field initialization, import the data again so that the system loads the data into the new fields.
Now you can use data from the Time in status fields in reports.


