View app on Atlassian Marketplace
Welcome to Fields panel for Jira Service Management (JSM)!
This is a application that allows you to display any issue fields to customers of the Jira Service Management portal.
For customization, two panels are provided with different placement on the portal(view request screen).
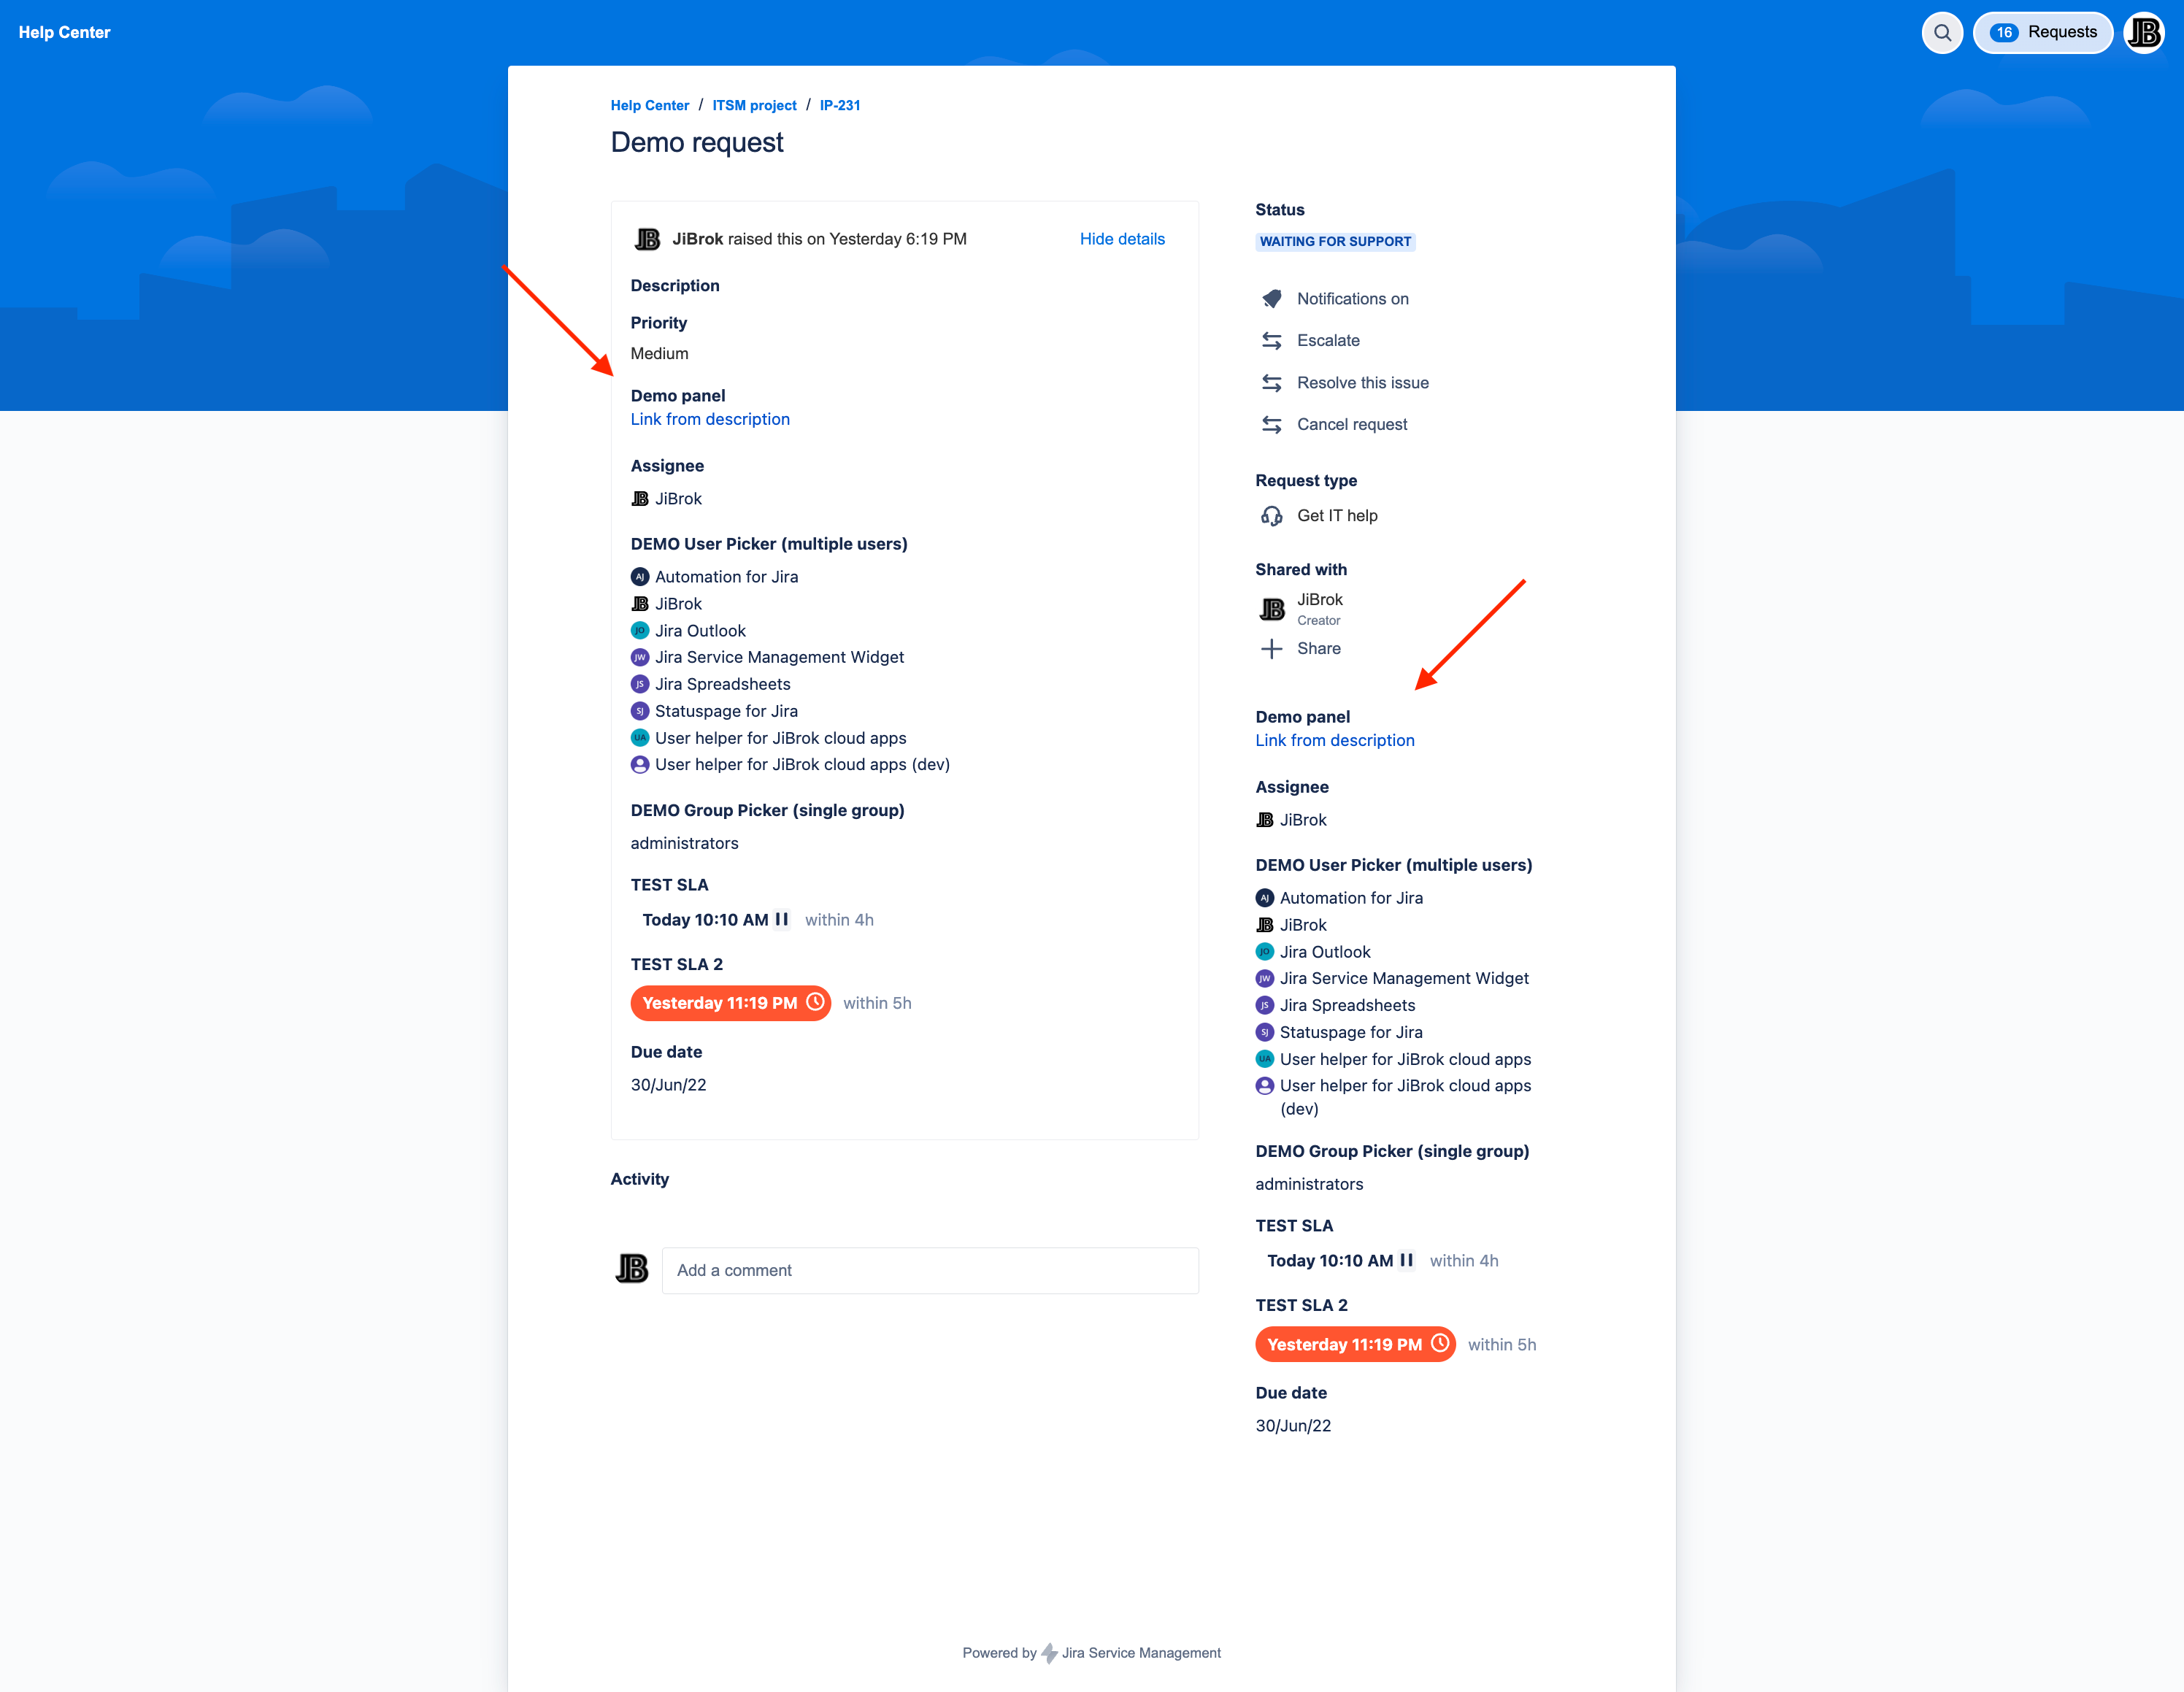
On each panel, you can display any number of fields and optionally the name and description of the panel. Description can contain plain or HTML text. This allows you to use the panels, including for displaying messages on the portal.
Panels only shown in created requests. They cannot be displayed on the request creation screens.
Panel settings
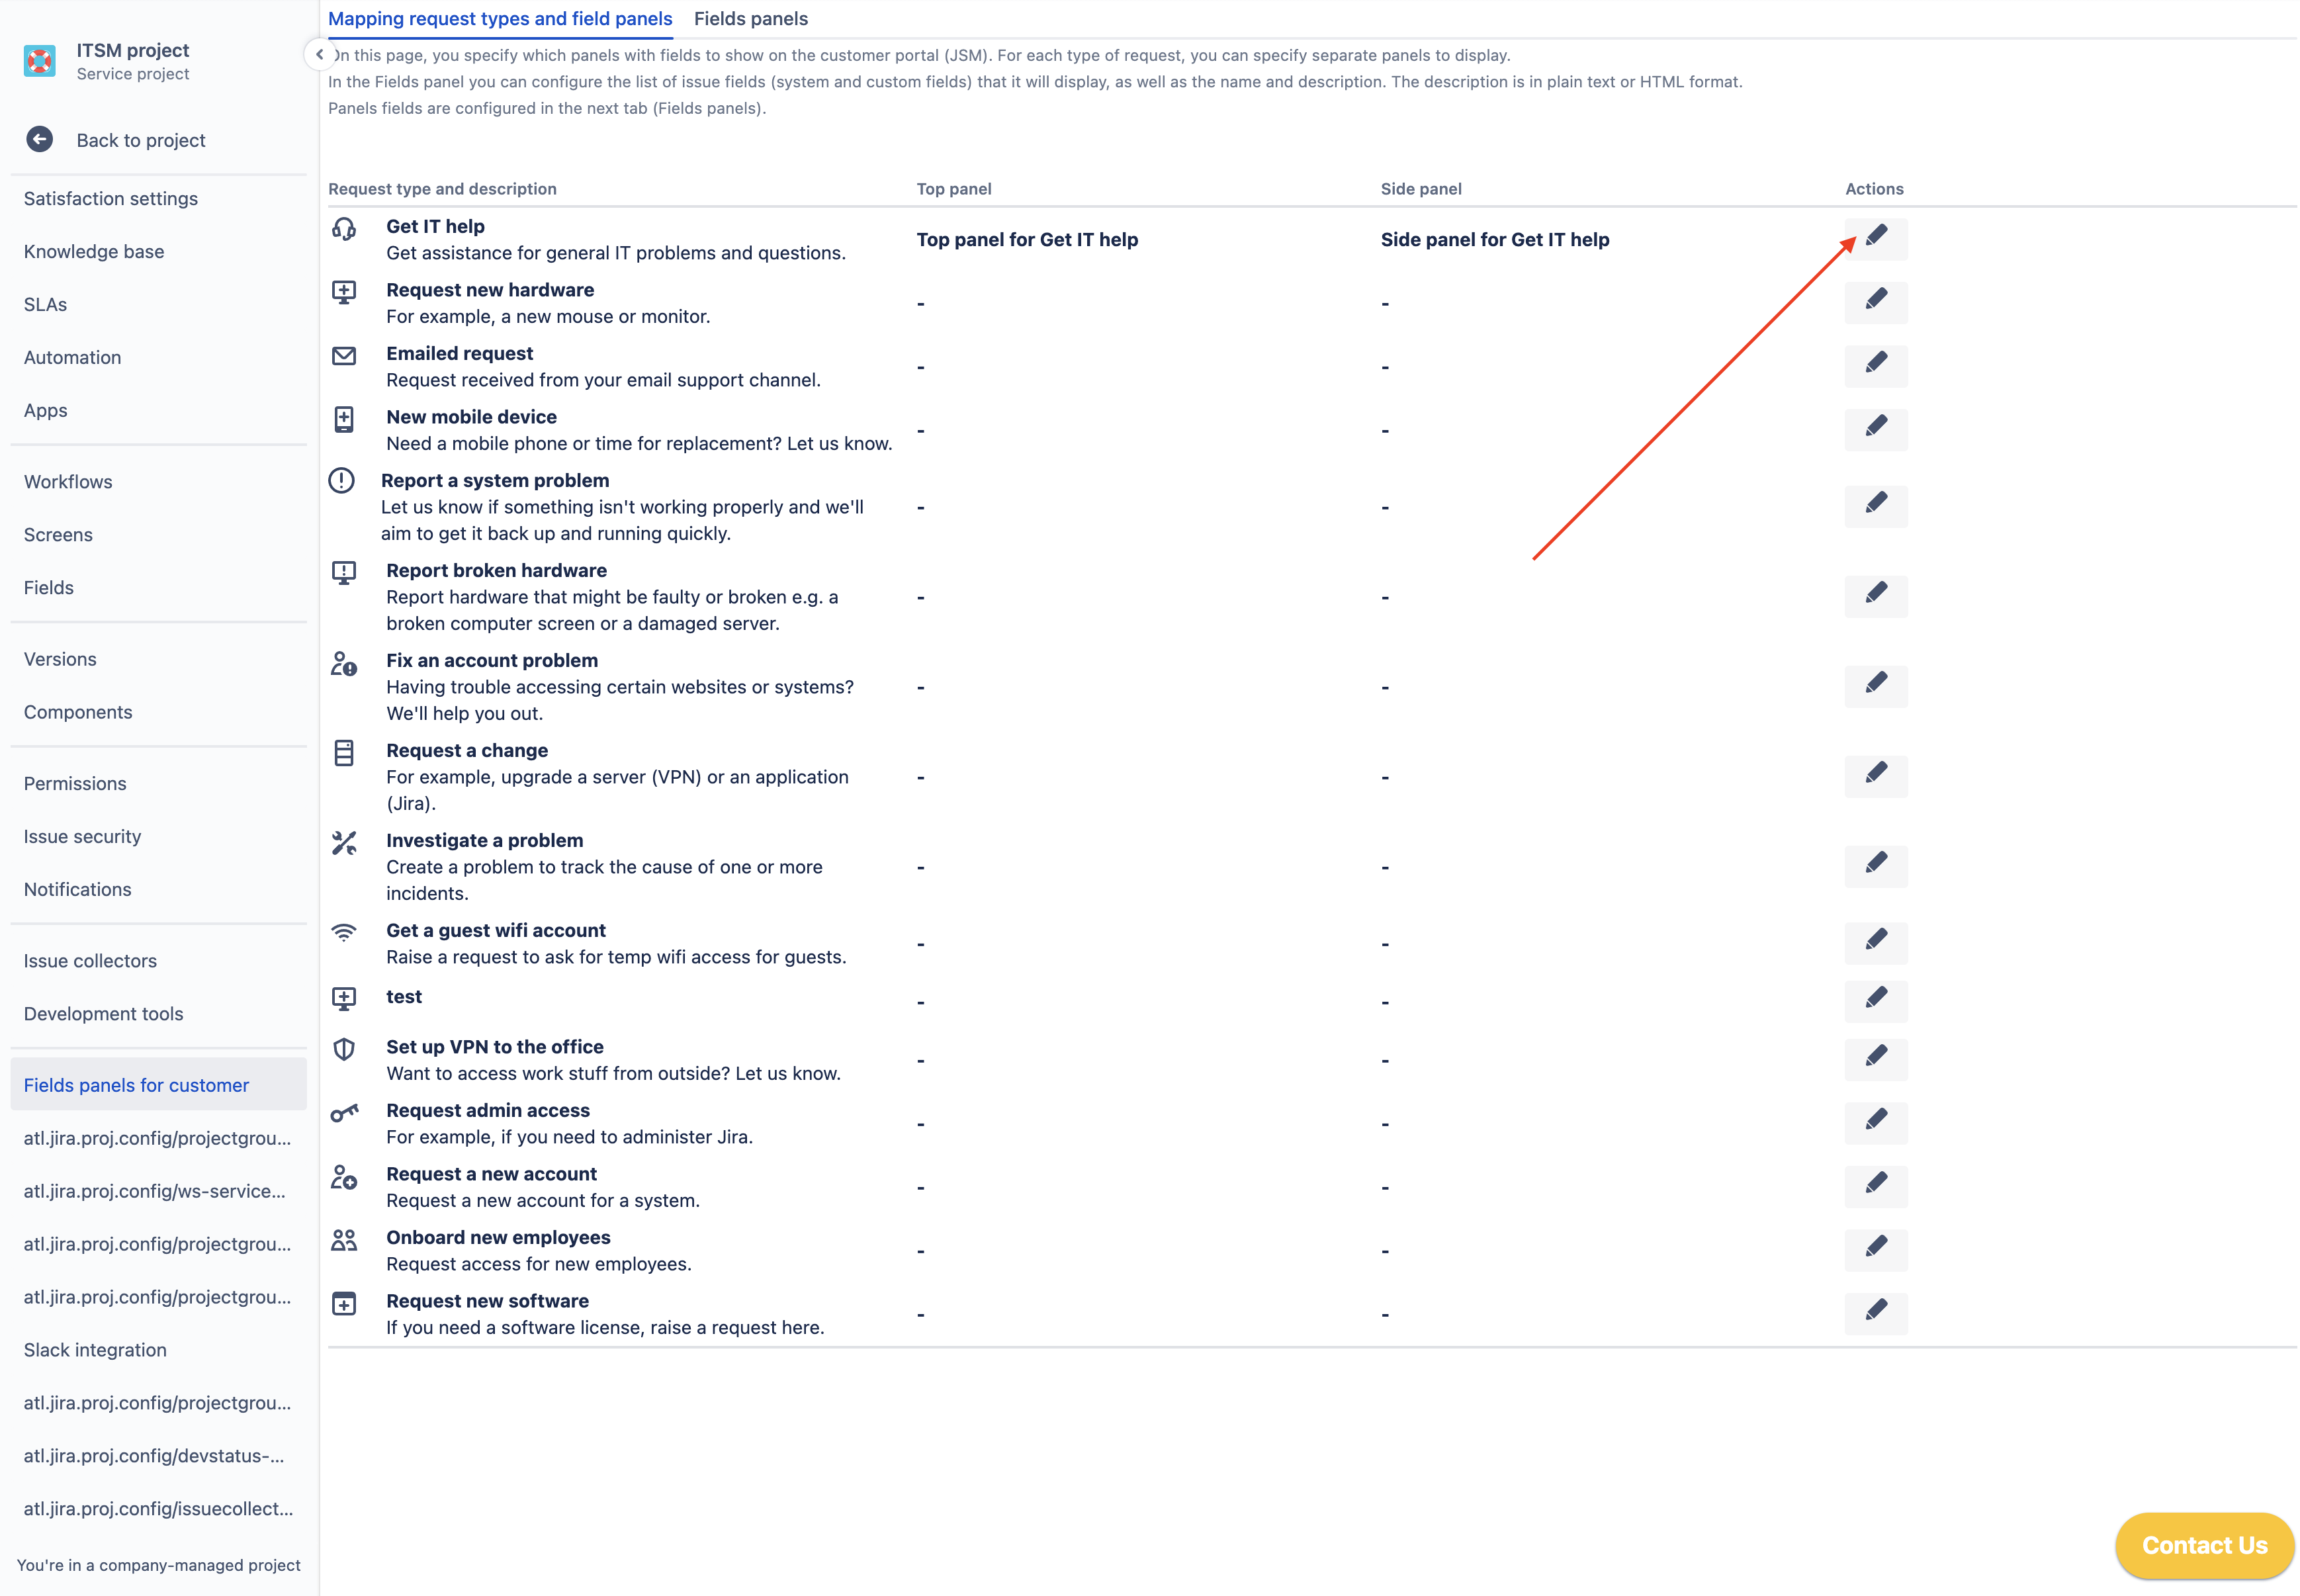
After installing the application, go to the project settings (project type: Service Management) and open the new menu Fields panels for customer:
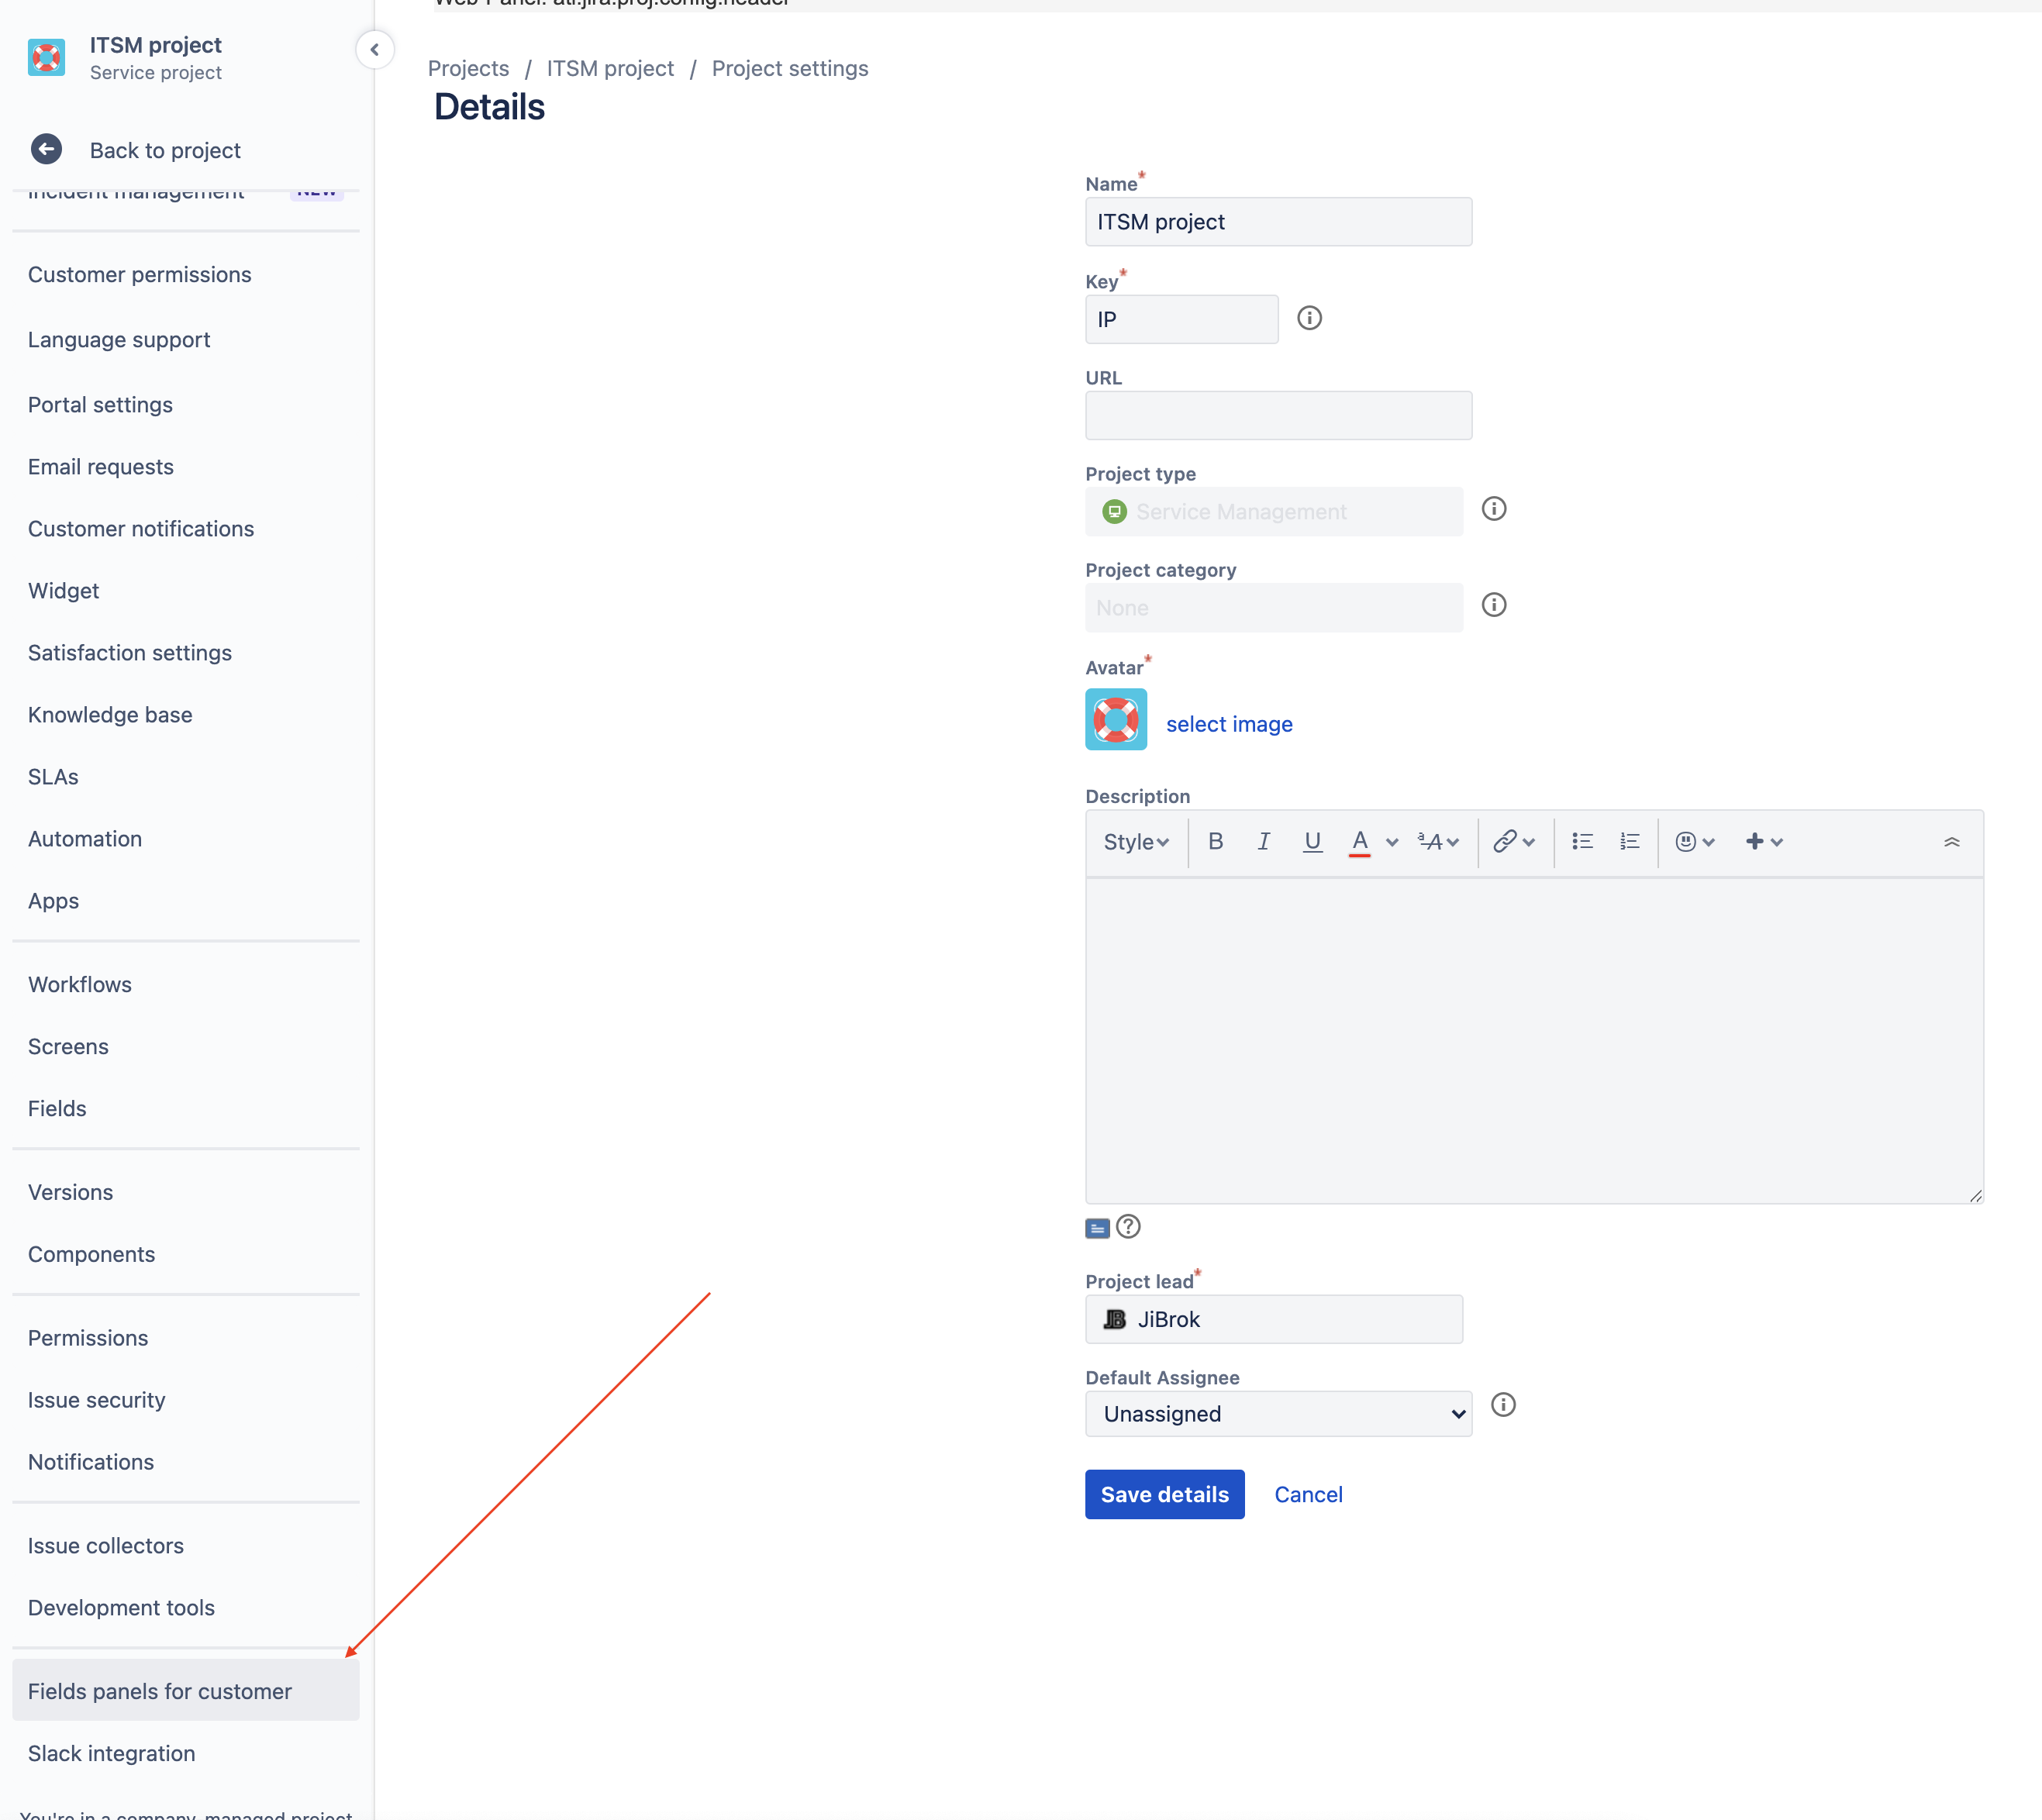
An interface for customizing panels with fields will open. This interface is available to Project Administrator.
The first thing you need to do is create a panel. To do this, open the tab with “Fields panels”.
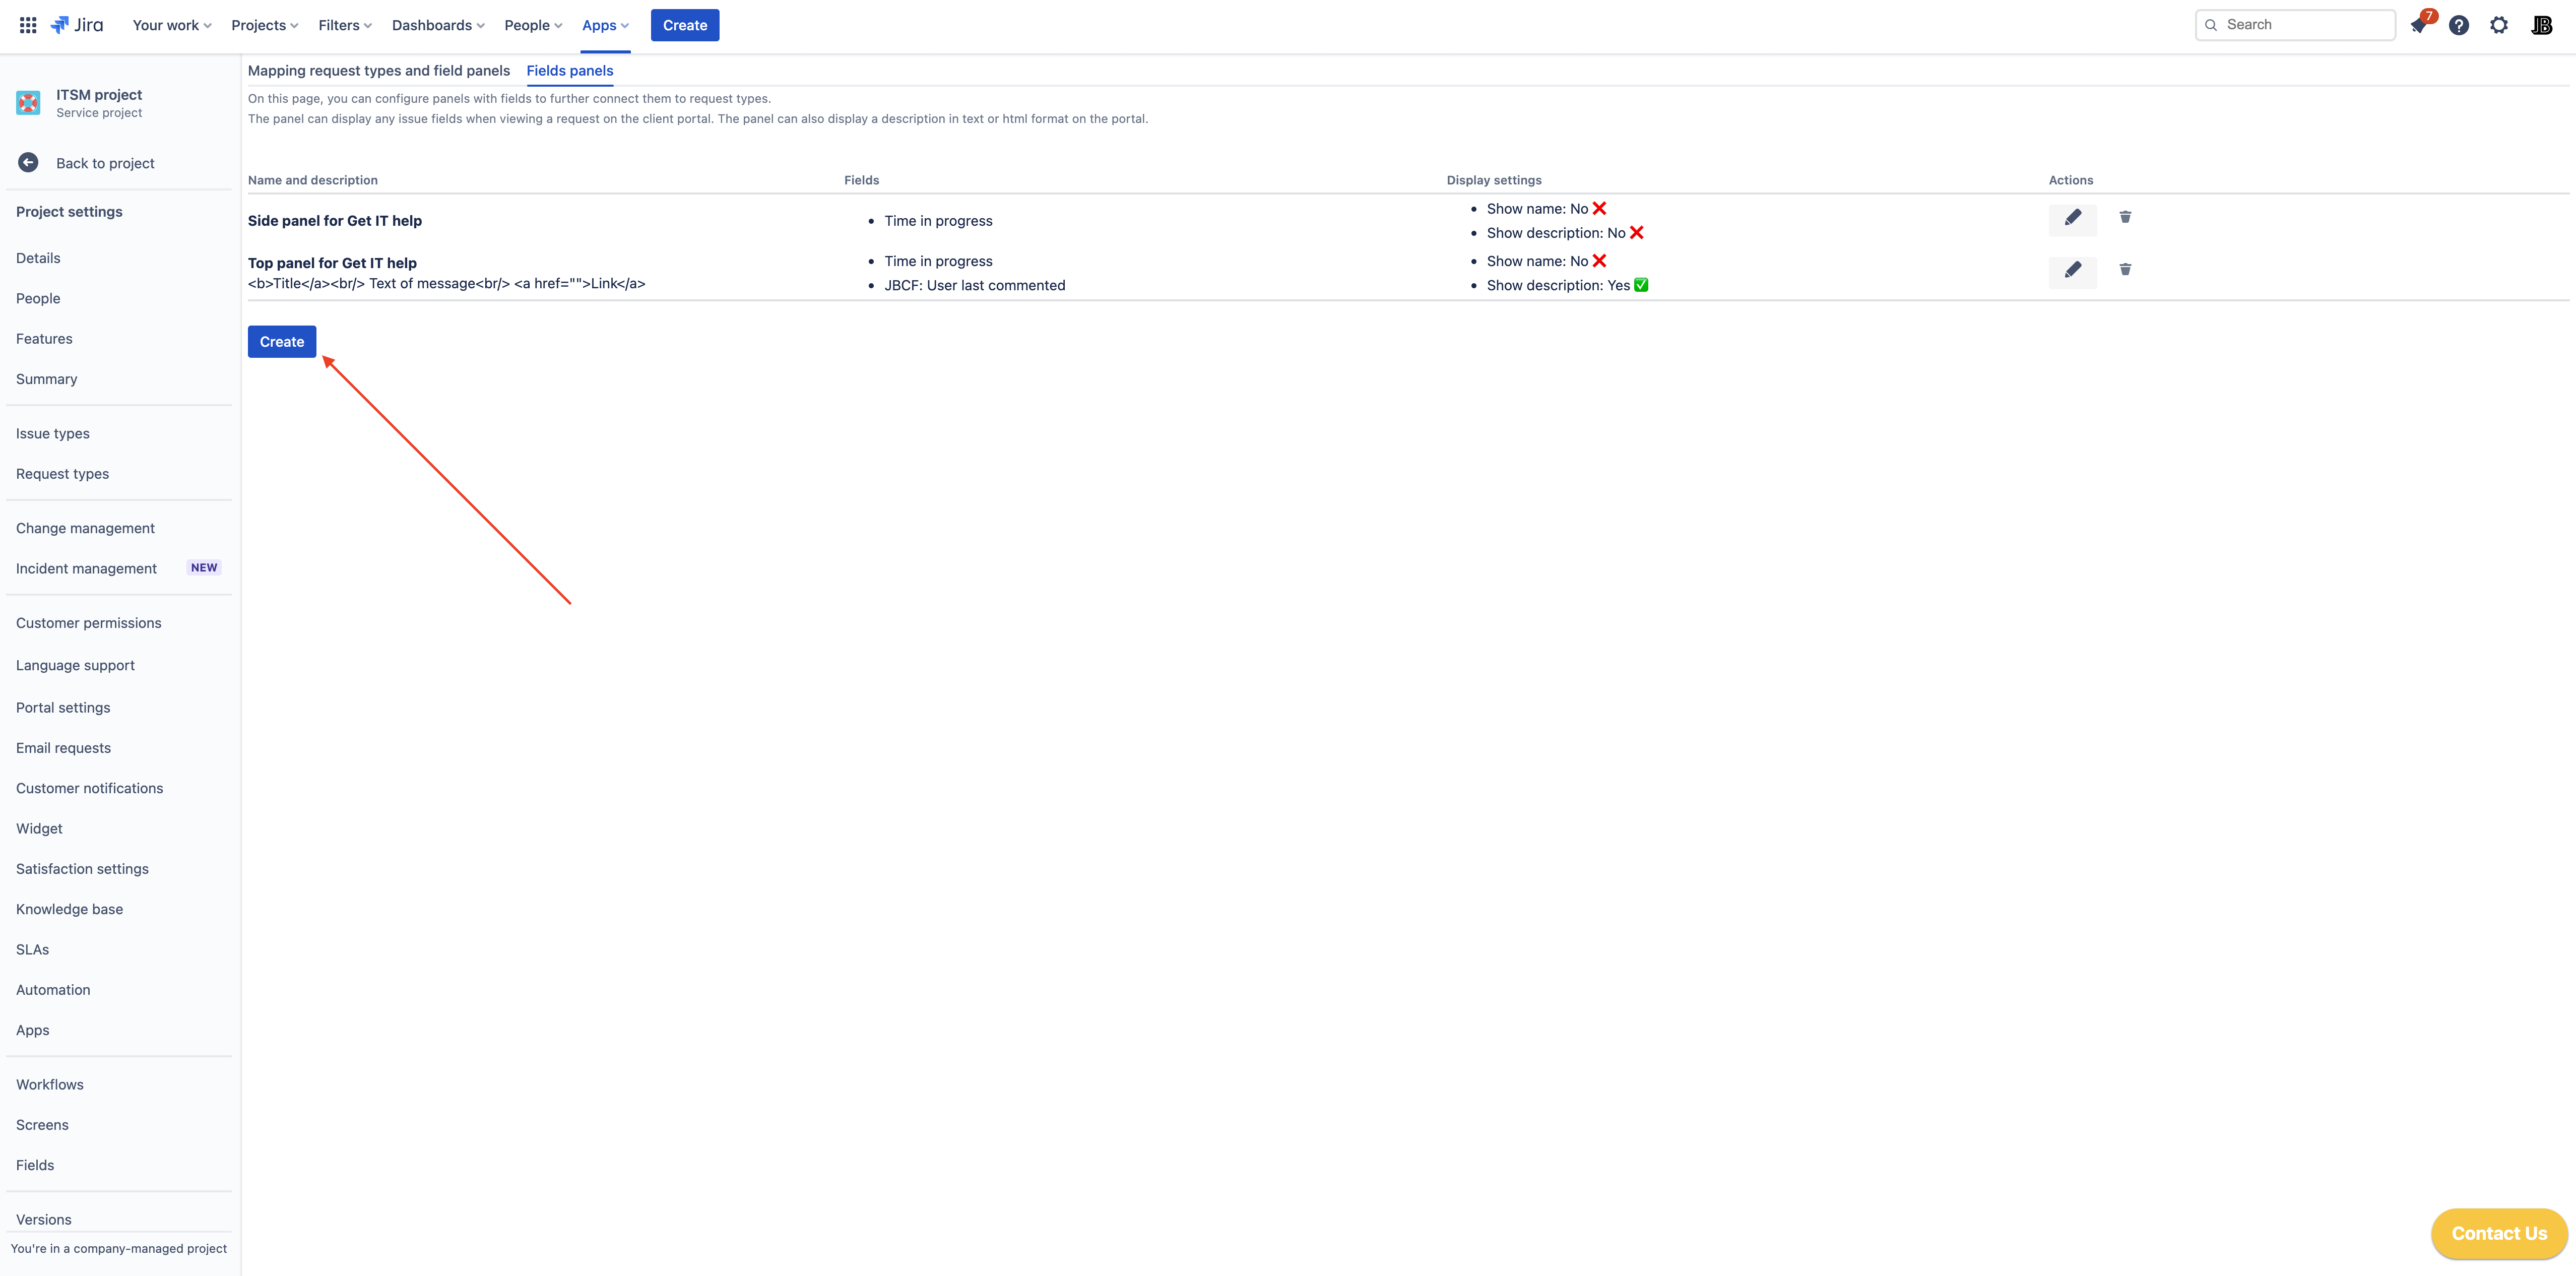
- Click the create button.
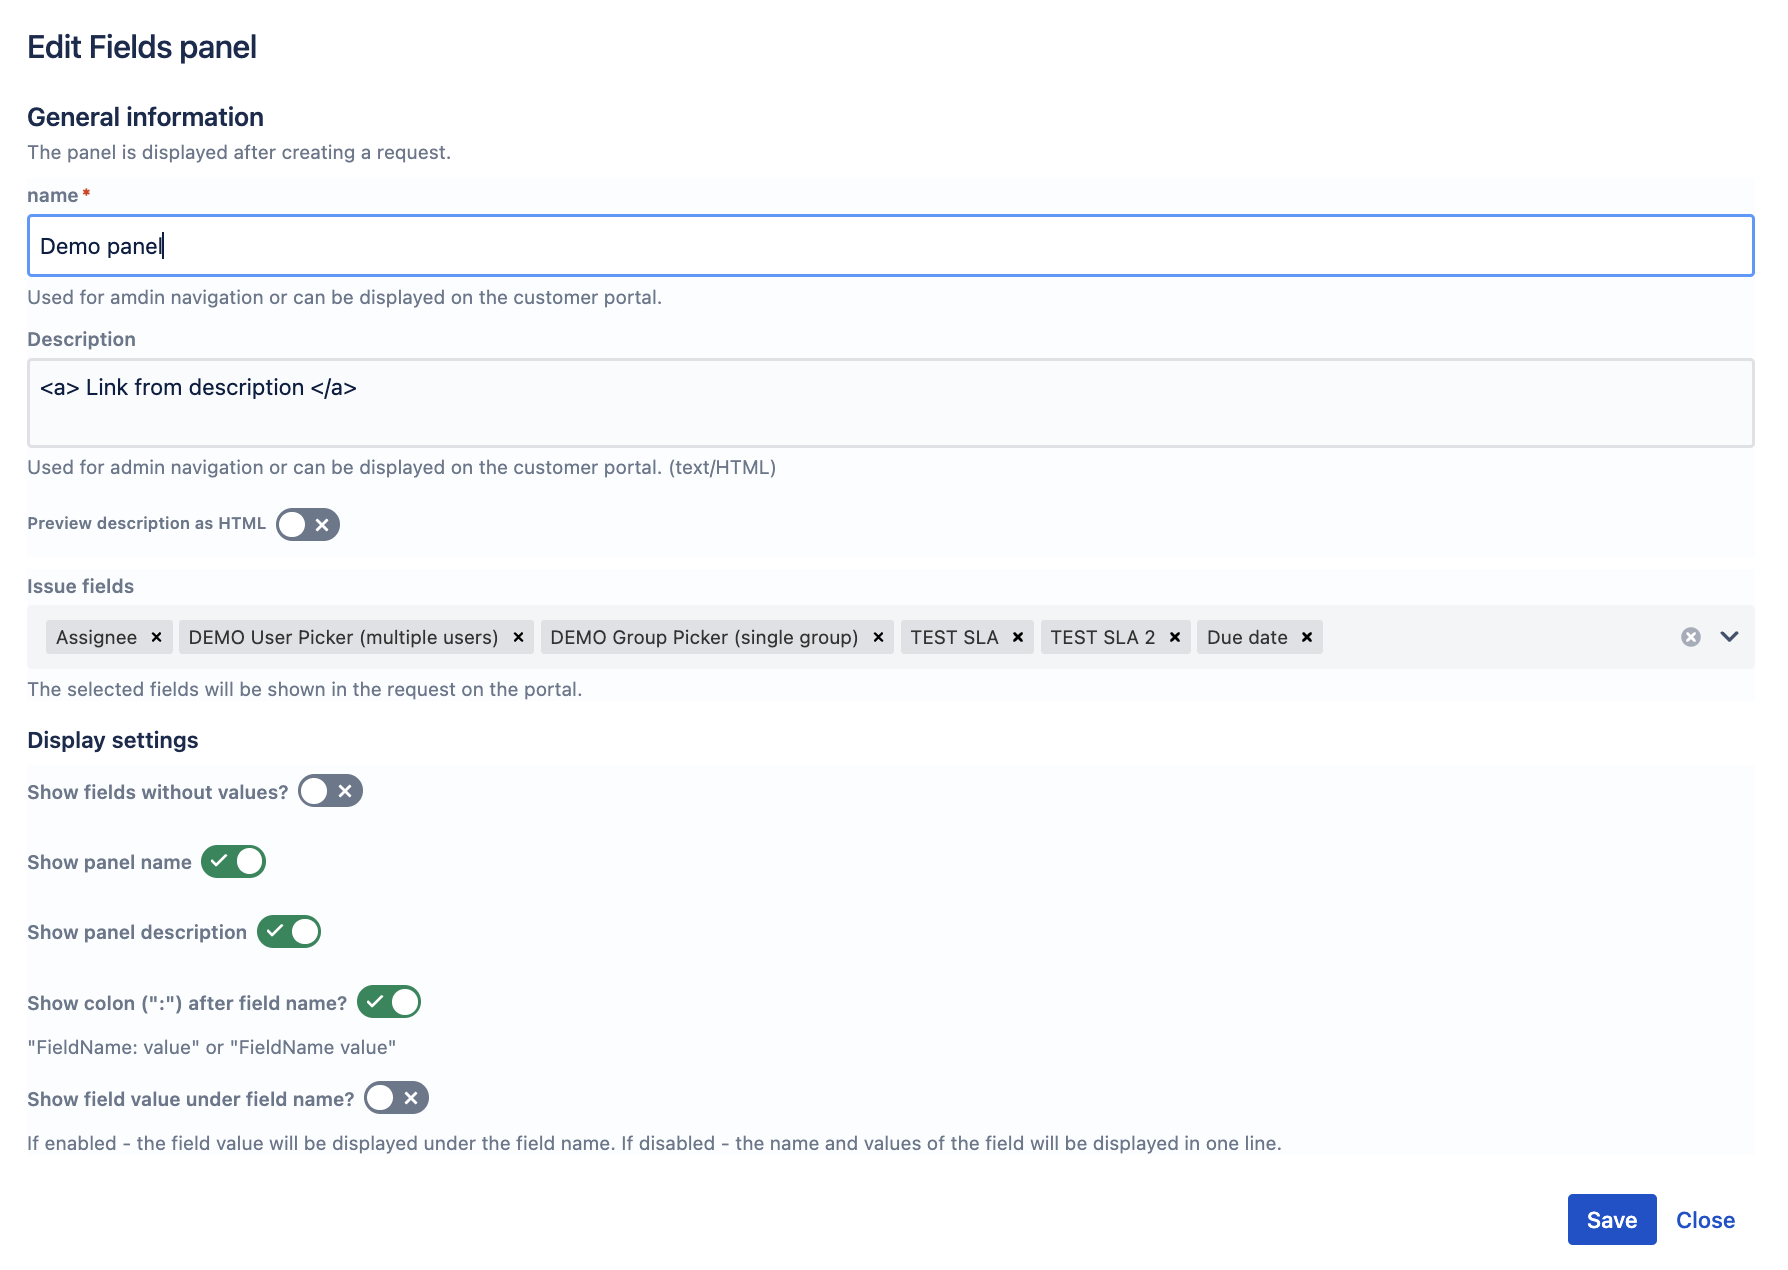
- Name - it can be technical (if it will not be displayed on the portal) or carry some kind of information to the user (if you want to display it on the portal).
- Description - can be left blank, filled with technical information or some kind of message for the user. You can specify the HTML that will be displayed on the portal.
- Preview description as HTML - will show how the description will look on the portal.
- Specify the fields that you want to display in this panel. If the field is displayed incorrectly on the portal, please write to support, we will quickly add it. This applies primarily to fields from third-party applications.
- Specify whether to display the name and description on the portal.
- Click the save button.
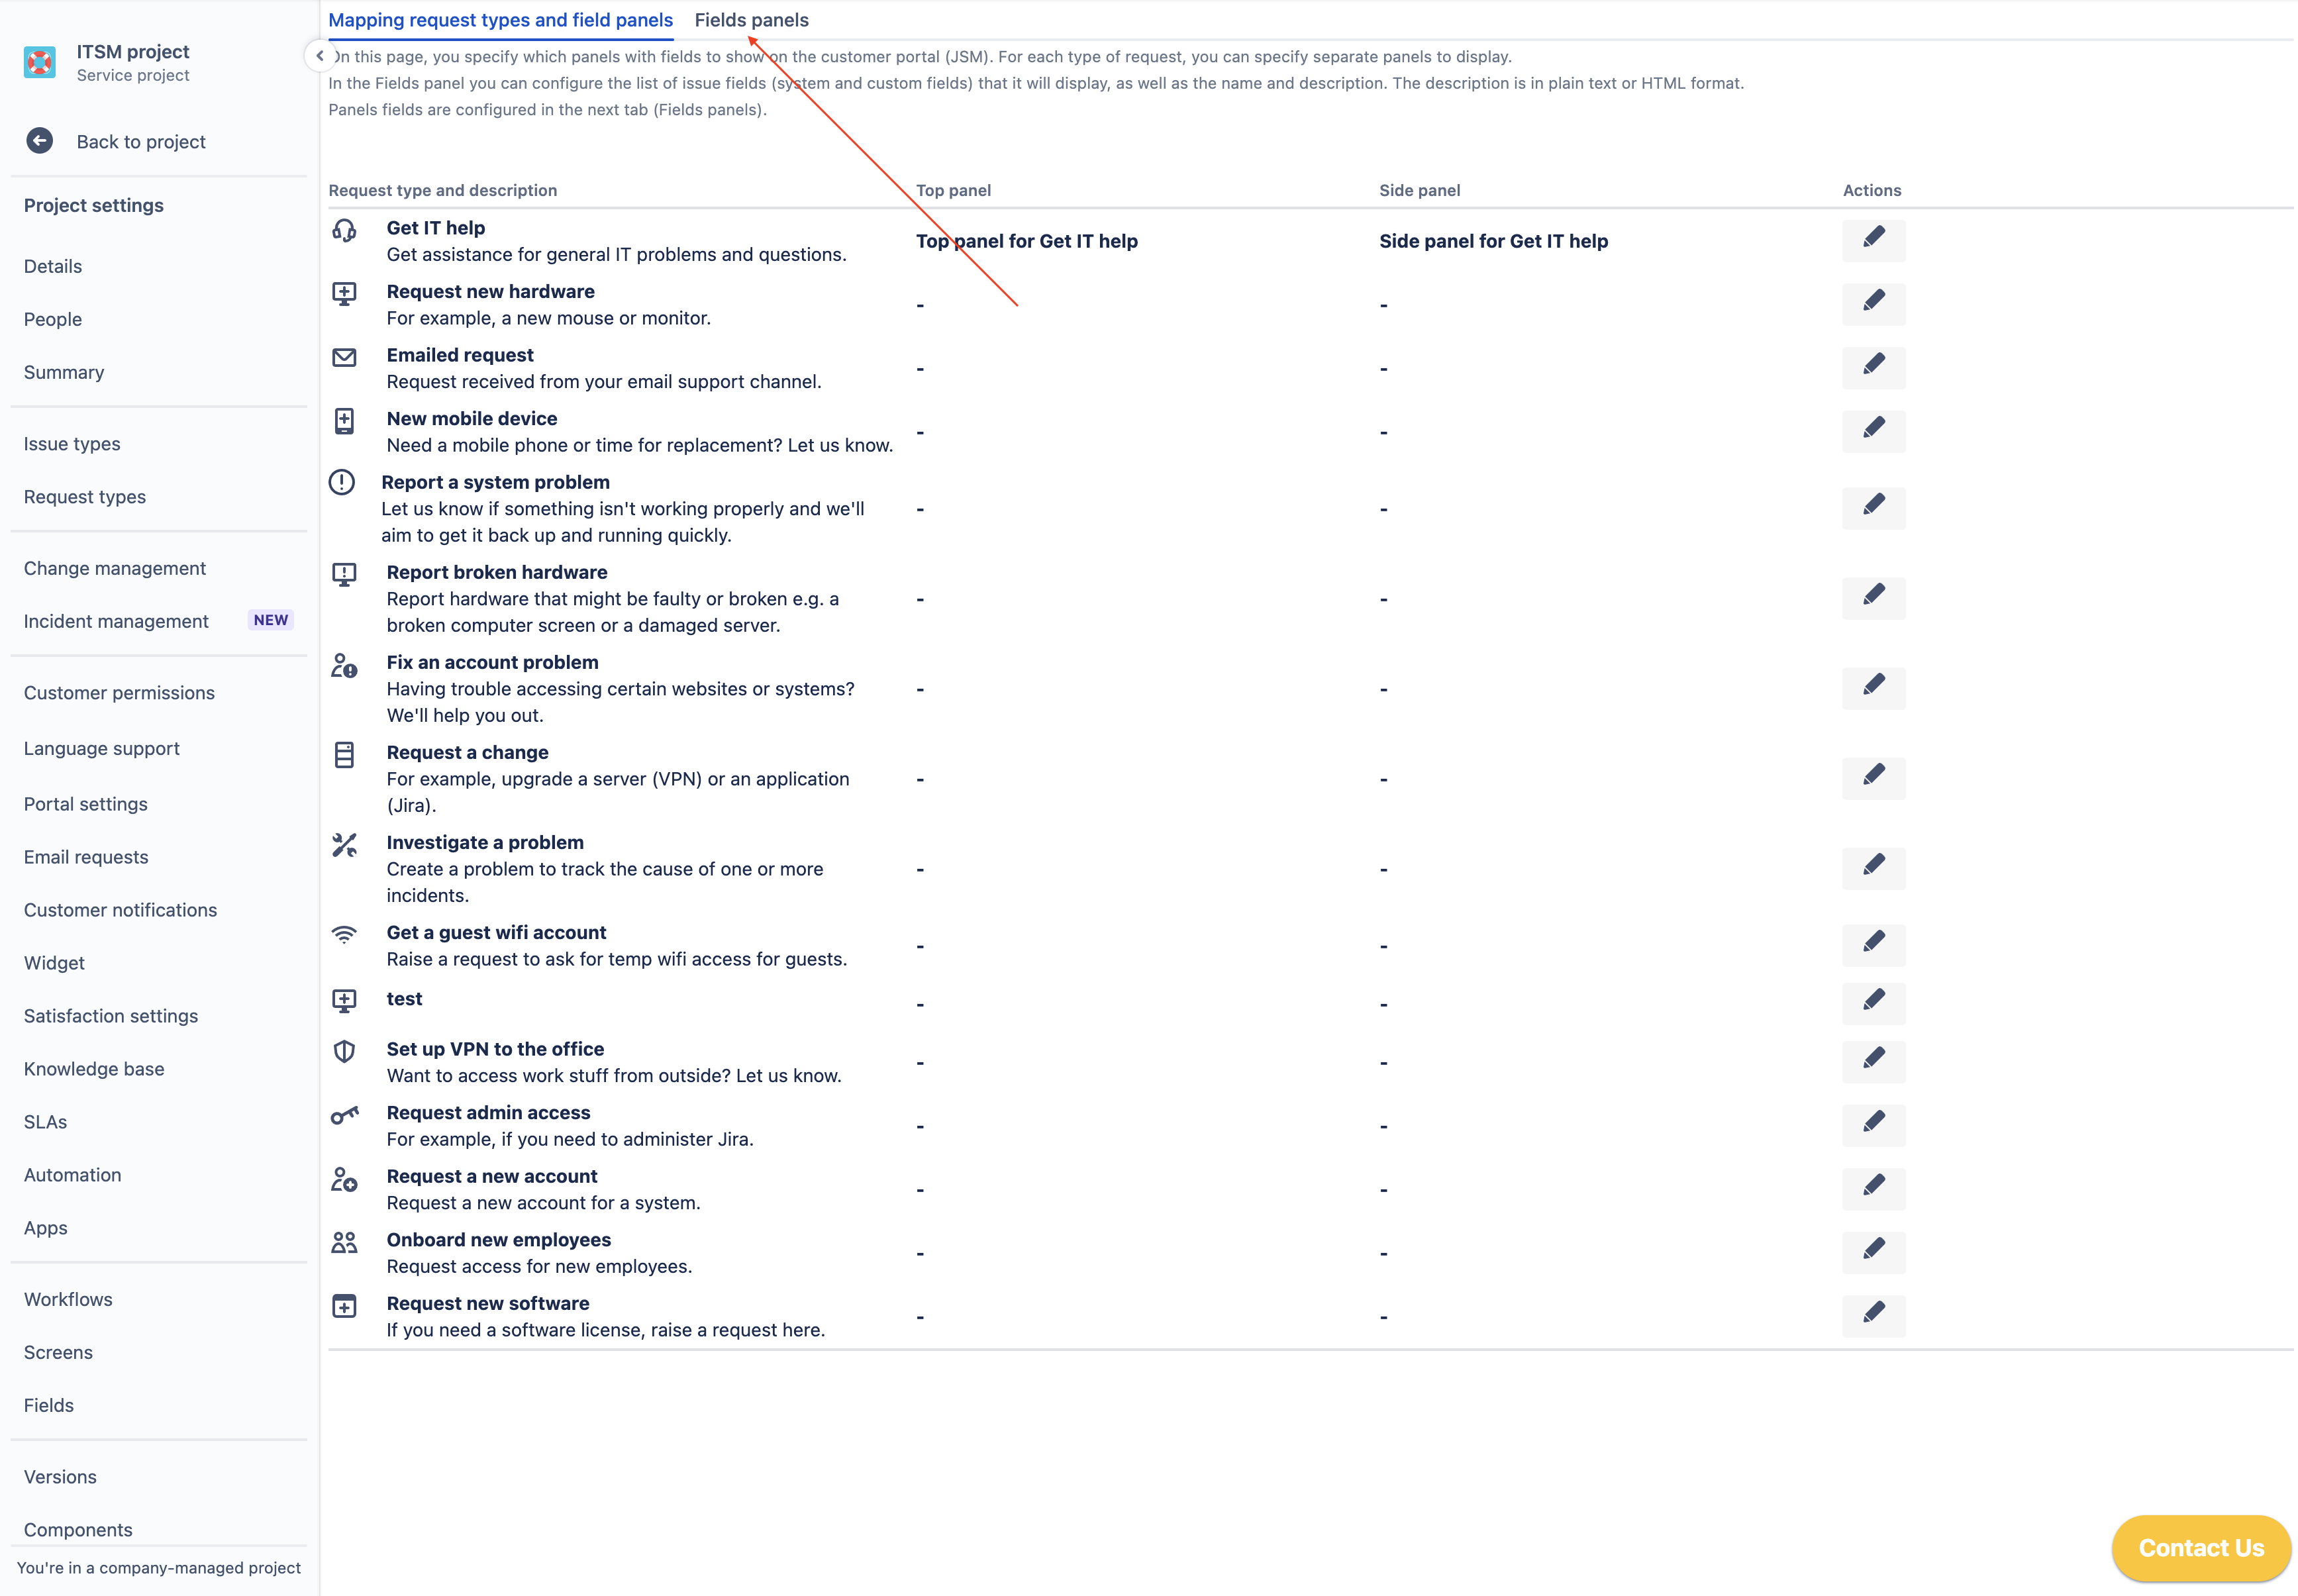
Go to the first tab Mapping request types and field panels.
Now you can set for what type of request and where to display this panel.
- To do this, click on the edit button opposite the required type of request.
- In the menu that opens, select the panel to display at the top of the request and in the side.
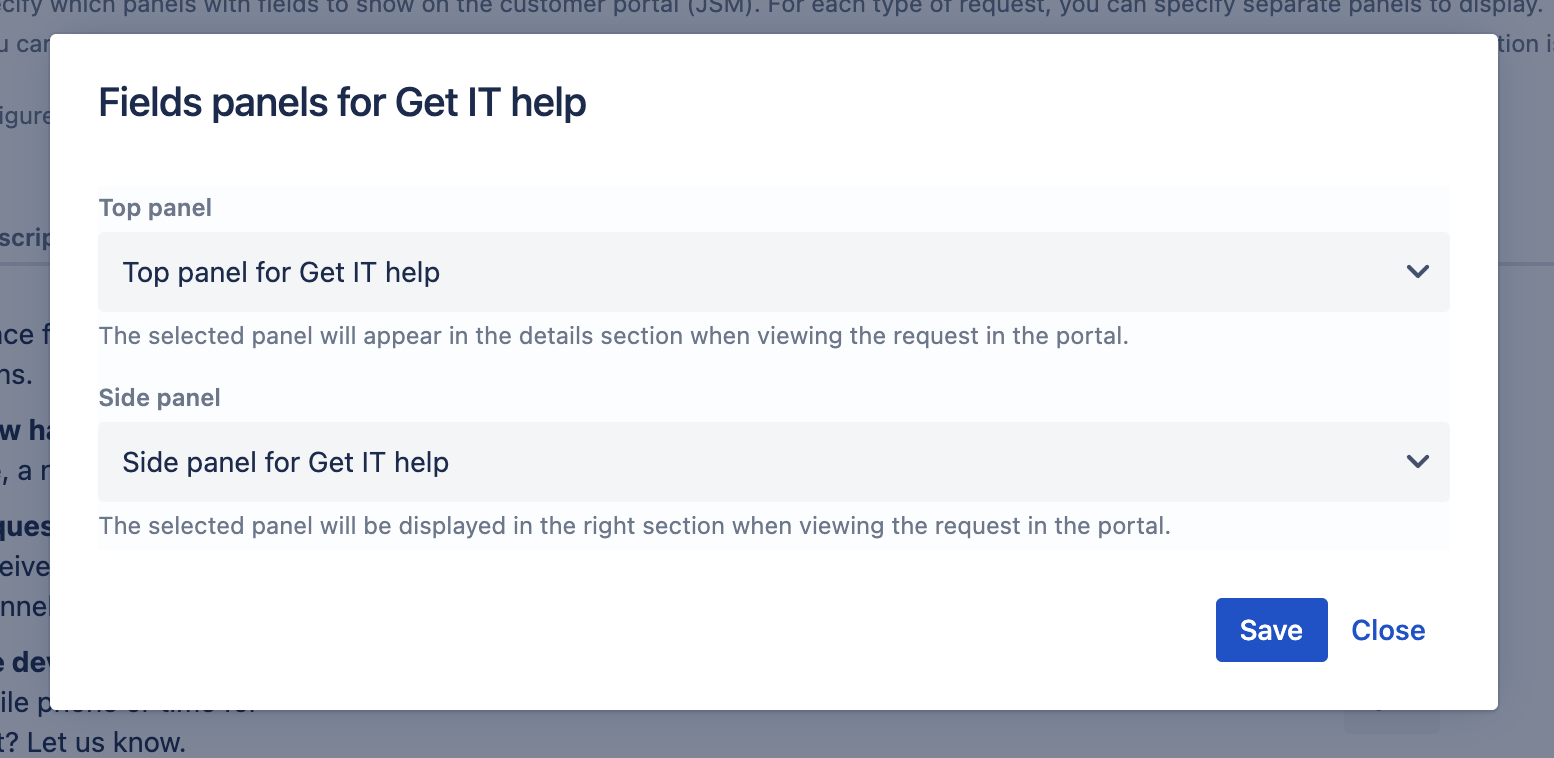
- Click the save button.
This completes the configuration and the selected fields are displayed on the portal.

View app on Atlassian Marketplace
 Message field
 Time in status | SLA | Timer | Stopwatch
 Switch to User + Delegating SU (Jira)
 Calculated fields (JBCF)
 Timer field | SLA for Jira Cloud
 Stopwatch for Jira Cloud
 Time between dates for Jira Cloud
 Fields panel for Jira Service Management (JSM)
 Display Linked Issues
 User helper for JiBrok cloud apps

