 Message Field for Jira Cloud
- What is the Custom Field Module?
- Setup Guide
- Field Contexts
- Display Modes
- Configuration Options
- UIM for Create Screens
- Automatic Cleanup
- Limitations
- Next Steps
What is the Custom Field Module?
The Custom Field module allows Message Field to function as a native Jira custom field rather than a display panel. Instead of appearing in fixed locations (sidebar, activity feed, etc.), the message is embedded directly in a custom field - visible on issue create, edit, transition, and view screens.
This is ideal for delivering contextual guidance, warnings, or dynamic information exactly where users interact with issue data.
How It Differs from Panel Modules
| Panel Modules | Custom Field Module | |
|---|---|---|
| Location | Fixed positions (sidebar, activity, context) | Custom field area on issue screens |
| Visibility | Issue view only | Create, edit, transition, and view screens |
| Configuration | Global per project/issue type | Per field context (project + issue type combination) |
| Setup | Enable module → create config | Create Jira custom field → add to screens → configure per context |
| Modal support | Yes (Issue Panel) | No |
Setup Guide
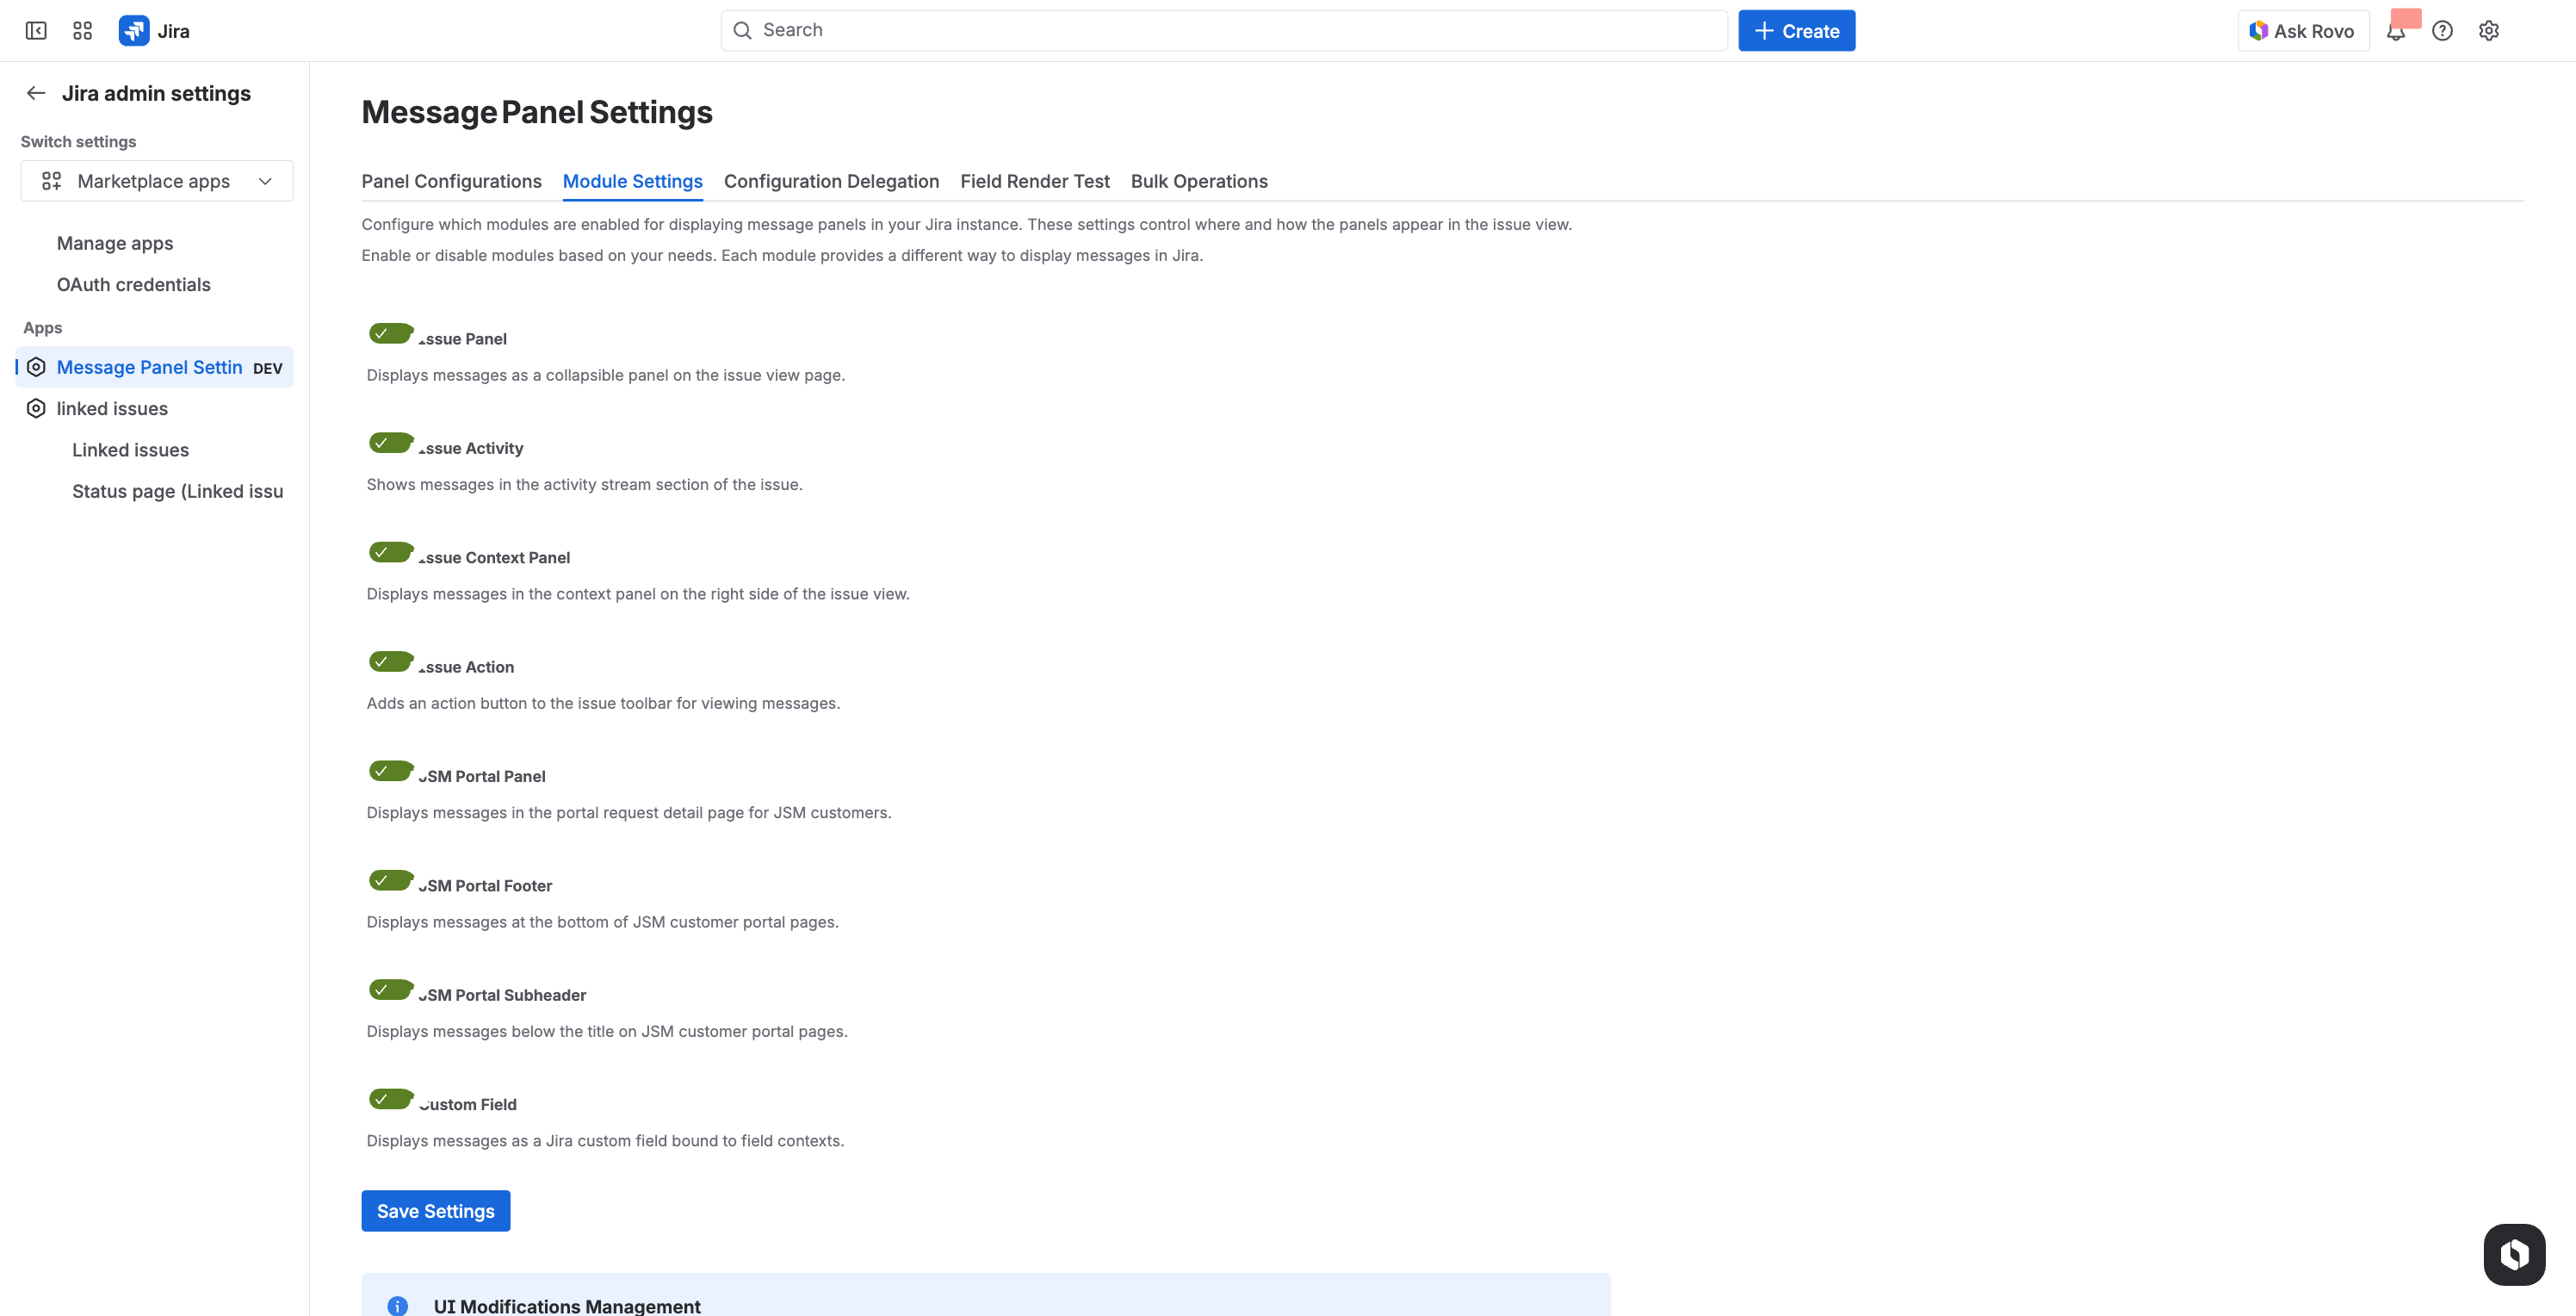
Step 1: Enable the Custom Field Module
- Go to Apps → Message Field Settings
- Click the Module Settings tab
- Enable Message Field (Custom Field)
- Click Save Settings
Step 2: Create a Custom Field in Jira
- Go to Jira Administration → Issues → Custom Fields
- Click Create custom field
- Select the Message Field field type
- Enter a name and description for the field
- Click Create
Tip: You can create multiple Message Field custom fields for different purposes (e.g., Form Instructions, Compliance Notice, Priority Guidance).
Step 3: Add the Field to Screens
Add your new custom field to the Jira screens where you want it to appear:
- Go to Jira Administration → Issues → Screens
- Select the relevant screen(s):
- Create Screen - field appears when creating issues
- Edit Screen - field appears when editing issues
- View Screen - field appears on issue view
- Transition Screen - field appears during workflow transitions
- Add your Message Field custom field to each screen
Step 4: Configure the Field
- Go to Apps → Message Field Settings
- Select the Custom Fields tab
- Select your custom field from the dropdown
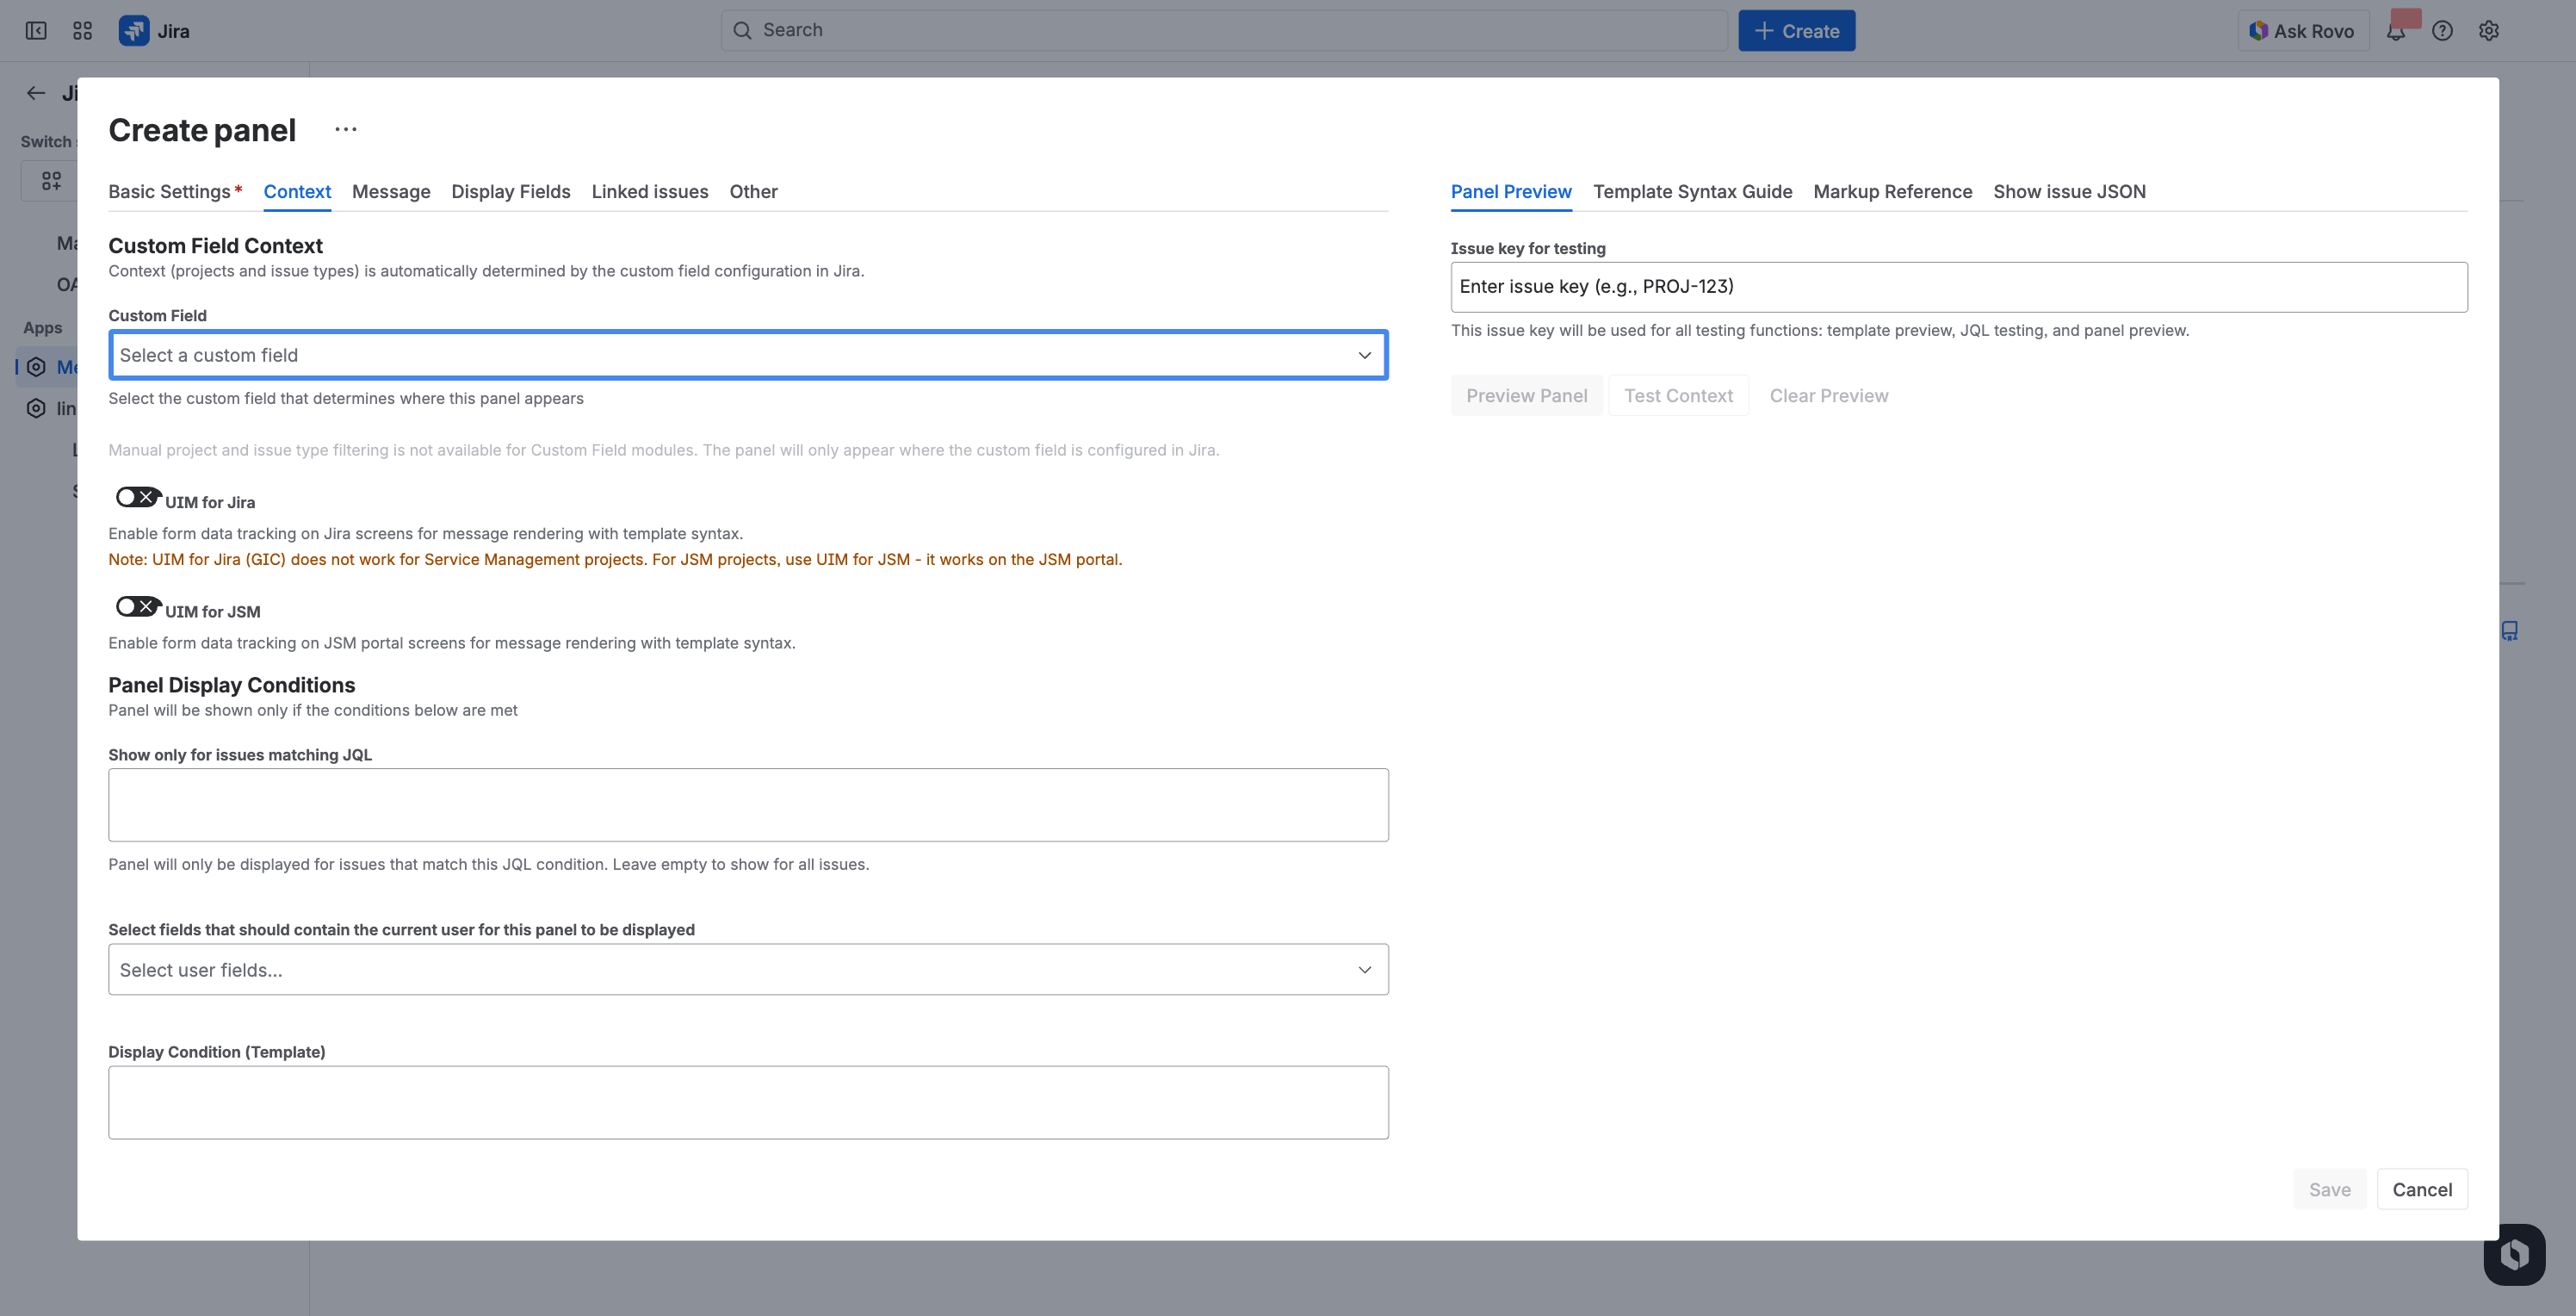
- Choose a field context (project + issue type combination)
- Configure the message content, data source, and display options
- Click Save
Field Contexts
Jira custom fields use contexts to define which projects and issue types the field applies to. Message Field leverages these contexts to provide different configurations per context.
This means you can show:
- One message for Bug issues in Project A
- A different message for Story issues in Project A
- Yet another message for all issues in Project B
Each context has its own independent configuration - data source, message template, display conditions, and formatting.
How Contexts Work
- When Jira displays the custom field, it determines which field context applies based on the current project and issue type
- Message Field looks up the configuration for that specific context
- The configured message is rendered and displayed in the field
Note: If no configuration exists for a context, the field displays as empty.
Display Modes
Issue View (Read-Only)
On the issue view screen, the custom field displays the rendered message as a read-only field value. It appears alongside other custom fields in the issue detail section.
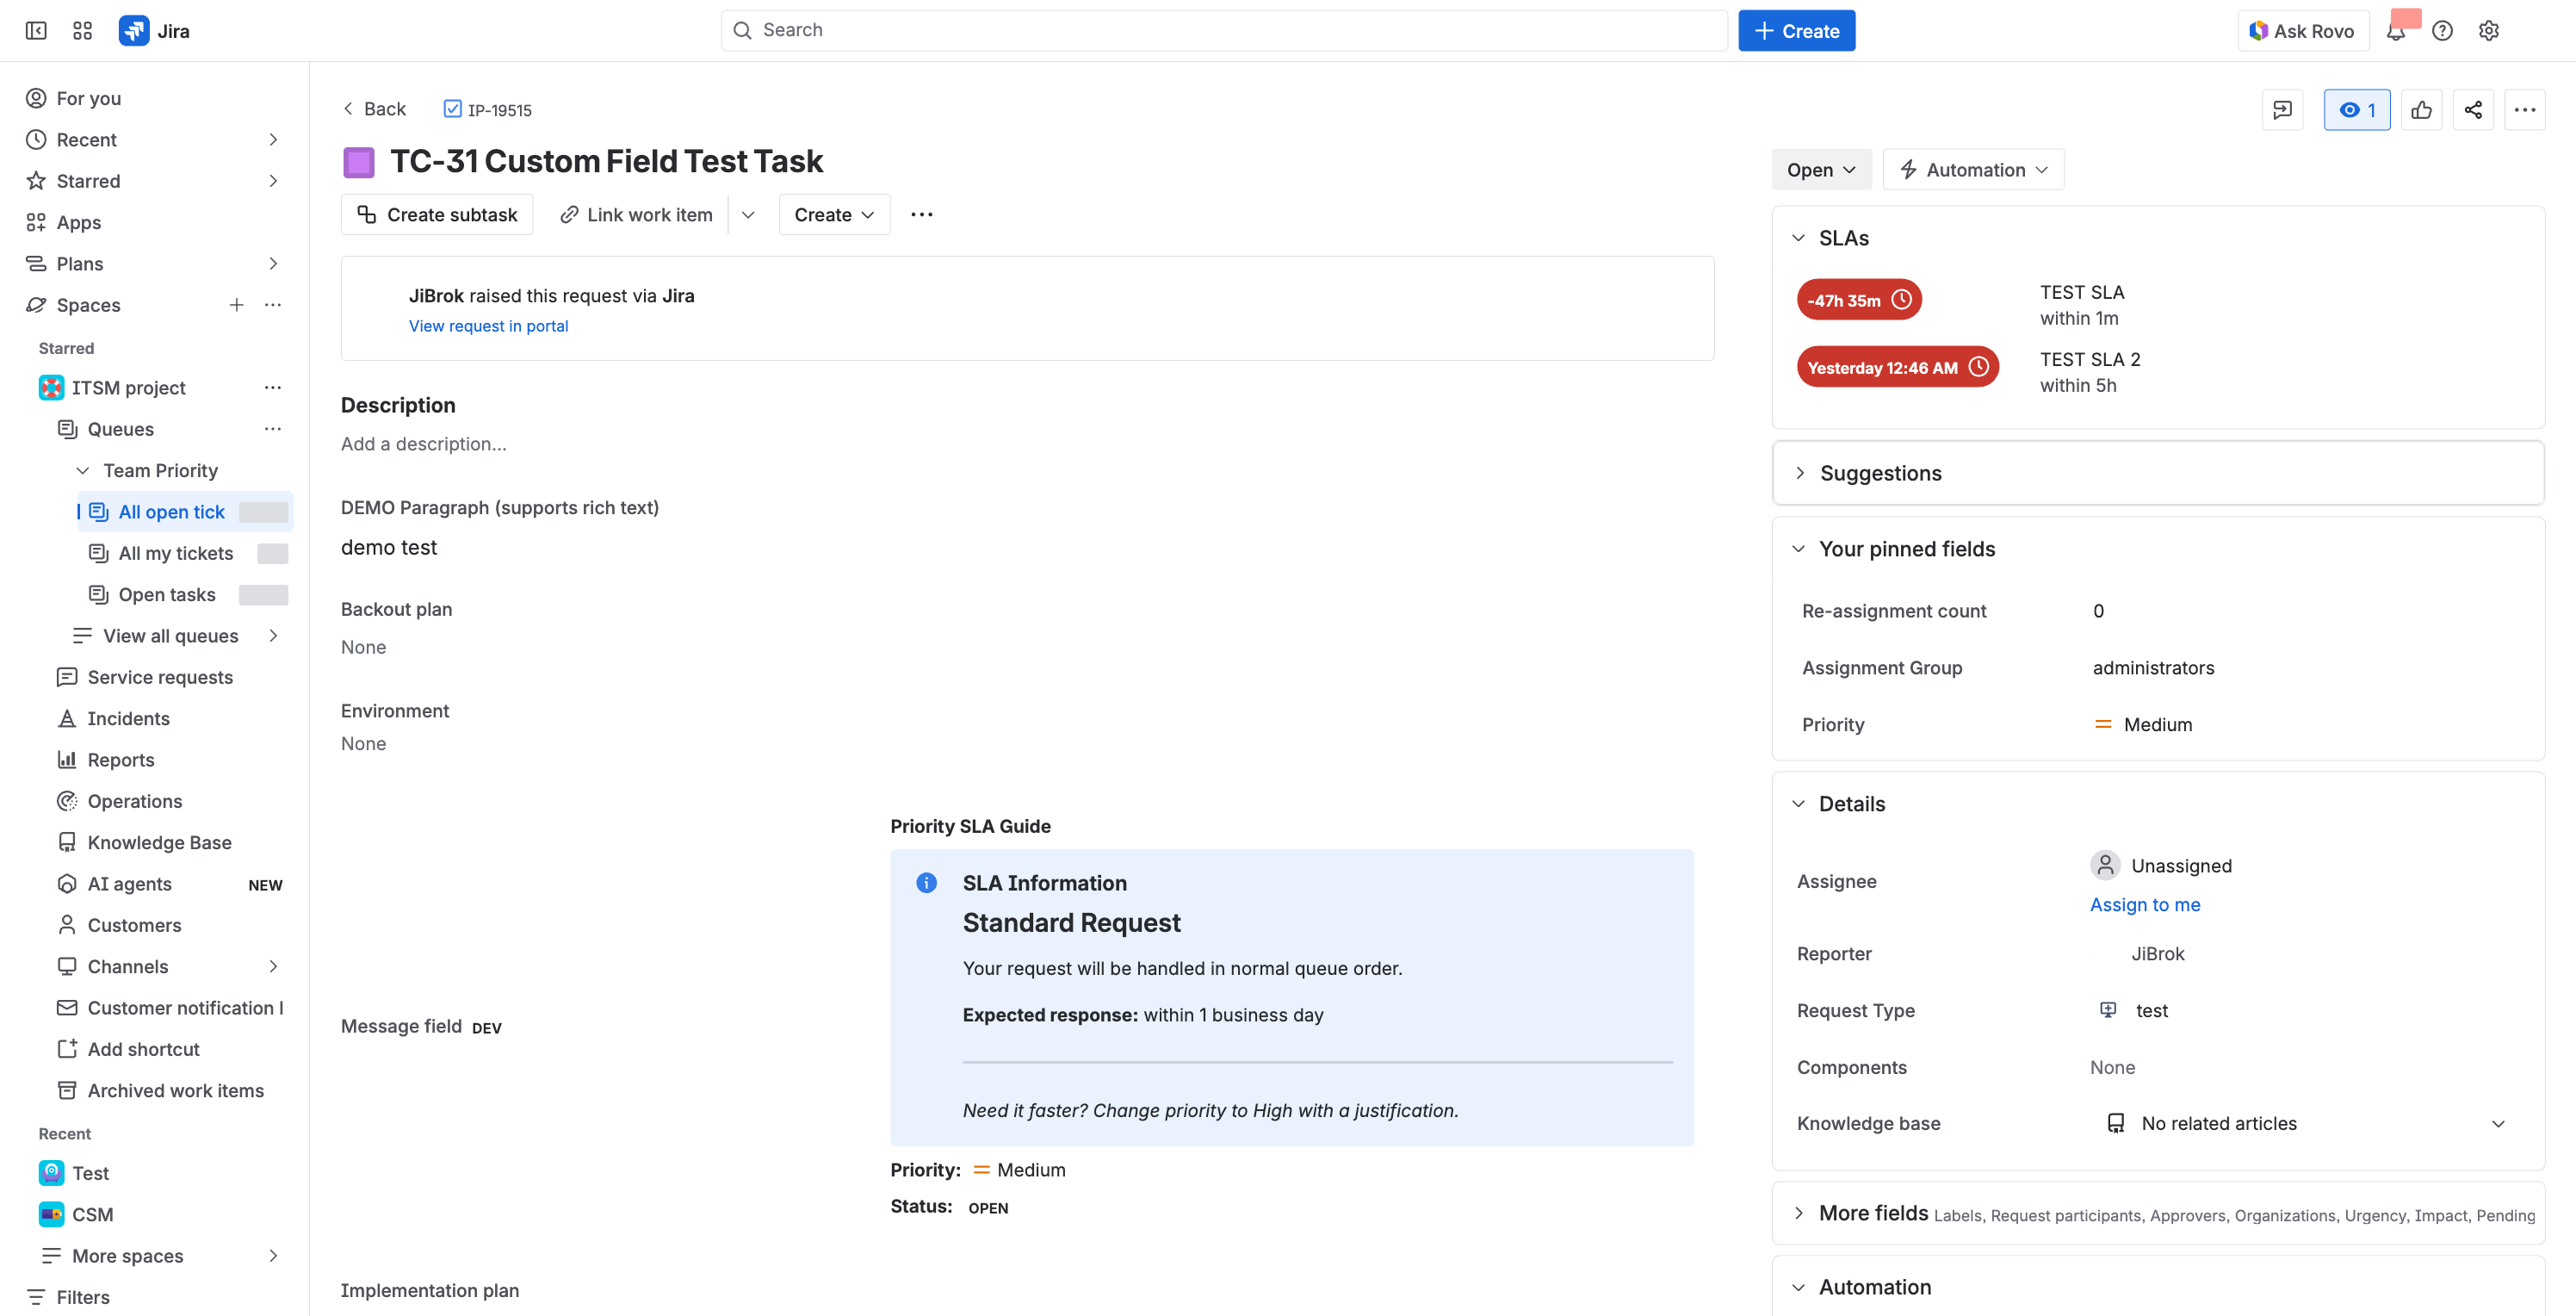
Create and Edit Screens
On create and edit screens, the custom field displays in the form alongside other fields. This is ideal for:
- Showing form-filling instructions
- Displaying warnings or compliance notices
- Providing context-sensitive guidance based on the selected project or issue type
Transition Screens
When configured on a transition screen, the field appears during workflow transitions. Use this to:
- Show transition-specific instructions
- Display warnings before status changes
- Provide checklists or reminders
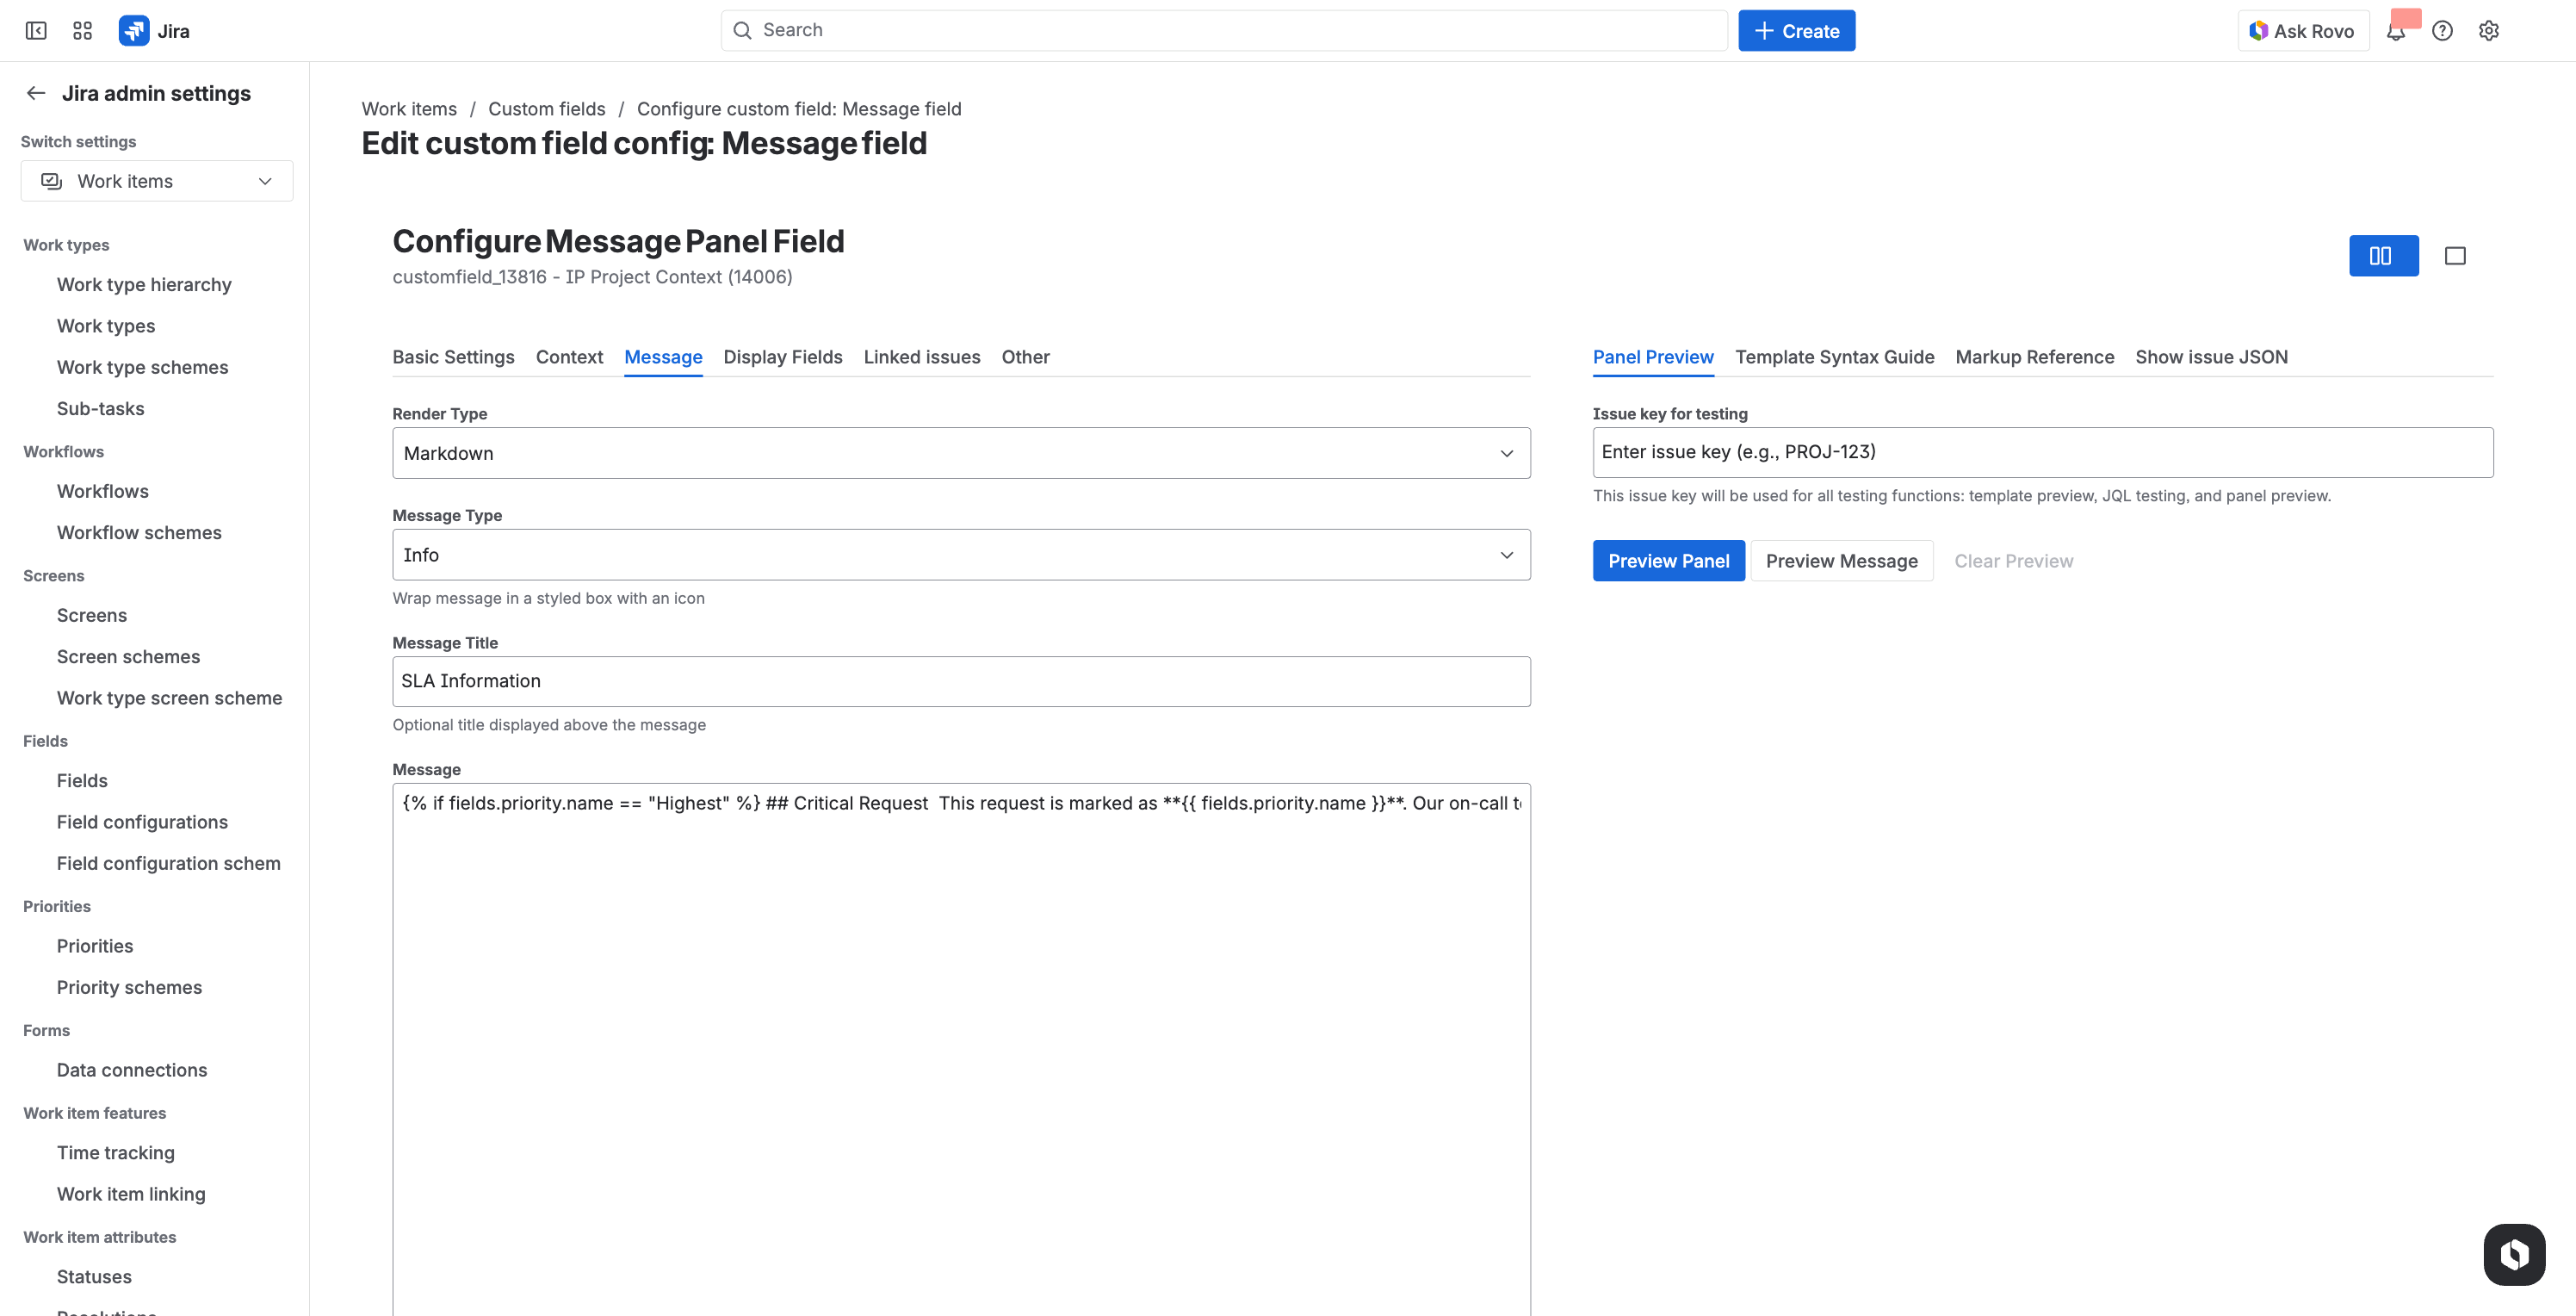
Configuration Options
Custom field configurations support the same options as panel configurations:
| Option | Description |
|---|---|
| Data Source | Empty (message only), Linked Issues, or JQL Query |
| Message Template | Dynamic content using template syntax |
| Message Format | Plain text, HTML, Markdown, or ADF |
| Display JQL | Conditional display based on JQL (issue view only) |
| User Fields Filter | Show only for users in specific fields (issue view only) |
Note: Display JQL and User Fields conditions are only evaluated on issue view screens, not on create/transition screens where the issue does not yet exist.
UIM for Create Screens
Message Field uses UI Modifications (UIM) to display custom field content on create screens. This is managed automatically, but there are two configuration options that control this behavior:
| Option | Description |
|---|---|
UIM for Jira (uimForJira) |
Enables the custom field on standard Jira issue create forms |
UIM for JSM (uimForJsm) |
Enables the custom field on JSM portal request creation forms |
When enabled, the custom field content appears in the create form alongside other fields, providing guidance and context before the issue is created.
Note: UIM registrations are managed through the Modules page. If the custom field doesn’t appear on create screens, check the UIM status and use Reregister All if needed.
Automatic Cleanup
Message Field automatically manages custom field configurations through an hourly scheduler that detects changes to fields and contexts.
What the Scheduler Detects
| Change | Action |
|---|---|
| Custom field deleted in Jira | Configuration is disabled |
| Field context removed | Associated configuration is disabled |
| Field context re-added | Configuration can be manually re-enabled |
How It Works
- The scheduler runs every hour
- It checks all custom field configurations against Jira’s current field and context data
- Orphaned configurations (where the field or context no longer exists) are marked as disabled
- Disabled configurations remain in the list and can be cleaned up manually or re-enabled if the field/context is restored
This prevents stale configurations from accumulating and ensures the system stays in sync with your Jira custom field setup.
Limitations
- Display conditions limited on create screens - JQL and User Fields conditions only work on issue view, not on create/transition screens
- One configuration per context - Each field context has a single configuration (unlike panel modules where multiple configs can target the same module)
- Screen configuration required - The field must be added to Jira screens manually; enabling the module alone is not sufficient
Next Steps
- Modules - Overview of all display modules
- Configuration Basics - Create and manage configurations
- Templates - Dynamic content with template syntax
- FAQ - Custom field troubleshooting
- Getting Started - Quick start guide


