 Message Field for Jira Cloud
- Export Configurations
- Import Configurations
- JSON Format Reference
- CSV Format Reference
- Validation Details
- Migration Between Instances
- Duplicate Configuration
- Bulk Enable/Disable
- Configuration Management
- Next Steps
Export Configurations
Save configurations as JSON file:
- Go to Apps → Message Field Settings
- Click Bulk Operations tab
- Select configurations to export
- Click Export Selected or Export All
The exported file contains all selected panel configurations and custom field configurations in JSON format.
Tip: Export configurations before making major changes as a backup.
Import Configurations
Load configurations from JSON or CSV file:
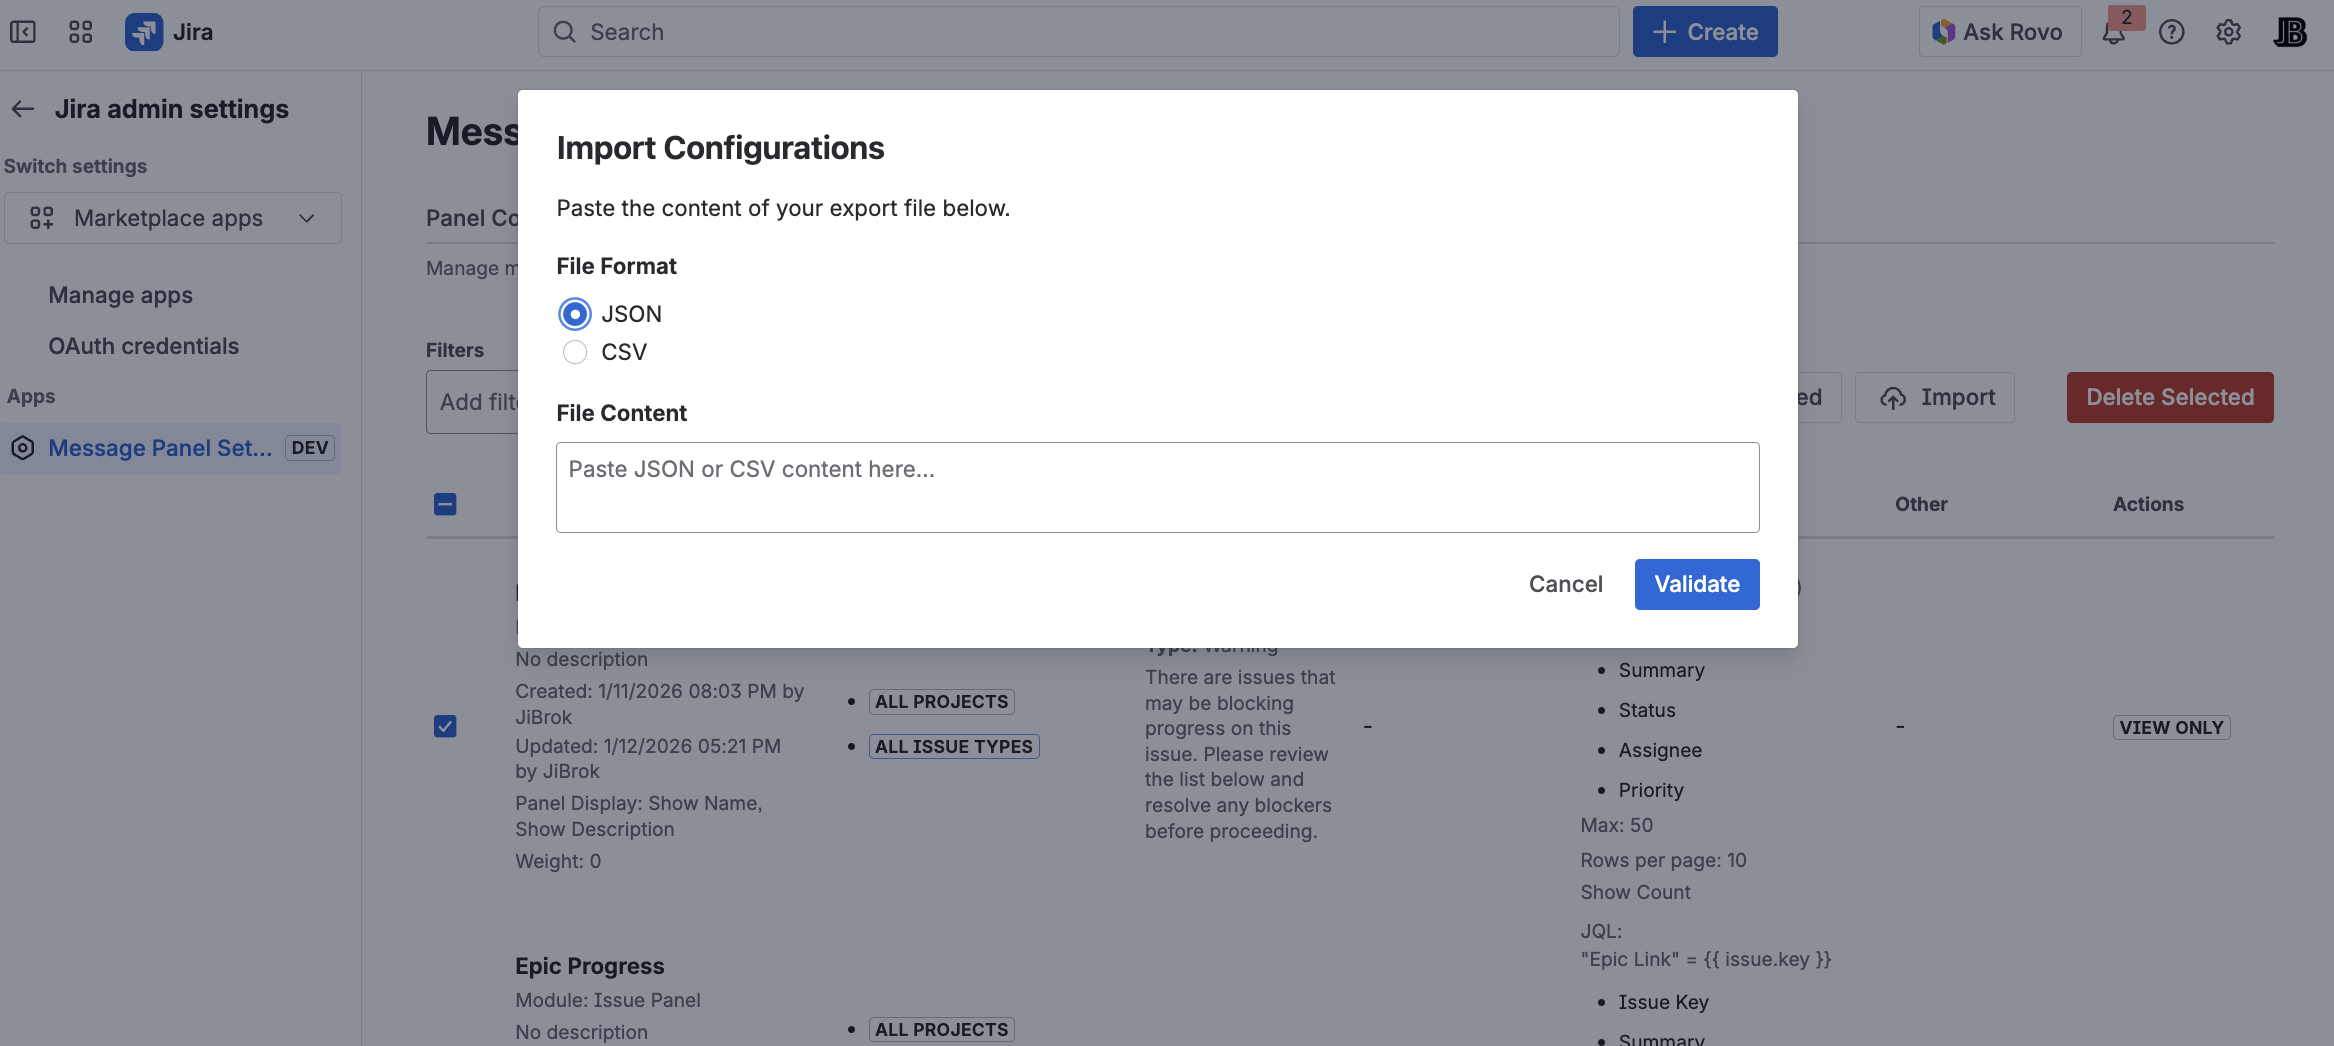
- Go to Bulk Operations tab
- Click Import
- Choose file format (JSON or CSV)
- Paste file content
- Click Validate to review
- Confirm import
Note: Imported configurations with duplicate names will be renamed automatically.
Note: Export and import includes custom field configurations alongside panel configurations.
JSON Format Reference
The JSON export uses the following structure:
{
  "configurations": [
    {
      "name": "Configuration Name",
      "description": "Optional description",
      "enabled": true,
      "module": "jira:issuePanel",
      "weight": 0,
      "context": {
        "projects": ["PROJ1", "PROJ2"],
        "issueTypes": ["Bug", "Story"],
        "portals": [],
        "requestTypes": []
      },
      "dataSource": {
        "type": "jql",
        "jql": "project = PROJ AND status = Open",
        "maxIssues": 50,
        "rowsPerPage": 10
      },
      "message": {
        "renderType": "html",
        "content": "<p>Message content</p>",
        "messageType": "custom",
        "messageTitle": ""
      },
      "display": {
        "showName": true,
        "showDescription": true,
        "showCount": true,
        "showJqlLink": false,
        "displayJql": "",
        "displayCondition": "",
        "userFields": []
      },
      "modal": {
        "enabled": false,
        "buttonText": "",
        "buttonAppearance": "default",
        "modalSize": "medium",
        "autoOpen": false,
        "showOncePerIssue": false,
        "modalAppearance": "default",
        "closeButtonText": ""
      },
      "fields": {
        "tableFieldIds": [],
        "displayFieldIds": []
      },
      "linkedIssues": {
        "linkTypes": []
      }
    }
  ]
}
Key Fields
| Field | Description |
|---|---|
name |
Unique configuration name (max 100 characters) |
enabled |
Whether the configuration is active |
module |
Display module identifier |
weight |
Display order (lower = first, negatives allowed) |
context |
Project, issue type, portal, and request type filters |
dataSource.type |
"jql", "linkedIssues", or "empty" |
message.renderType |
"text", "html", "markdown", or "adf" |
message.messageType |
"custom", "info", "warning", "error", "success", or "change" |
CSV Format Reference
The CSV export includes the following columns:
| Column | Description |
|---|---|
name |
Configuration name |
description |
Configuration description |
enabled |
true or false |
module |
Display module |
weight |
Display order weight |
projects |
Comma-separated project keys |
issueTypes |
Comma-separated issue type names |
dataSourceType |
Data source type |
jql |
JQL query (if applicable) |
maxIssues |
Maximum issues to load |
rowsPerPage |
Rows per page |
renderType |
Message render type |
message |
Message content |
messageType |
Section message type |
messageTitle |
Section message title |
displayJql |
Display JQL condition |
Note: CSV format is useful for bulk reviewing and editing configurations in a spreadsheet application. For full configuration fidelity (including all options), use JSON format.
Validation Details
When importing configurations, the Validate step checks:
| Check | Description |
|---|---|
| Name uniqueness | Detects duplicate names across existing and imported configurations |
| Required fields | Ensures name and module are present |
| Module validity | Checks that the module identifier is valid |
| JQL syntax | Basic JQL syntax validation (if applicable) |
| Field limits | Validates field counts don’t exceed limits |
| JSON structure | Validates the JSON/CSV structure is well-formed |
Name Conflict Resolution
When an imported configuration has the same name as an existing one:
- The import tool flags the conflict during validation
- You can choose to rename the imported configuration (a suffix is added automatically)
- Existing configurations are never overwritten during import
Migration Between Instances
Use export/import to migrate configurations between Jira instances (e.g., dev → staging → production).
Migration Workflow
- Export all configurations from the source instance
- Review the exported JSON for environment-specific values:
- Project keys - must match on the target instance
- Issue type names - must match on the target instance
- Custom field IDs - may differ between instances
- Portal IDs - will differ between instances
- Edit the JSON if needed to adjust values for the target environment
- Import into the target instance
- Validate and review the import preview
- Test imported configurations with real issues
Tips for Migration
- Project keys: Keep project keys consistent across environments when possible
- Custom fields: Use field names instead of IDs in templates when possible - names are more portable
- JQL queries: Review parametric JQL for environment-specific references
- Portals: JSM portal IDs will need to be updated manually after import
- Module settings: Module enable/disable settings are not included in export - configure these separately on each instance
Duplicate Configuration
Create a copy of existing configuration:
- Click … menu on the configuration row
- Select Duplicate
- New configuration created with “(Copy)” suffix
Bulk Enable/Disable
Enable or disable multiple configurations at once:
- Go to Bulk Operations tab
- Select configurations using checkboxes
- Click Enable Selected or Disable Selected
This is useful for:
- Temporarily disabling all panels during maintenance
- Enabling a set of new configurations together
- Testing by toggling configurations on/off
Note: Bulk enable/disable operations also apply to custom field configurations.
Tip: You can also toggle individual configurations using the switch in the configuration list.
Configuration Management
Edit
- Click on configuration name or row
- Modify settings
- Click Save
Delete
Remove configuration permanently:
- Click … menu
- Select Delete
- Confirm deletion
Warning: Deletion is permanent. Export configuration first if you may need it later.
Next Steps
- Configuration Basics - Basic panel settings
- Testing Panels - Preview and debug configurations
- Templates - Dynamic content syntax
- Limits - Configuration size and count limits


