 Message Panel for Jira Cloud
- Overview
- Creating a Configuration
- Panel Configuration Tabs
- Basic Settings
- Data Source
- Field Selection
- Display Settings
- Context Filters - When Your Panel Appears
- Message Format
- Advanced Options
- Testing and Preview Tools
- Configuration Management
- Examples
- Next Steps
Overview
When you create a message panel configuration, you control:
- WHERE it appears - Choose the display location (Display Module: sidebar, activity, context menu, or action button)
- WHEN it appears - Set visibility conditions (Context Filters: which projects, issue types, JQL conditions)
- WHAT it shows - Configure the message content and linked issues to display
Both the Display Module and Context Filters work together to determine panel visibility. The panel will only appear when ALL conditions are met.
Creating a Configuration
- Go to Apps → Message Panel Settings
- Click Create panel button
- Configure settings across the available tabs (see sections below)
- Click Save
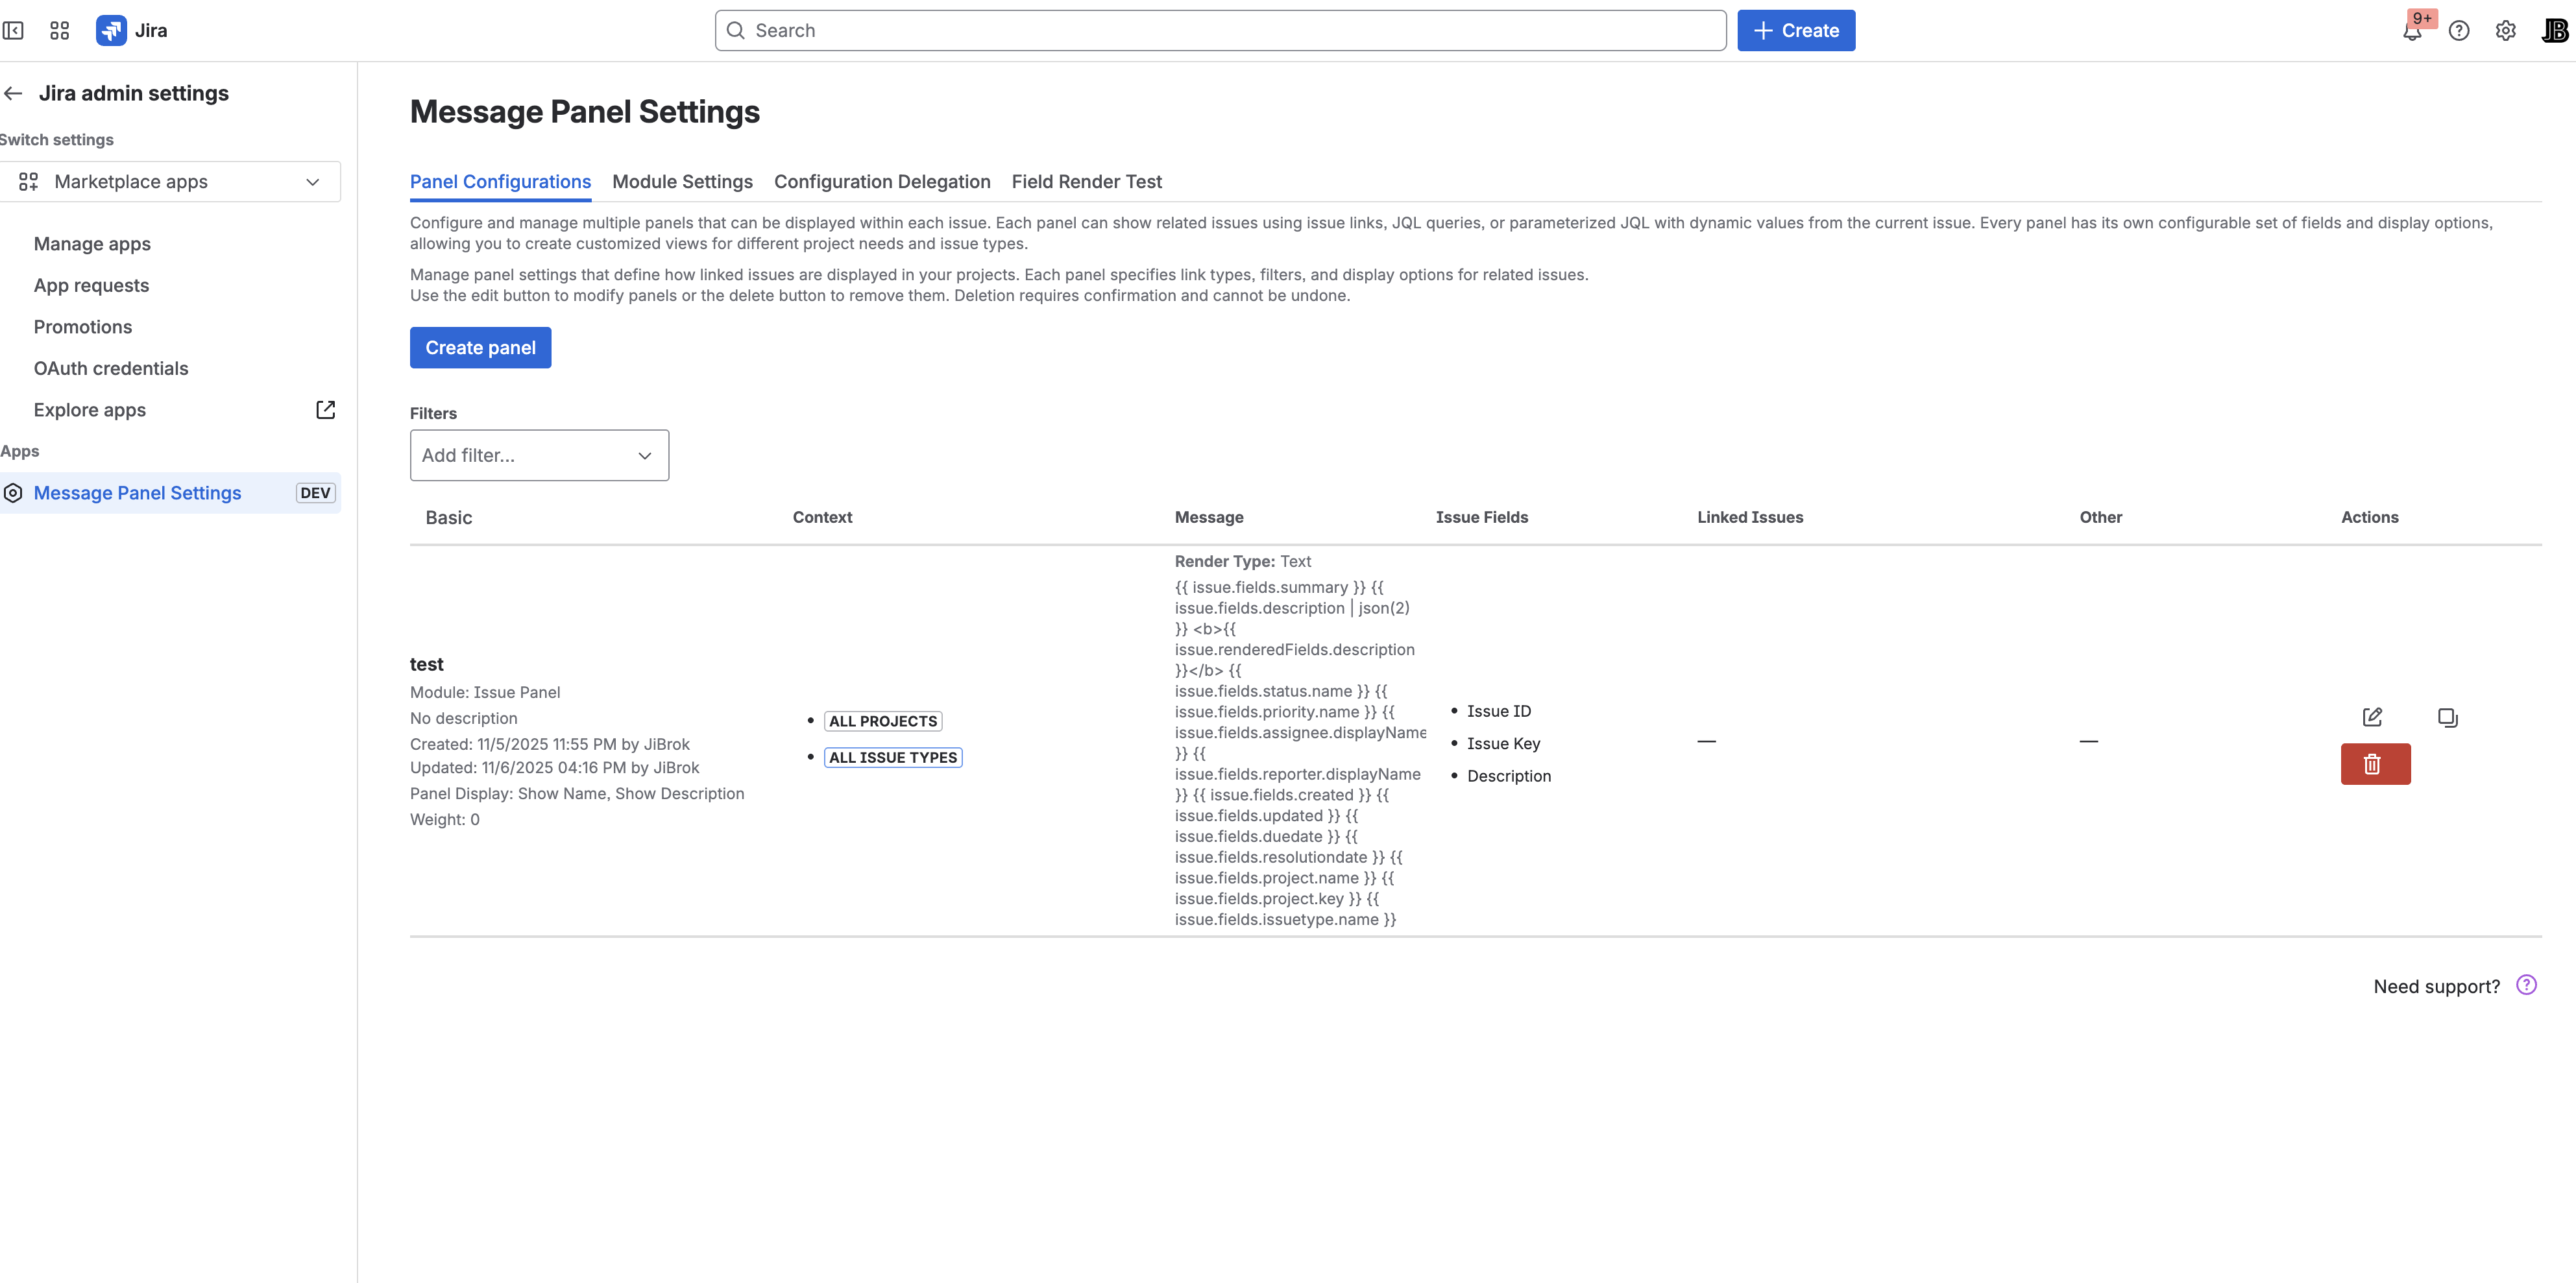
The Message Panel Settings page has four main tabs:
- Panel Configurations - Create and manage message panels
- Module Settings - Enable/disable display modules
- Configuration Delegation - Control project admin access
- Field Render Test - Test field rendering with real data
Panel Configuration Tabs
When creating or editing a panel, you’ll work with multiple tabs to configure different aspects:
Basic Settings Tab
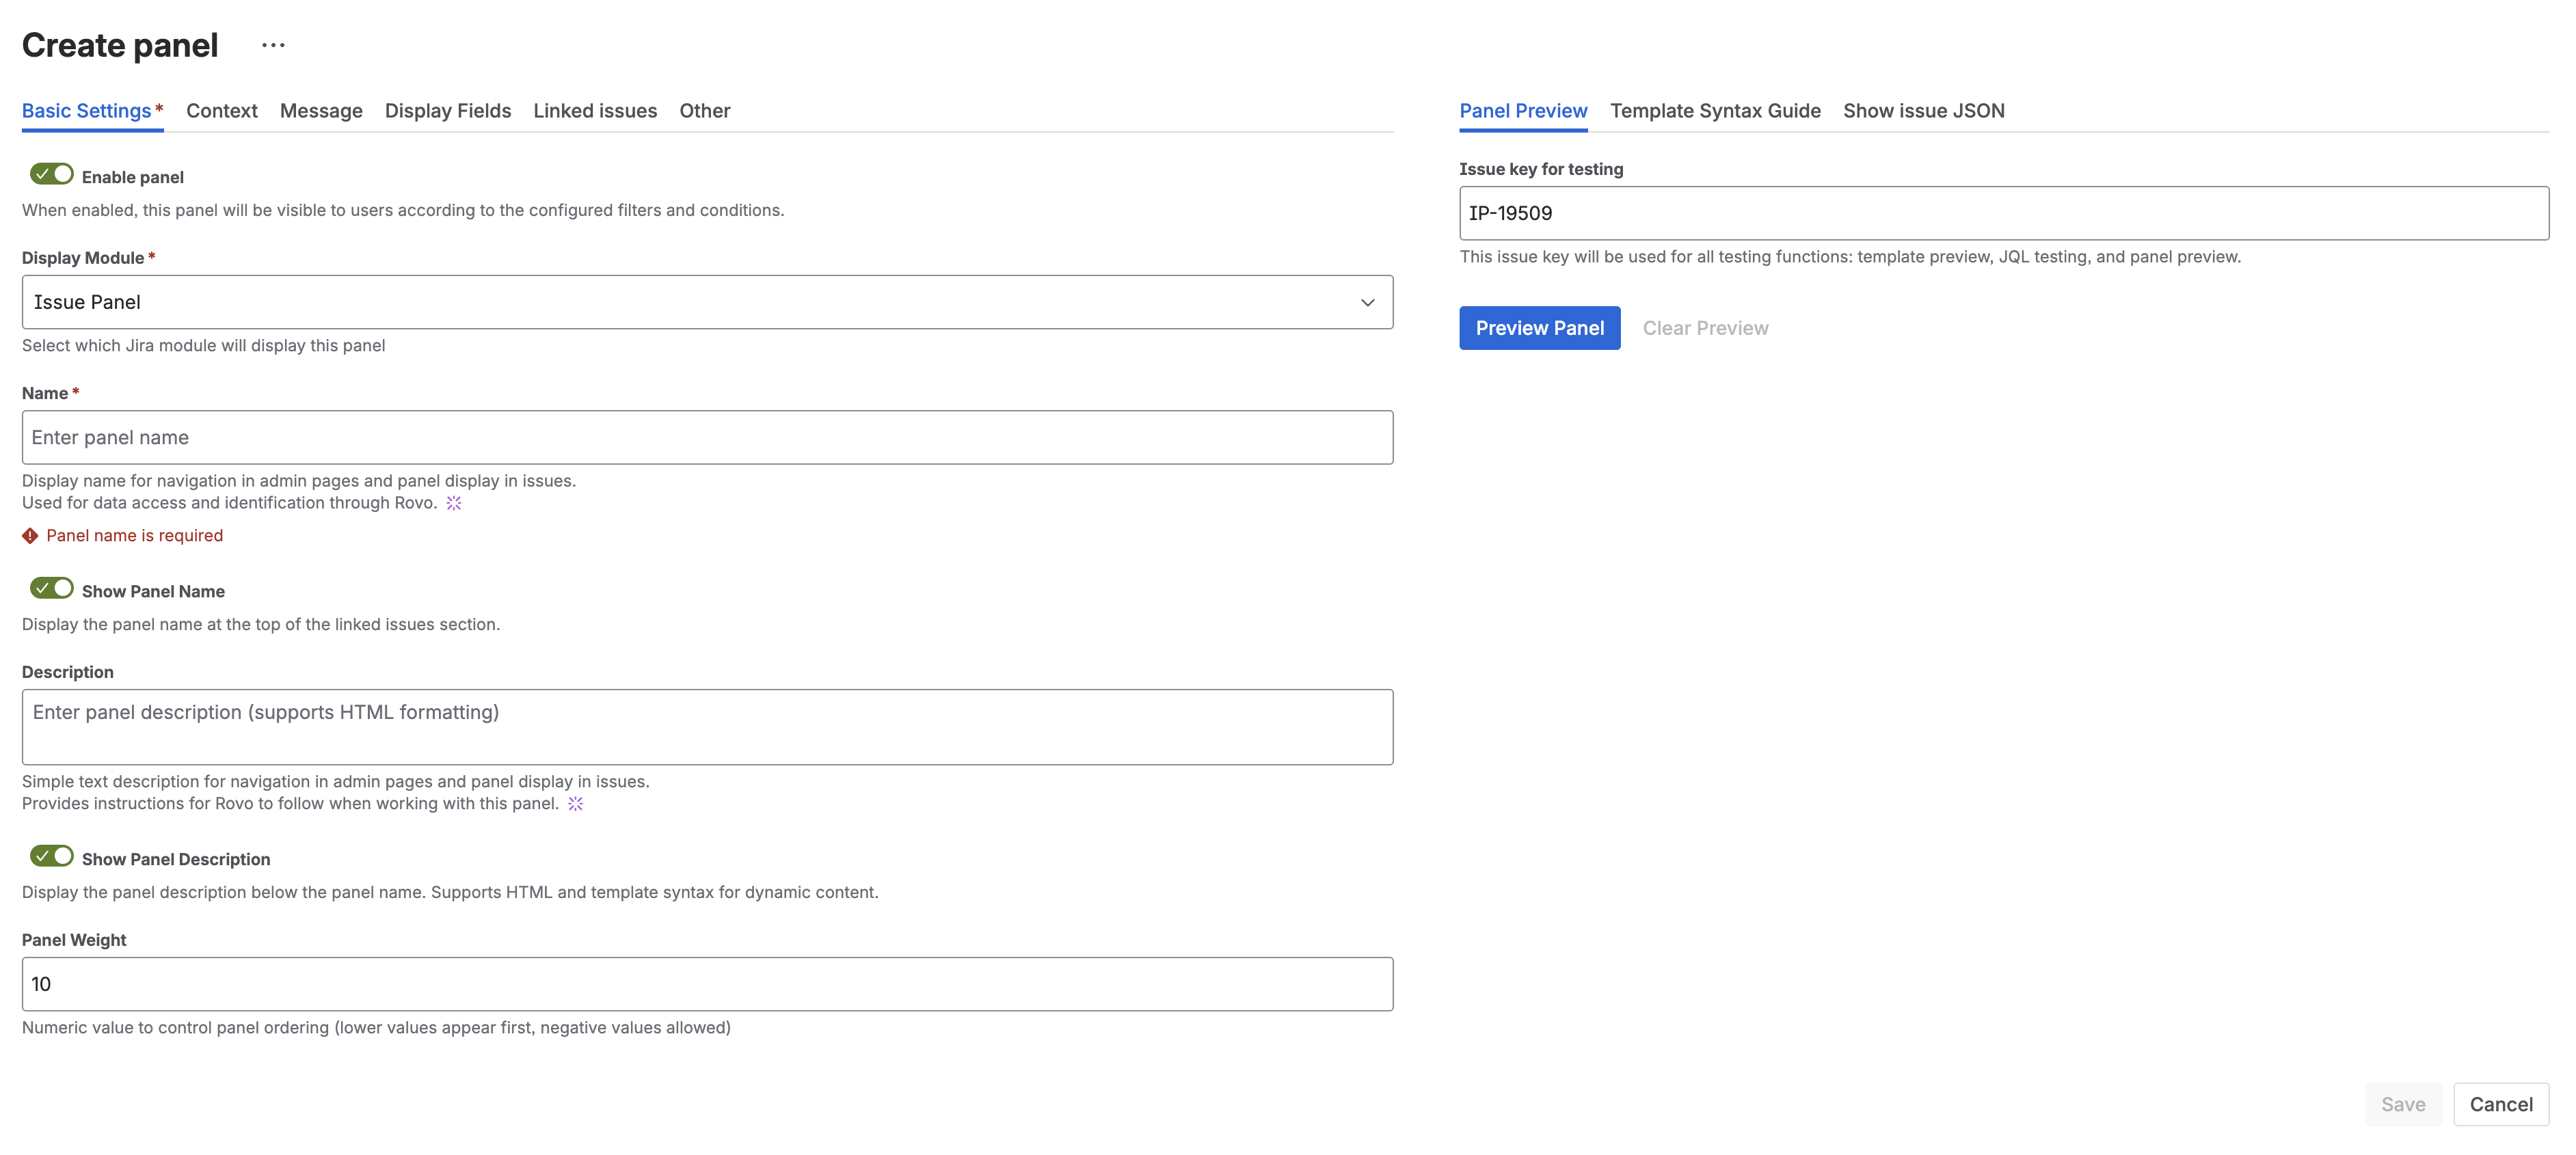
Basic Settings
Name
- Required field
- Displayed as the panel title
- Use descriptive names: “Blockers”, “Related Bugs”, “Epic Progress”
Description
- Optional field
- Supports dynamic templates with issue data
- Can reference fields and linked issues
- See Dynamic Templates for syntax
Example:
This issue has {{ linkedIssues.length }} related items
Data Source
Choose what data the panel should display:
Linked Issues
Display issues connected via link types.
- Select one or more link types with direction (inward/outward)
- Issues are aggregated from all selected link types
- Examples: “is blocked by”, “relates to”, “is parent of”
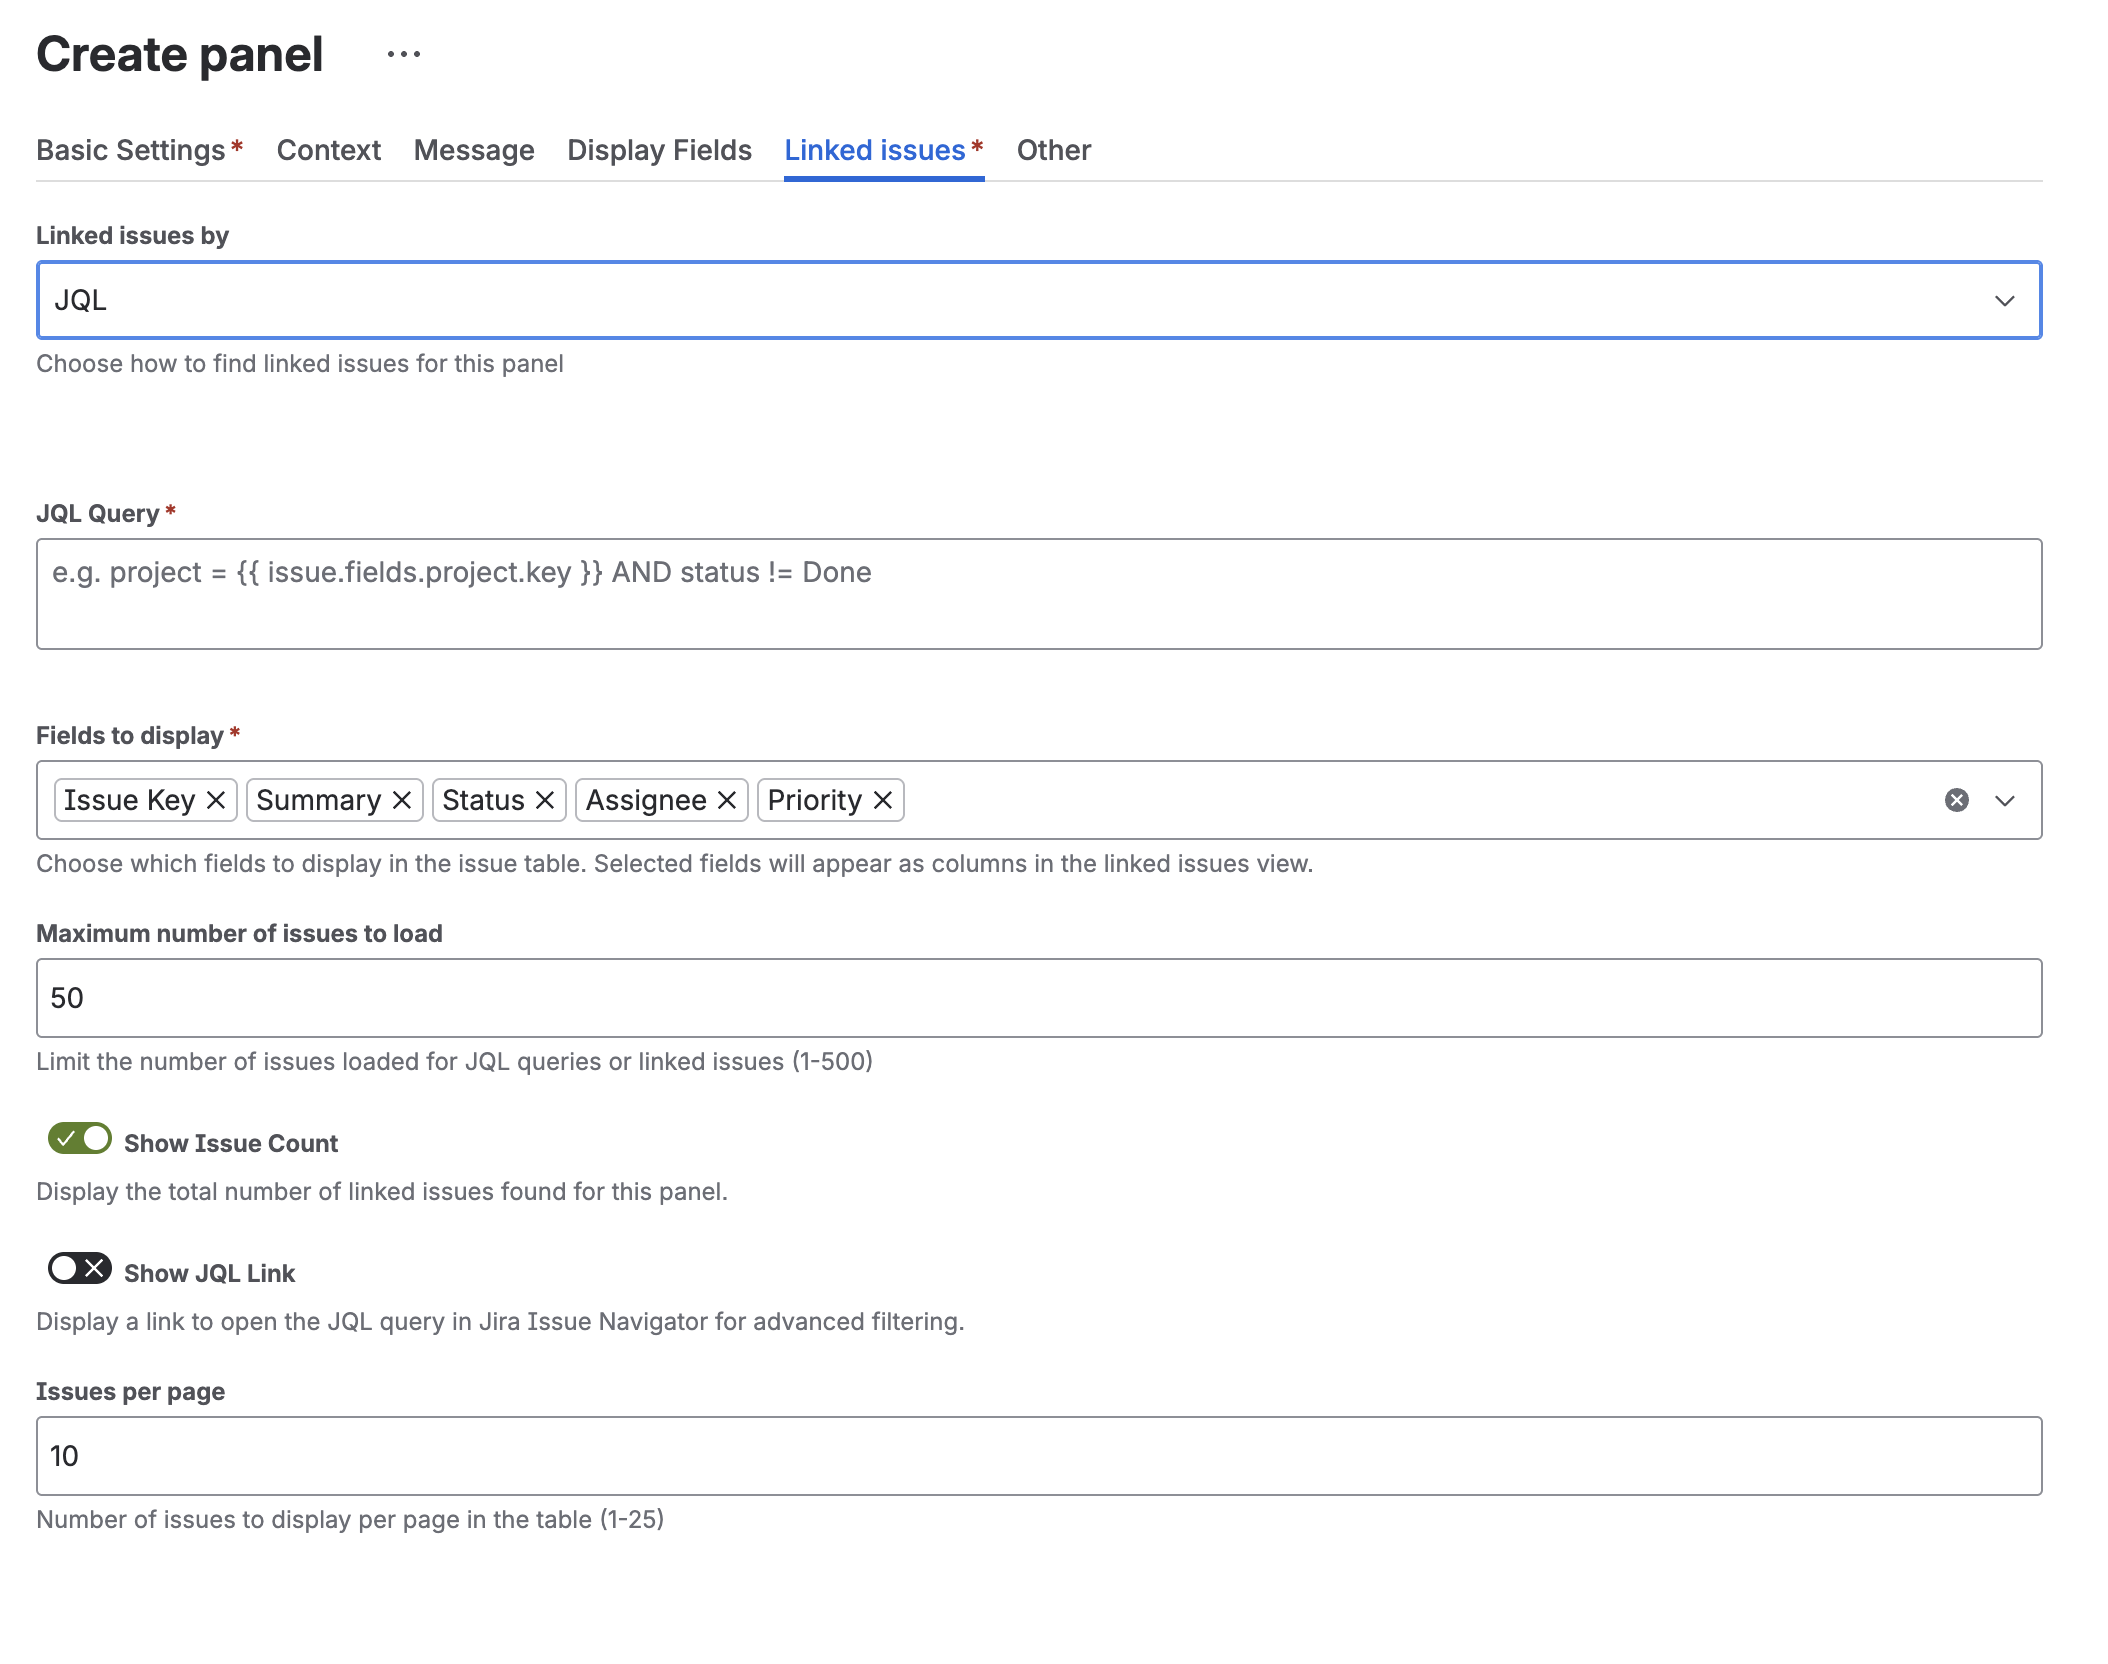
Configure how linked issues are displayed:
- Linked issues by - Choose JQL or Link Types
- JQL Query - Define custom query to find related issues
- Fields to display - Select which columns appear in the issue table
- Maximum number of issues to load - Limit results (1-500)
- Show Issue Count - Display total number of linked issues
- Show JQL Link - Add link to open query in Issue Navigator
- Issues per page - Control pagination (1-25)
JQL Query
Display issues matching a JQL search.
- Enter a valid JQL query
- Supports template variables:
project = {{ issue.fields.project.id }} - Maximum 100 issues by default
Template variables in JQL:
"Epic Link" = {{ issue.key }}
project = {{ projectId }} AND type = Bug
Empty
Create a message-only panel with no issue table.
Field Selection
Choose which Jira fields to display in the issue table.
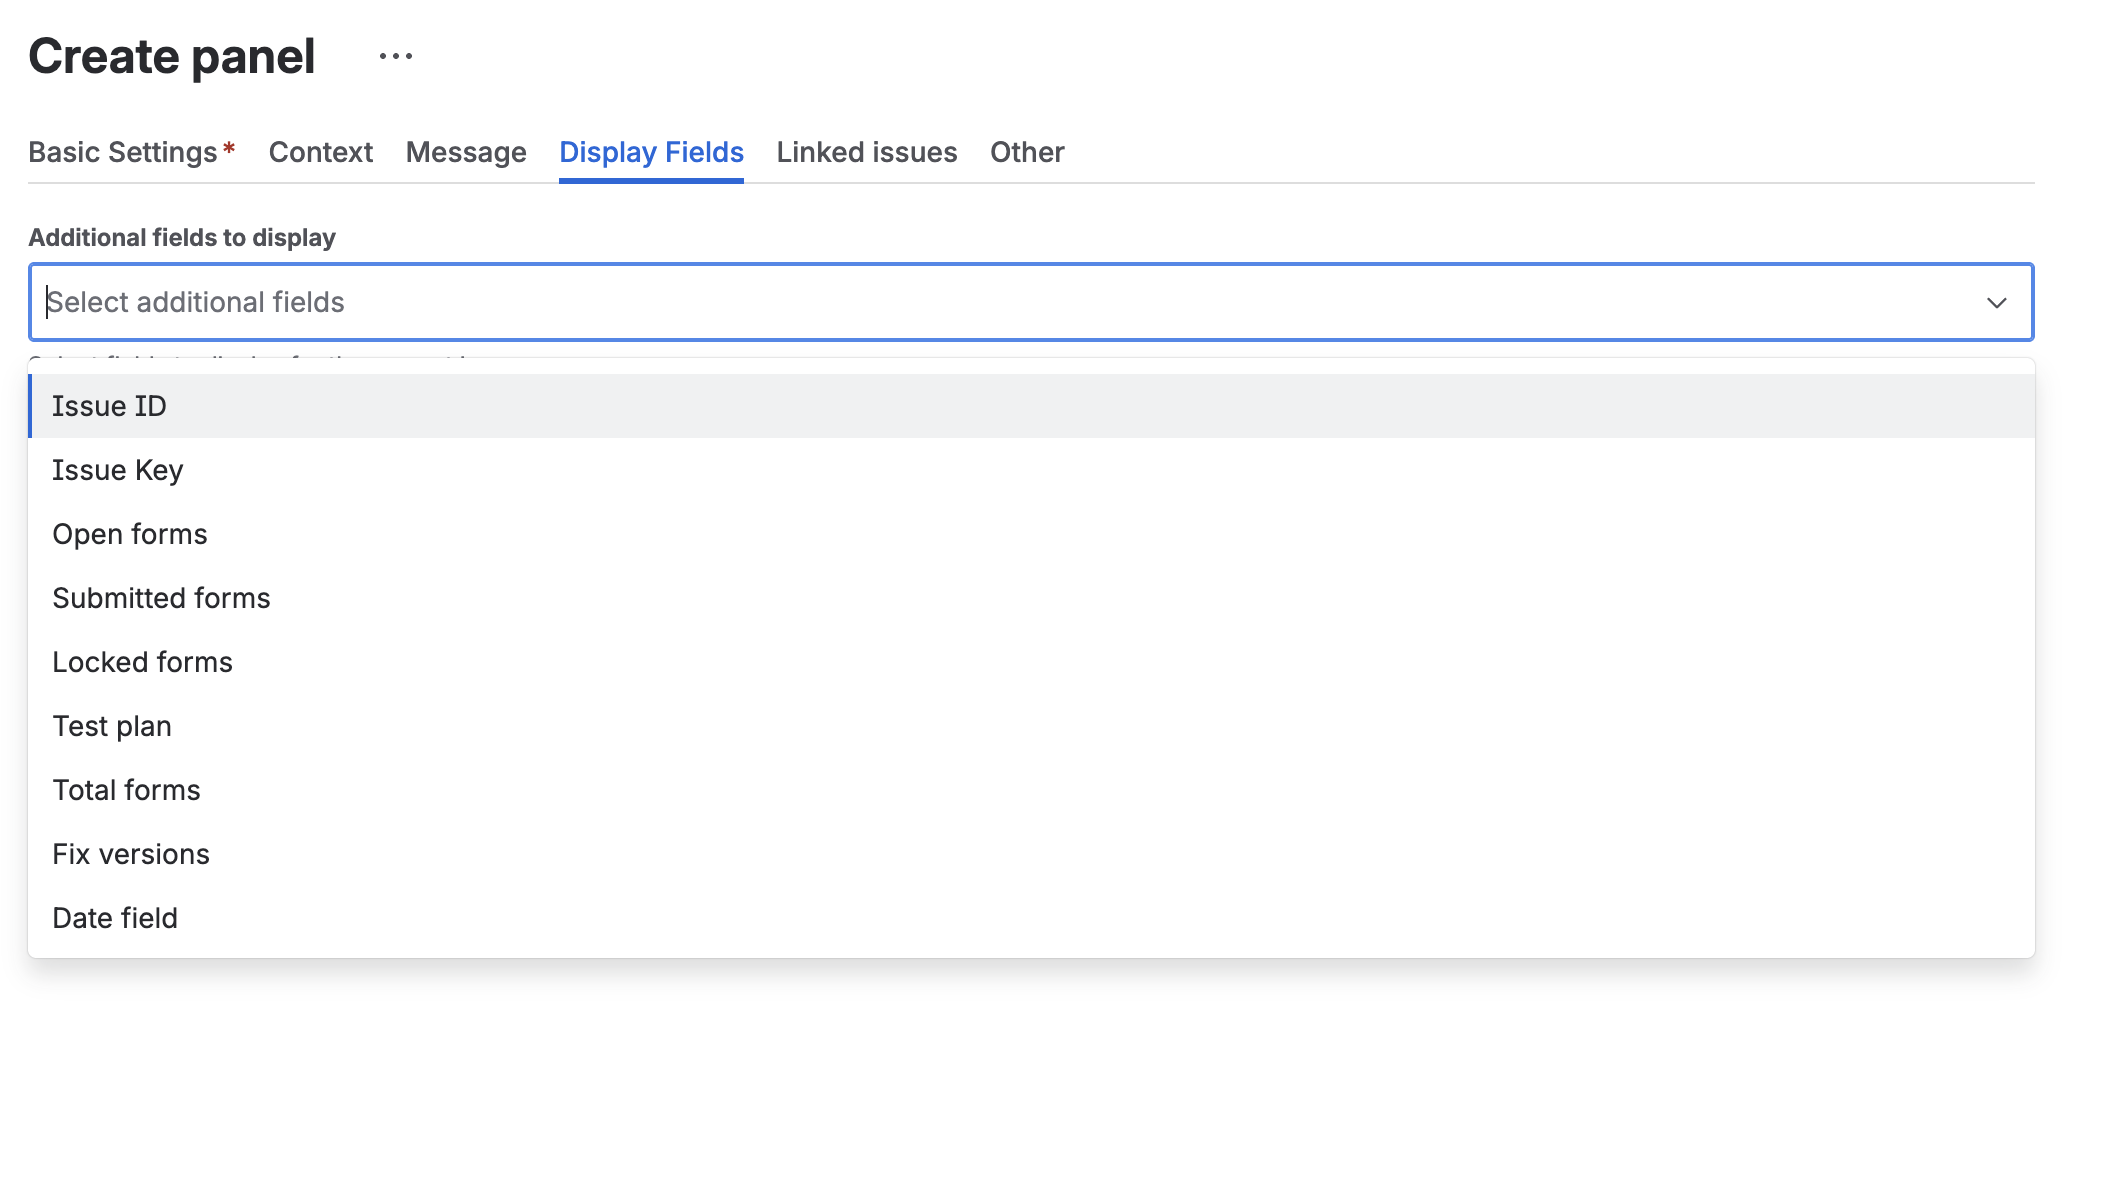
- Click Select Fields button
- Select/deselect fields with checkboxes
- Reorder fields by dragging
- Click Save
Available field types:
- System fields (Issue ID, Issue Key, Summary, Status, Priority, etc.)
- Custom fields
- Form fields (Open forms, Submitted forms, Locked forms)
- Test plan related fields
- Date fields
Default fields: Key, Summary, Status, Priority, Assignee
Display Settings
Where Your Message Will Appear
The configured message panel will be displayed based on TWO key settings:
- Display Module - WHERE the panel appears (which location in Jira)
- Context Filters - WHEN the panel appears (which issues and conditions)
Both settings work together to control panel visibility. The panel will only appear when:
- The selected module is enabled globally (see Modules Guide)
- The current issue matches all context filters (project, issue type, JQL conditions)
- All panel display conditions are met
Display Module
Choose where the panel appears in Jira:
- Issue Panel - Right sidebar on issue view page as a collapsible panel
- Issue Activity - Activity feed timeline, mixed with comments and history
- Issue Context Panel - Context panel on the right side of issue view
- Issue Action - Custom action button in the issue toolbar
Important: Each panel configuration targets ONE specific module. To show the same content in multiple locations, create separate panel configurations for each module.
See Modules Guide for detailed information about each module type with visual examples showing how they appear in Jira.
Pagination
- Rows Per Page - Number of issues per page (default: 10)
- Max Issues - Maximum issues to load (default: 100)
Weight
Control the display order of multiple panels:
- Lower weights appear first
- Range: -1000 to 1000
- Default: 0
Context Filters - When Your Panel Appears
Control which issues display the panel. These filters determine WHEN and FOR WHICH ISSUES your configured message will be visible.
How it works: The panel appears only when ALL of the following conditions are met:
- Issue belongs to selected projects (if any specified)
- Issue has selected issue type (if any specified)
- Issue matches JQL condition (if any specified)
- Current user is in selected fields (if any specified)
If you leave all filters empty, the panel will appear for ALL issues (where the module is available).
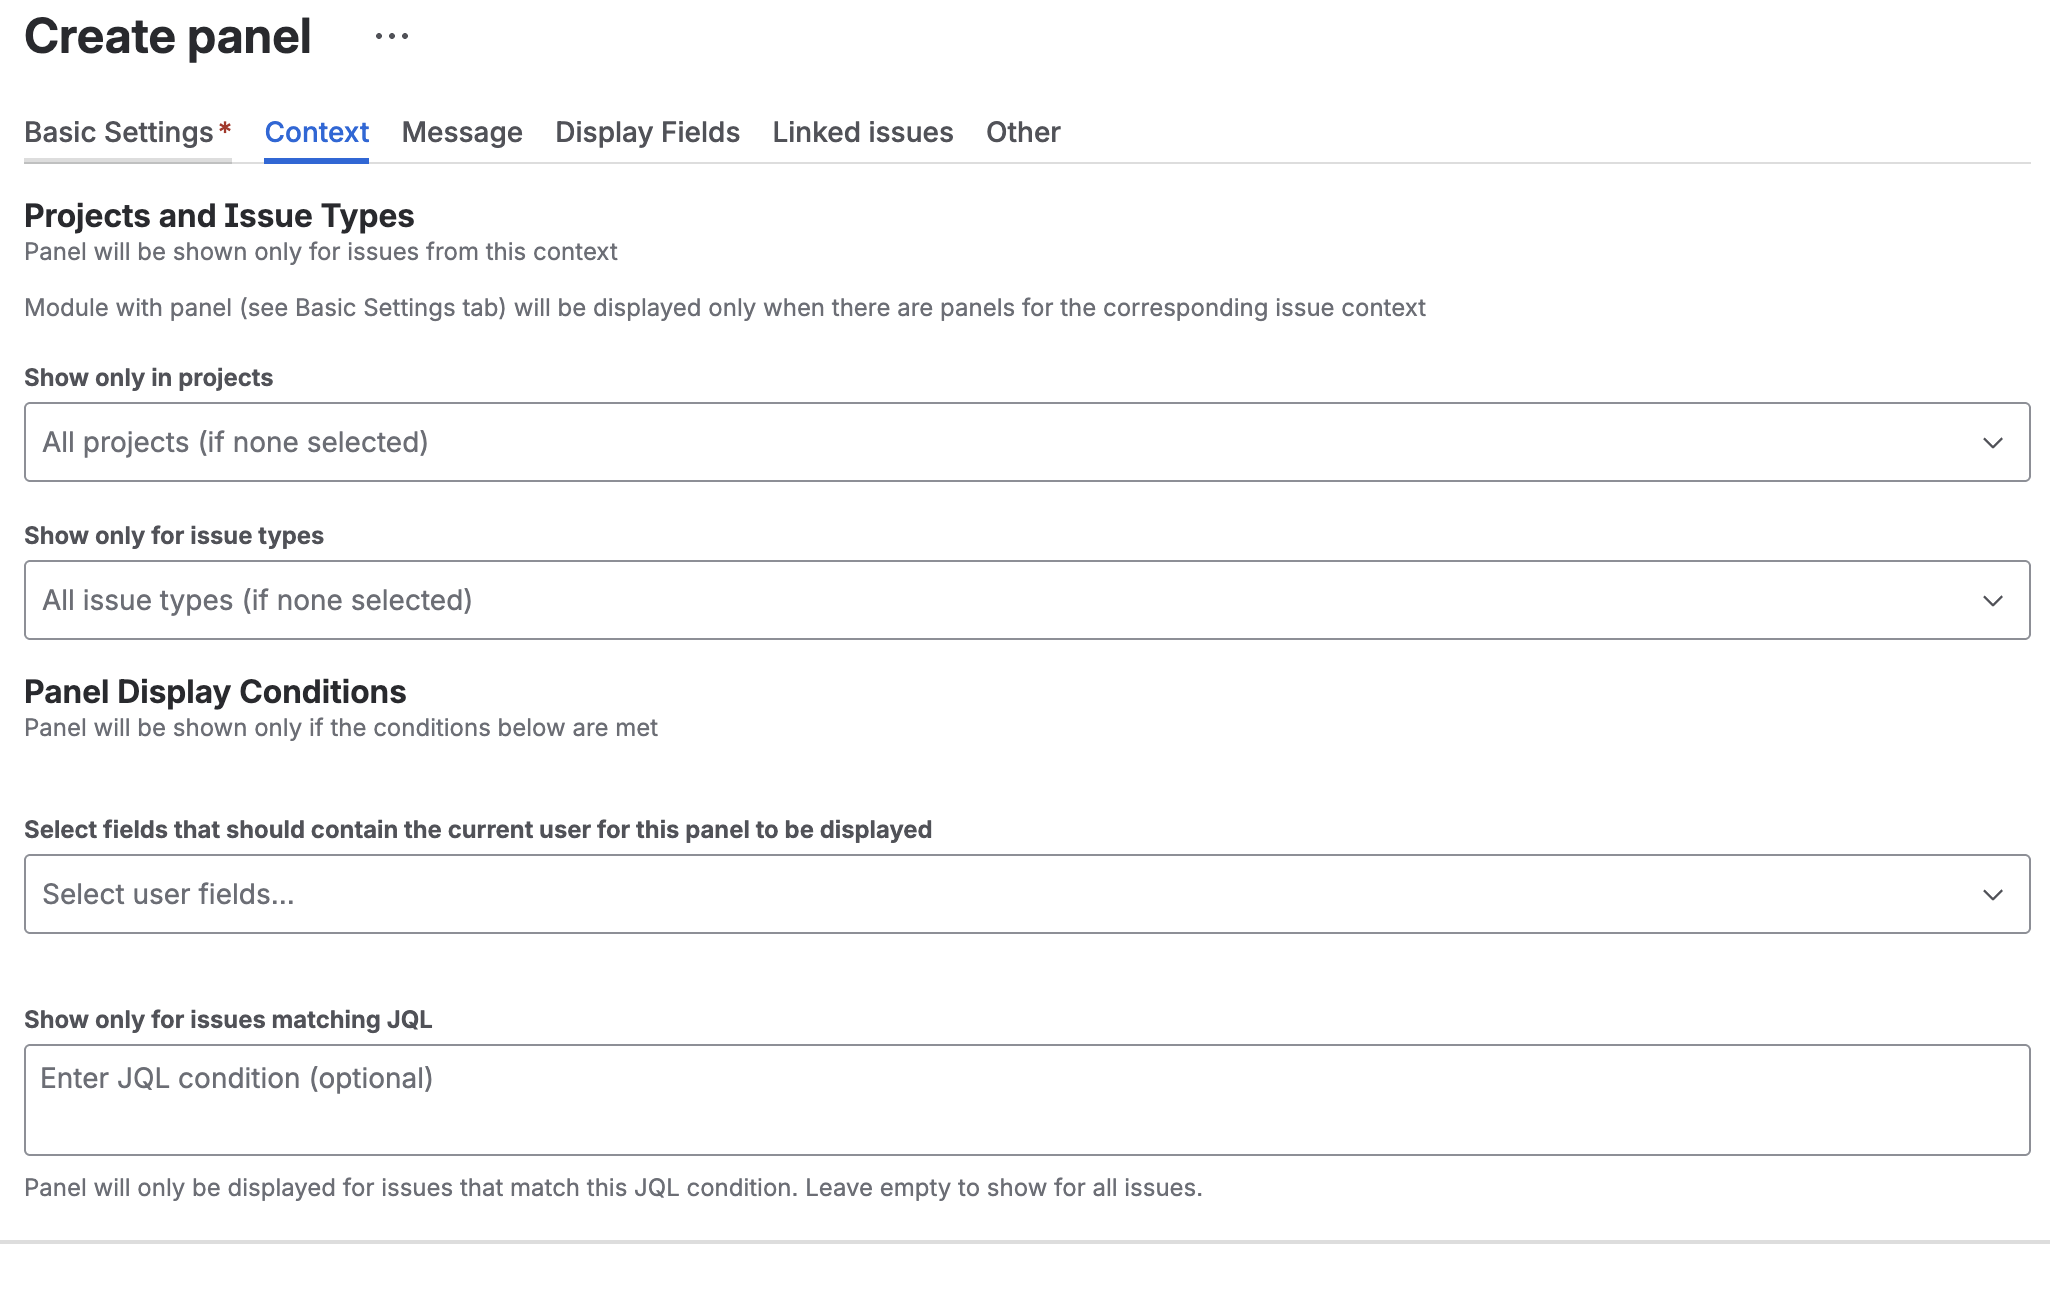
Projects and Issue Types
Panel will be shown only for issues from this context.
- Show only in projects - Select specific projects, or leave empty for all projects
- Show only for issue types - Select specific issue types, or leave empty for all types
Panel Display Conditions
Panel will be shown only if the conditions below are met.
- Select fields that should contain the current user - Show panel only when current user is in specific fields (e.g., Assignee, Reporter)
- Show only for issues matching JQL - Additional JQL condition for showing the panel
Display JQL Examples
priority in (Highest, High)
status in ("In Progress", "In Review")
assignee =
Panel will only be displayed for issues that match this JQL condition. Leave empty to show for all issues.
Example: Combining Module and Context Settings
Scenario: Show a “Blockers” panel only for high-priority issues in the “Development” project
Configuration:
- Display Module: Issue Panel (appears in right sidebar)
- Show only in projects: Development
- Show only for issue types: Leave empty (all types)
- Display JQL:
priority in (High, Highest)
Result: The “Blockers” panel will appear in the right sidebar ONLY when:
- Viewing an issue from the “Development” project AND
- The issue has priority “High” or “Highest”
If you view a “Low” priority issue or an issue from another project, the panel will not appear at all.
Message Format
Choose how the message content is rendered:
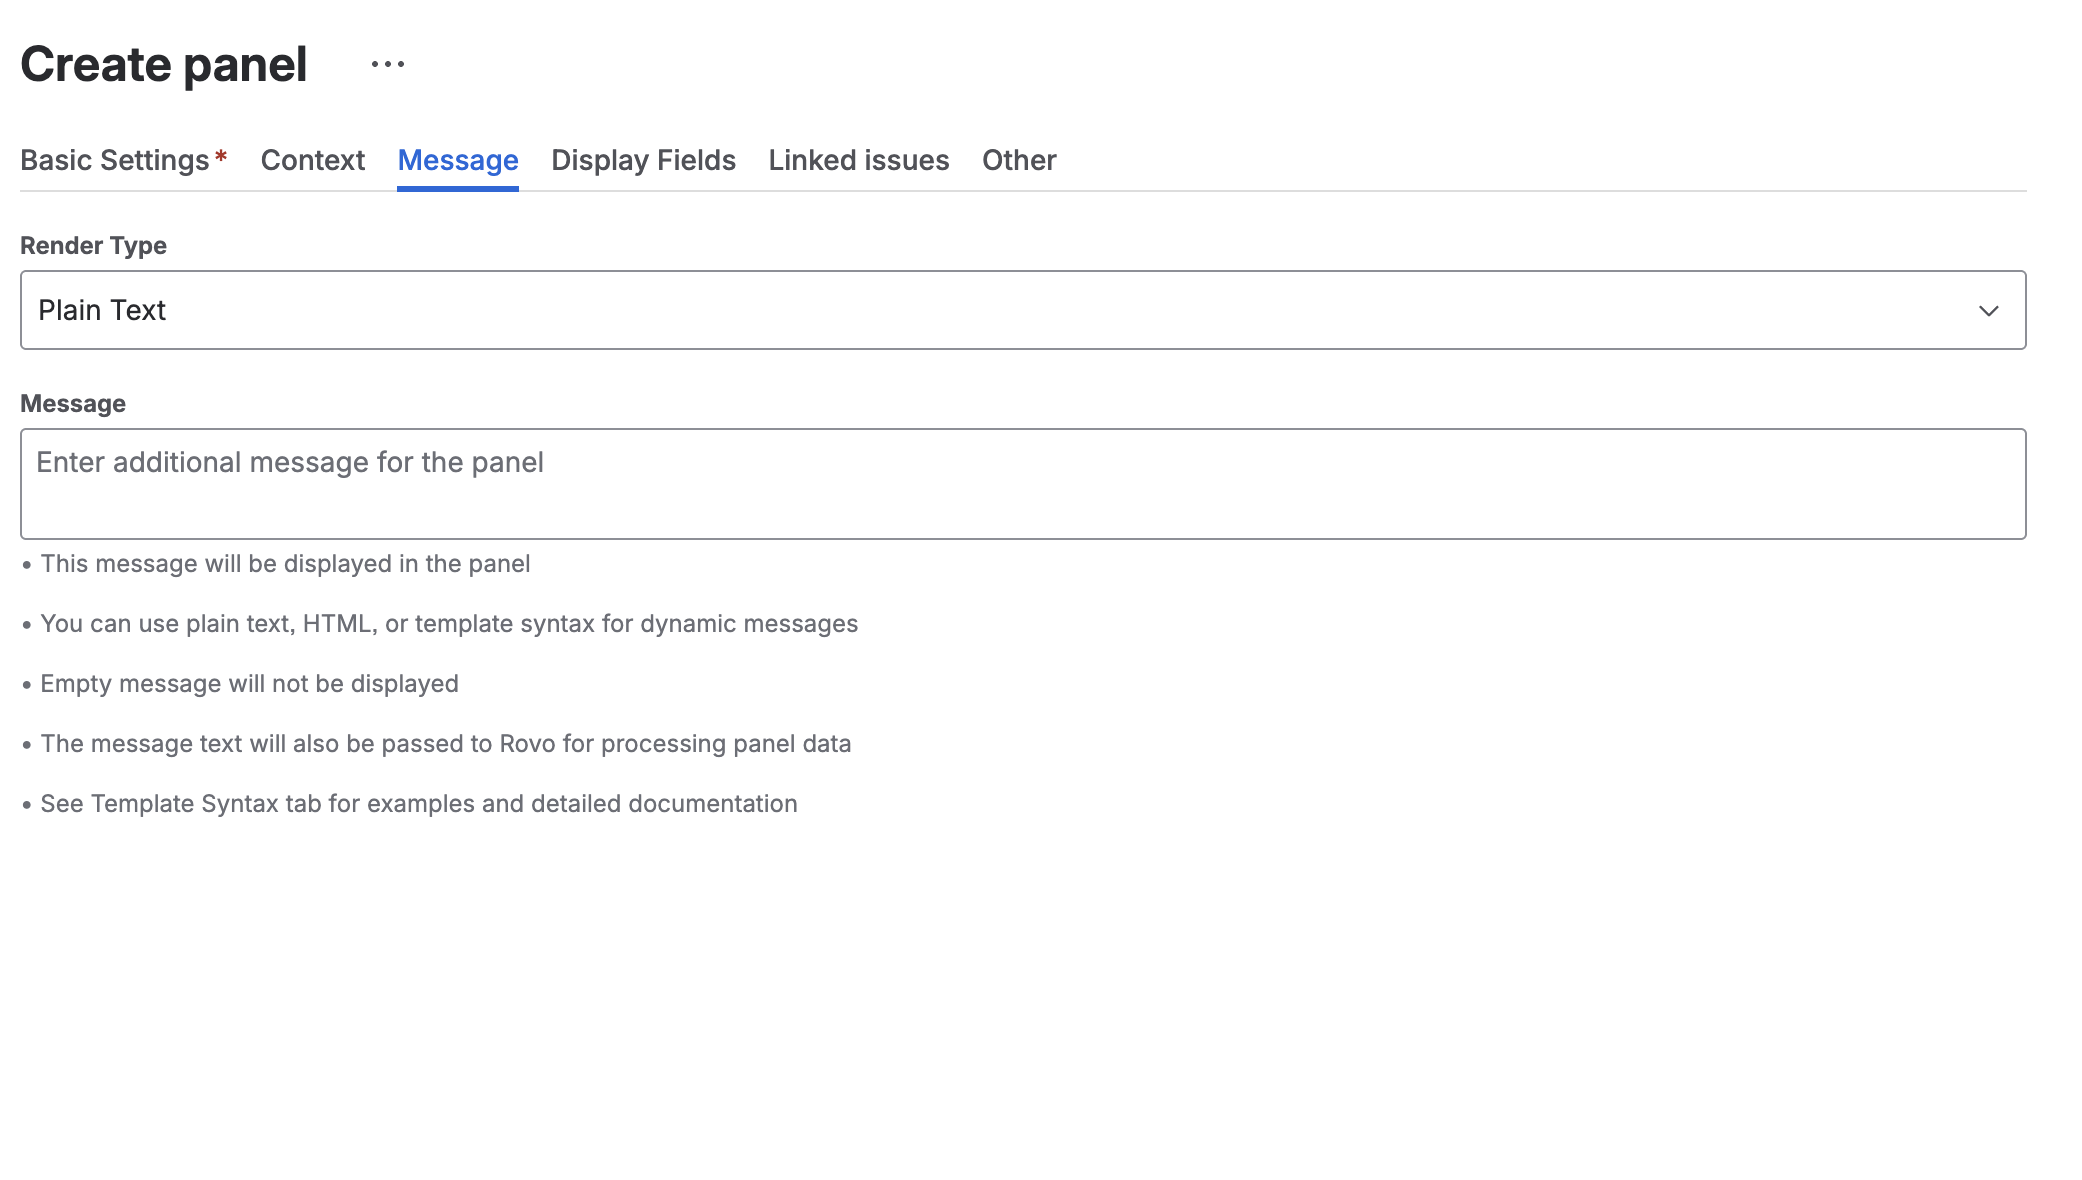
Render Type
- Plain Text - No formatting, displays text as-is
- HTML - Full HTML support with styling
- Markdown - GitHub-flavored Markdown
- ADF - Atlassian Document Format
Message
Enter the content to display in the panel:
- This message will be displayed in the panel
- You can use plain text, HTML, or template syntax for dynamic messages
- Empty message will not be displayed
- The message text will also be passed to Rovo for processing panel data
See Template Syntax Guide for examples and detailed documentation.
Advanced Options
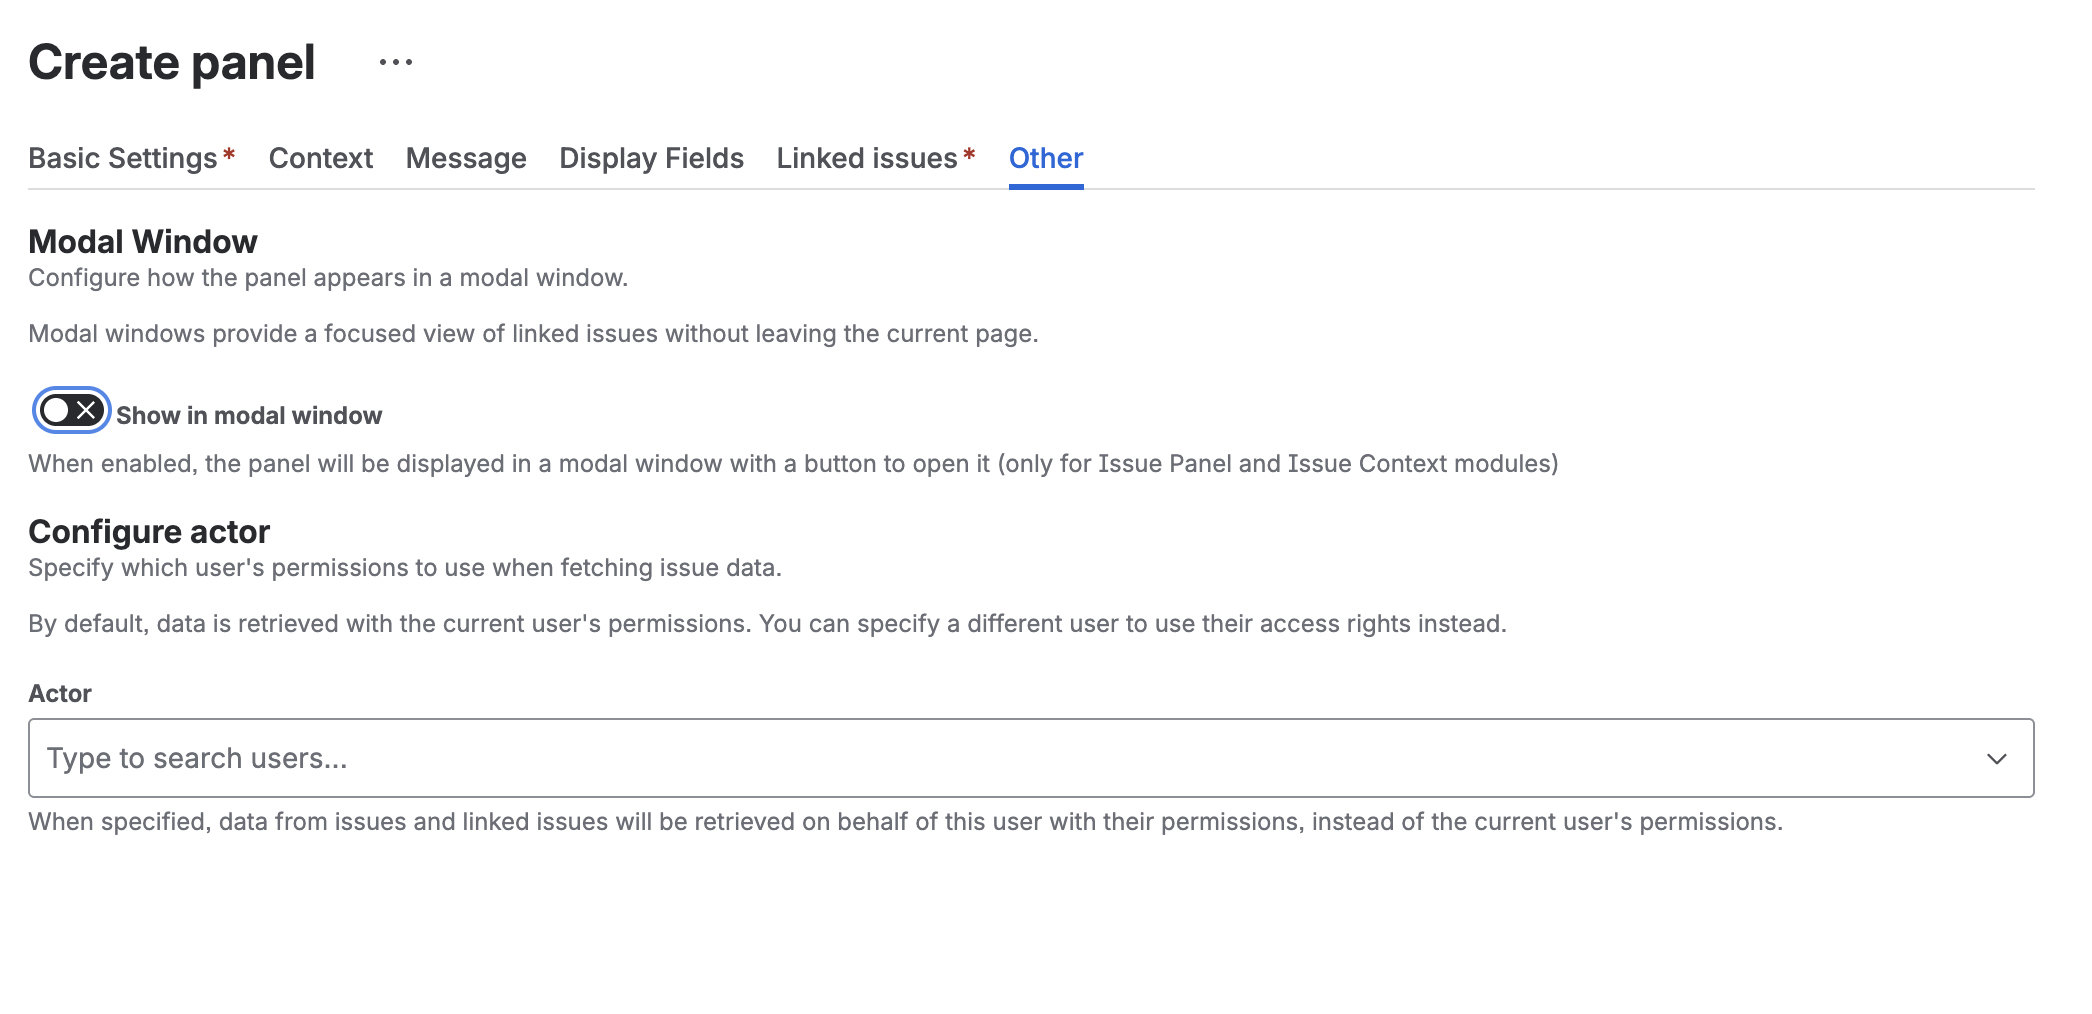
Modal Window (Issue Panel and Issue Context modules only)
Display the panel in a modal dialog:
- Show in modal window - Enable modal window display
- When enabled, the panel will be displayed in a modal window with a button to open it
Modal windows provide a focused view of linked issues without leaving the current page.
Configure Actor
Specify which user’s permissions to use when fetching issue data:
- By default, data is retrieved with the current user’s permissions
- You can specify a different user to use their access rights instead
- Actor - Type to search users
- When specified, data from issues and linked issues will be retrieved on behalf of this user with their permissions, instead of the current user’s permissions
This is useful for showing data that requires specific permissions.
Testing and Preview Tools
The panel configuration interface provides several helpful tools for testing and previewing your panels:
Panel Preview
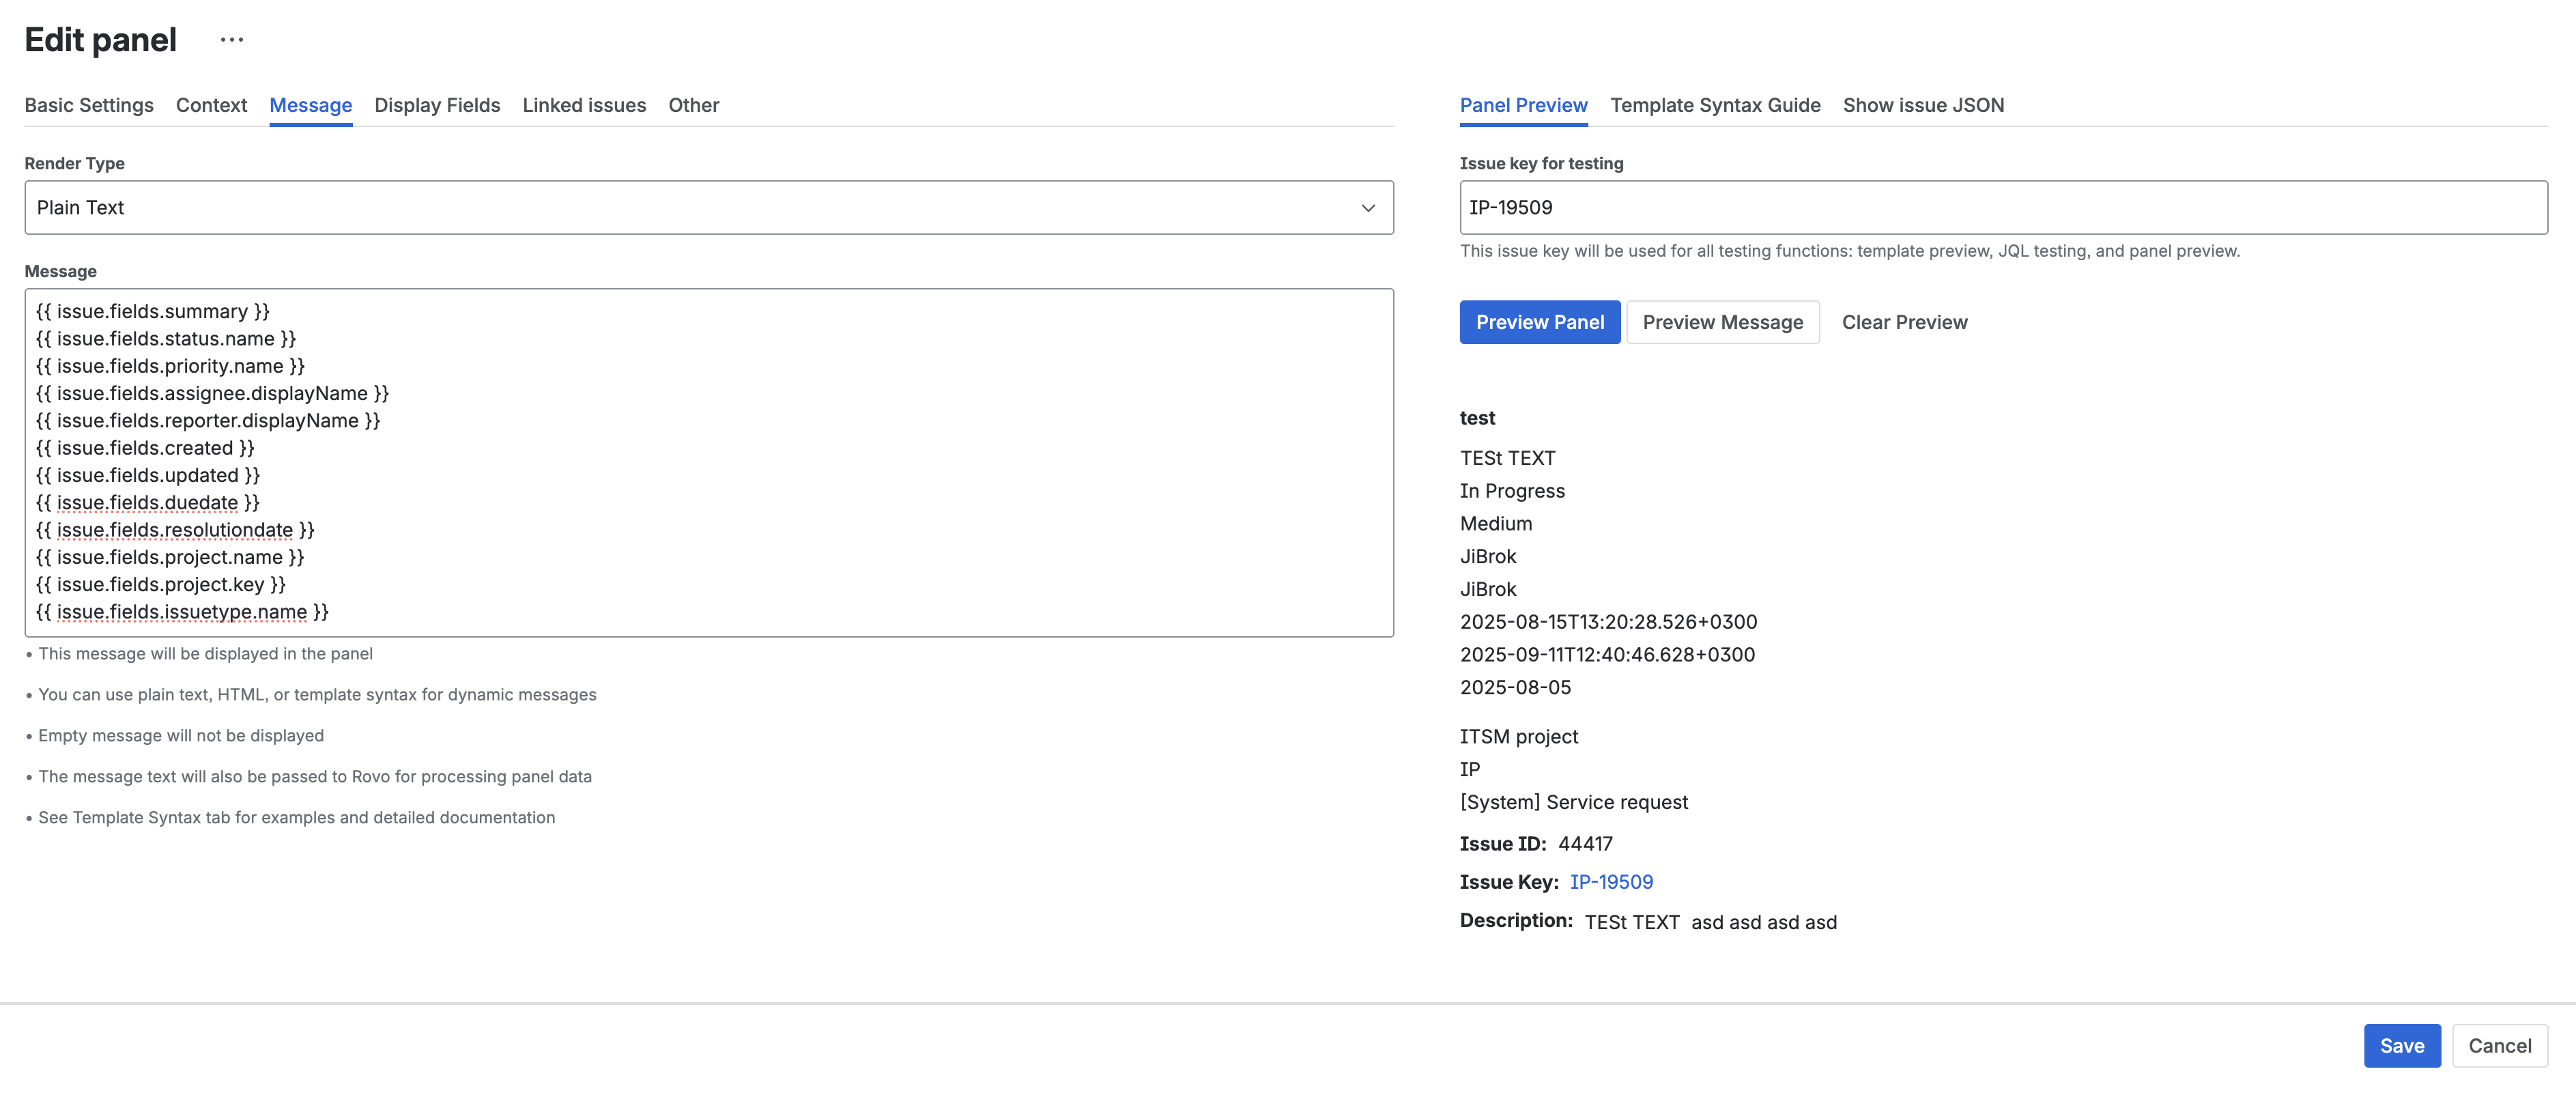
Test your panel configuration with real issue data:
- Enter an Issue key for testing (e.g., IP-19509)
- Click Preview Panel button
- View how the panel will appear with actual data
The preview shows:
- Rendered message with dynamic values
- Issue fields and their values
- Linked issues table (if configured)
- Exactly how users will see the panel
Template Syntax Guide
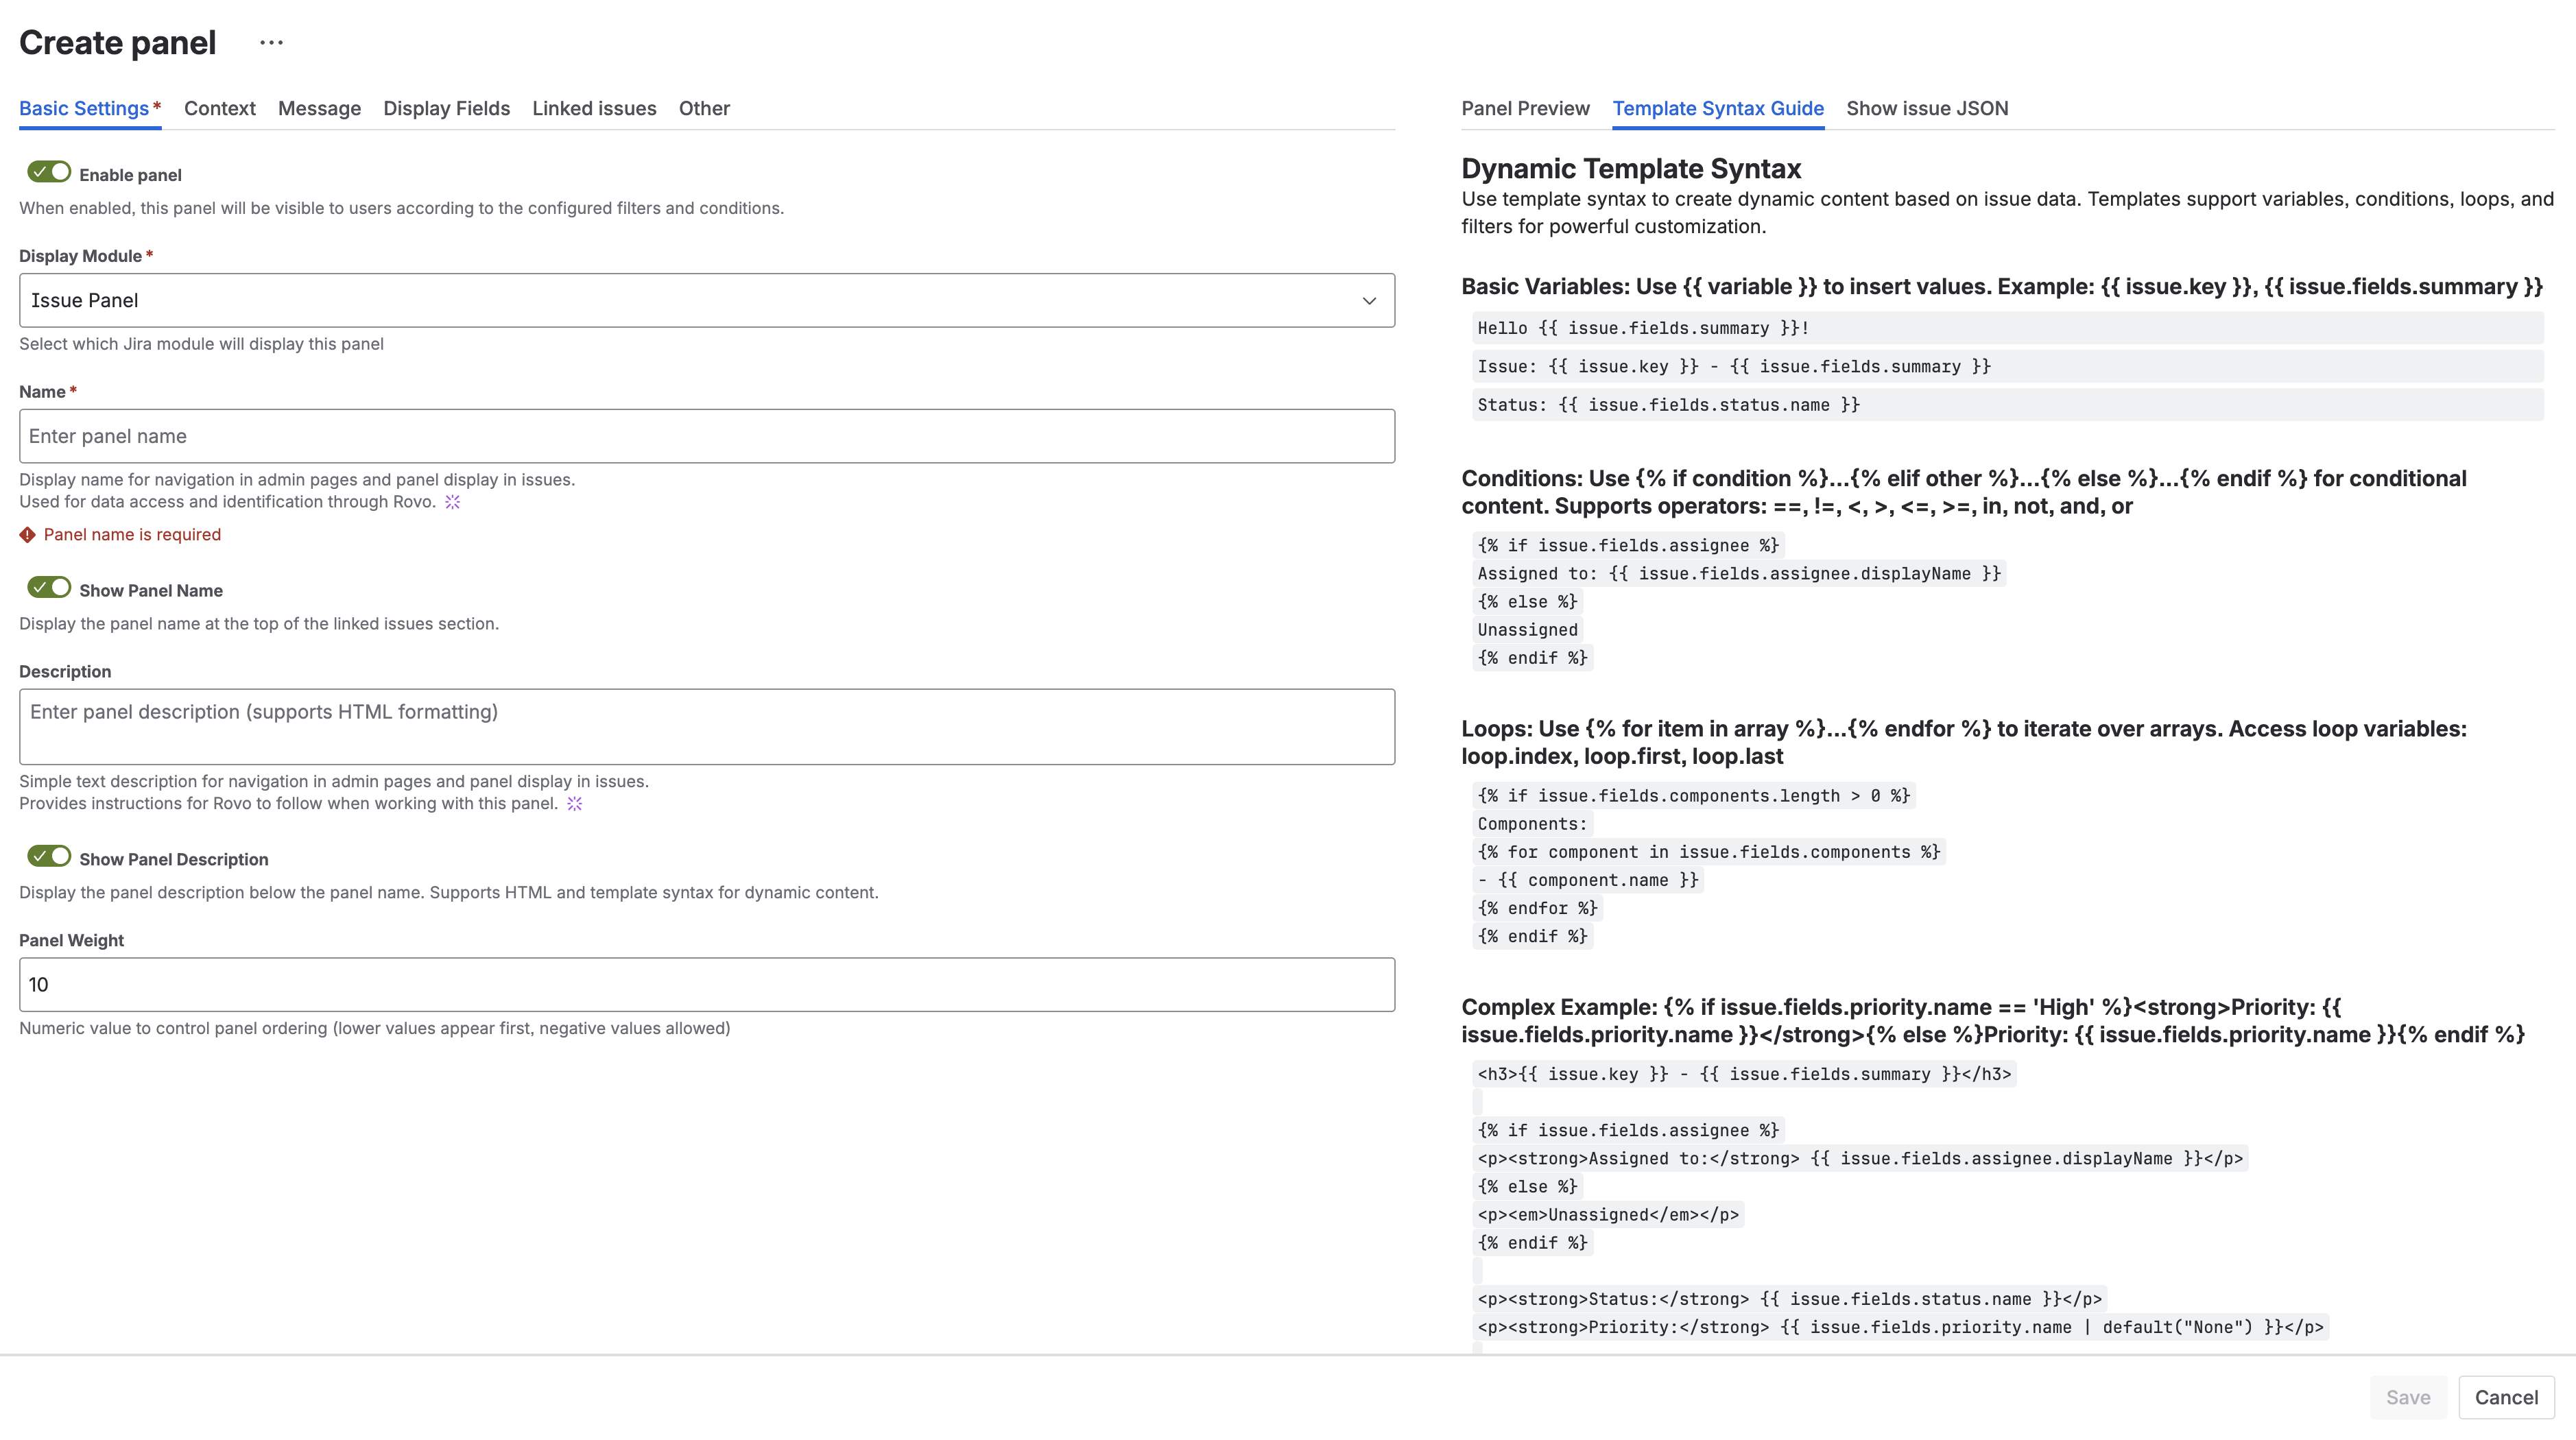
Quick reference for dynamic template syntax:
- Basic Variables - Access issue fields with
{{ variable }} - Conditions - Control content with
{% if condition %} -
Loops - Iterate over arrays with
{% for item in array %} - Complex Examples - Ready-to-use template patterns
See Dynamic Templates for complete documentation.
Show Issue JSON

View the complete JSON data structure for any issue:
- Enter an issue key
- Click Download Issue Data
- Explore all available fields and values
This helps you:
- Discover field IDs and structure
- Find custom field names
- Understand data format
- Build accurate templates
Field Render Test
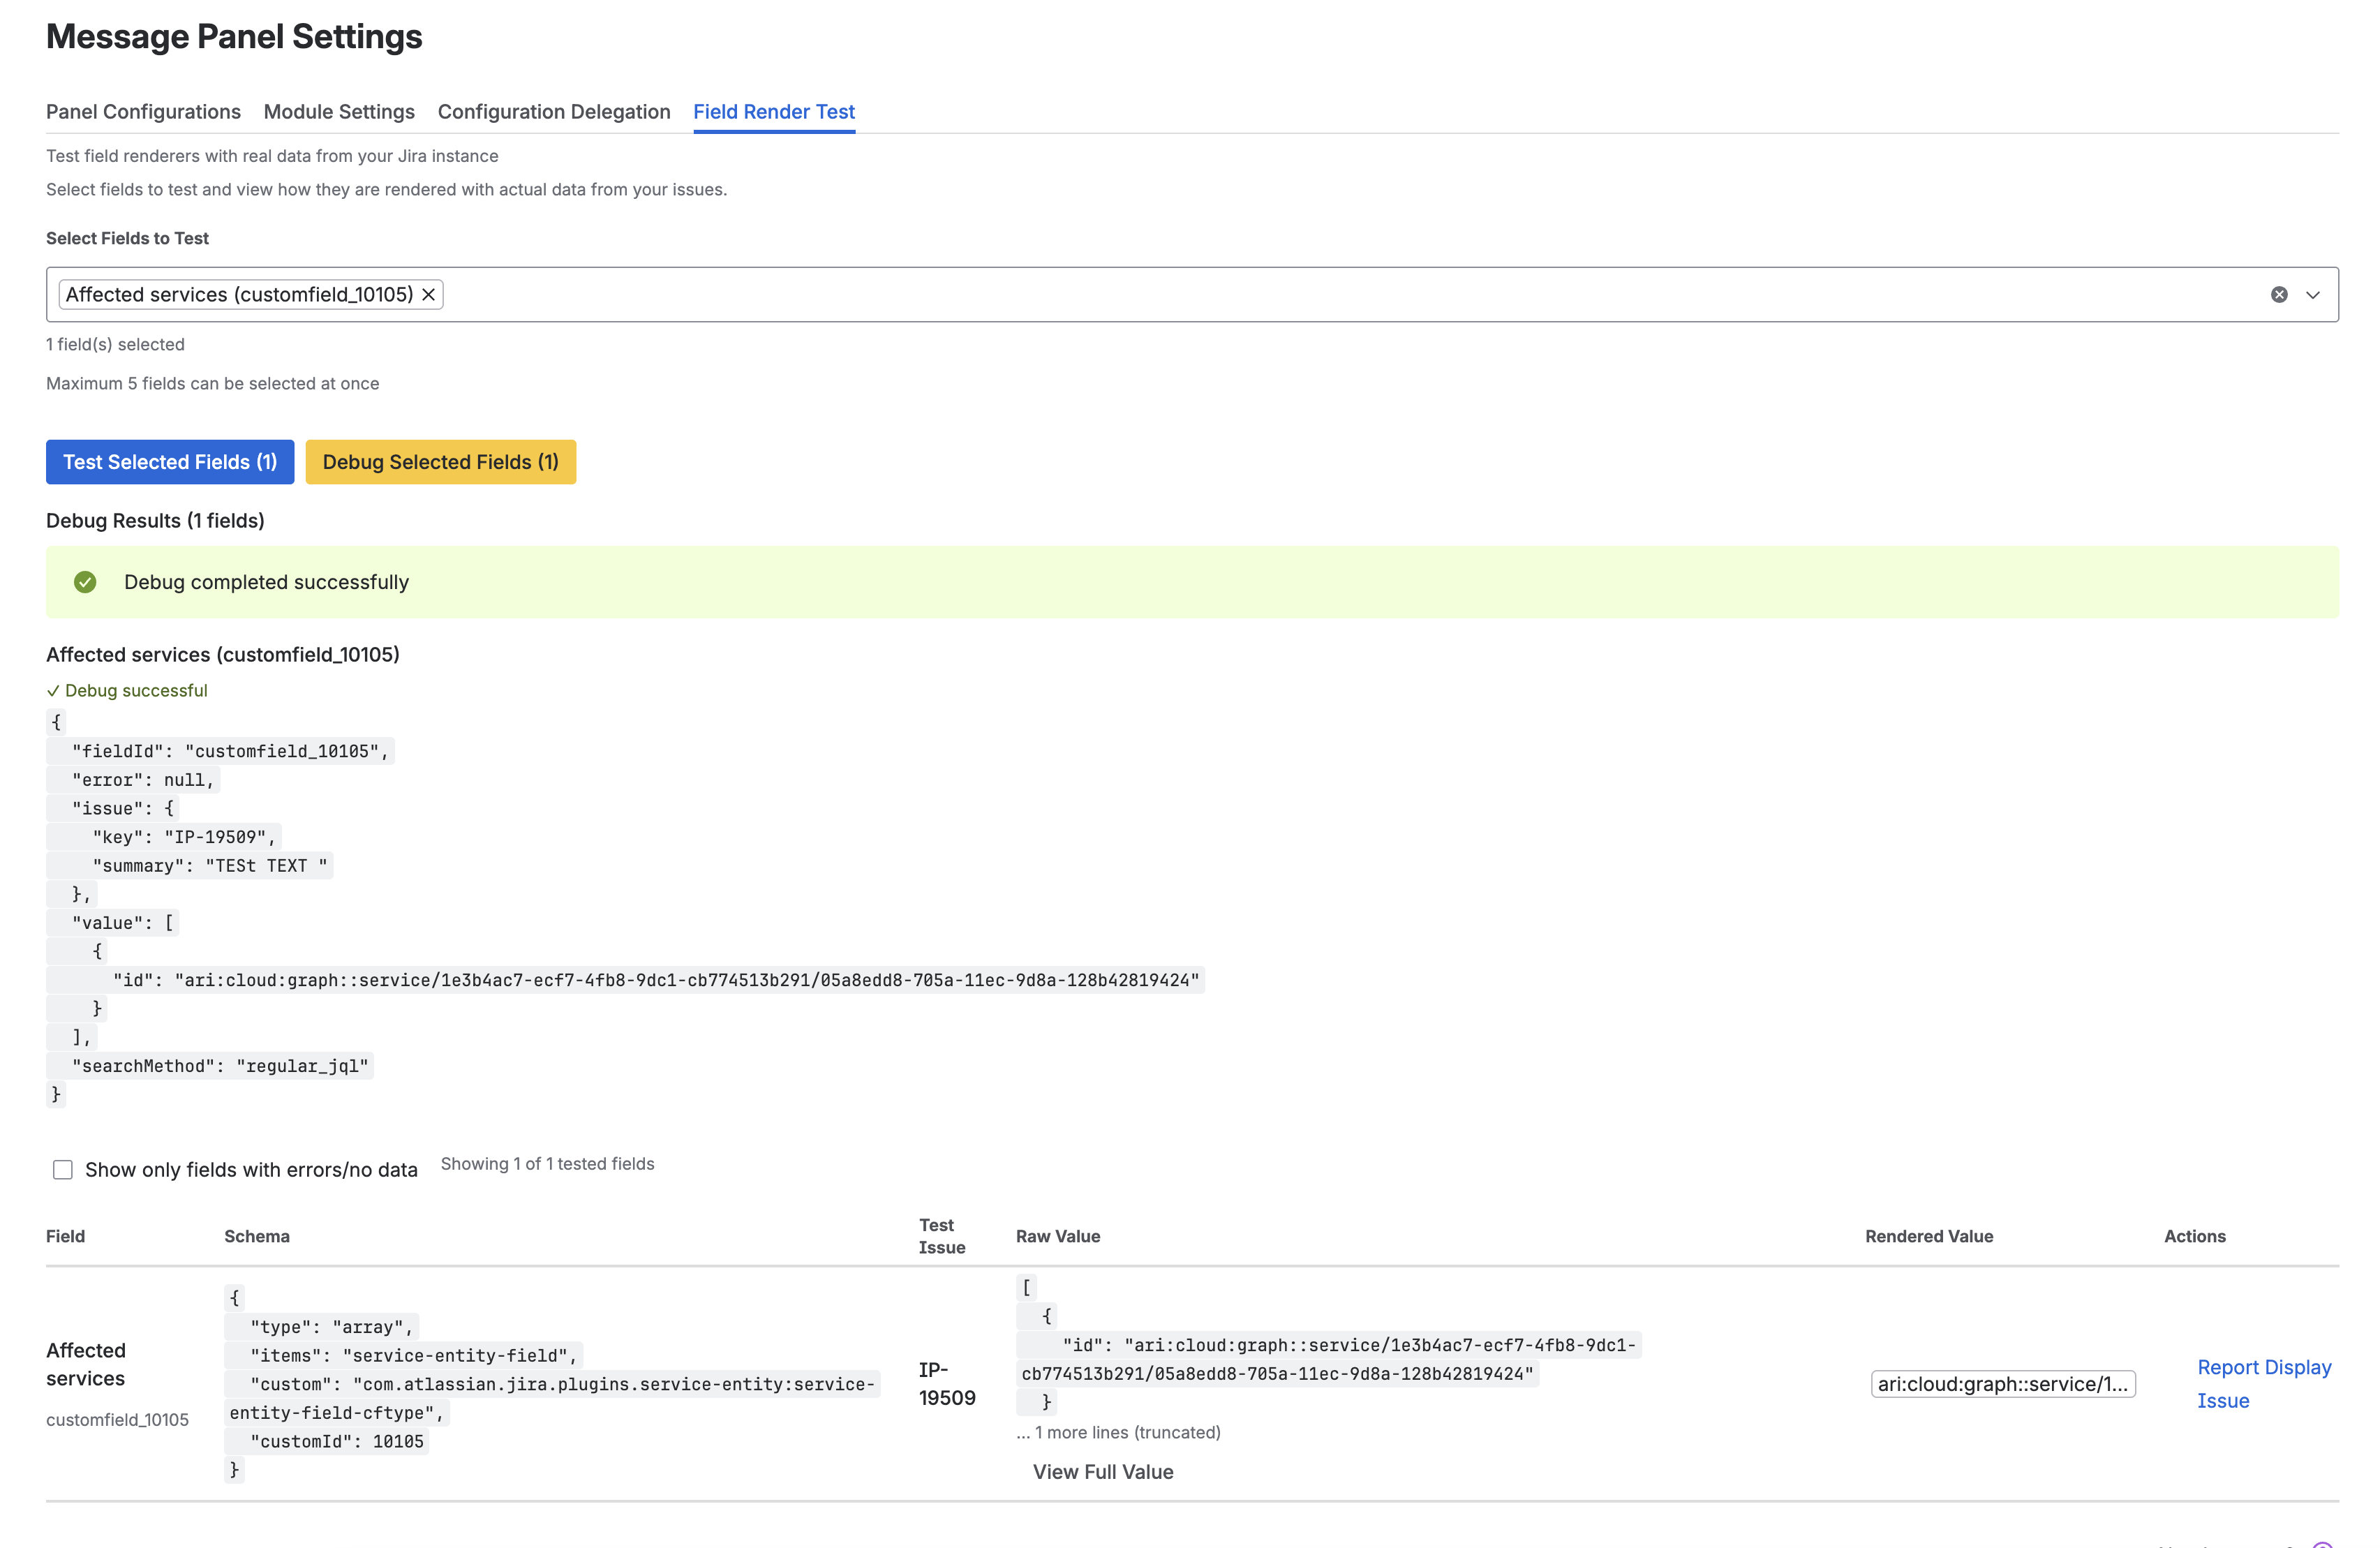
Test field renderers with real data from your Jira instance:
- Go to Field Render Test tab
- Select fields to test (maximum 5)
- Click Test Selected Fields or Debug Selected Fields
- View rendered values and debug information
Features:
- Test with actual issue data
- Debug field rendering issues
- View raw values and schemas
- Verify custom field configurations
Configuration Management
Duplicate Configuration
Click … menu → Duplicate to create a copy.
Export/Import
- Export - Download as JSON
- Import - Upload JSON file
Delete Configuration
Click … menu → Delete to remove permanently.
Examples
Blockers Dashboard
- Name: “⛔ Blockers”
- Data Source: Linked Issues → “is blocked by”
- Fields: Key, Summary, Status, Assignee
- Display JQL:
status != Done
Epic Progress
- Name: “Epic Progress”
- Data Source: JQL →
"Epic Link" = {{ key }} - Fields: Key, Summary, Status, Assignee
- Module: Issue Panel
Warning Banner
- Name: “⚠️ Missing Information”
- Data Source: Empty
- Description:
{% if not issue.fields.description %}Please add a description{% endif %} - Display JQL:
status = "To Do"
Next Steps
- Dynamic Templates - Add dynamic content
- Template Examples - Ready-to-use templates
- Modules - Display locations
- Rovo Integration - AI-powered analysis
- Delegation - Project admin access


